We all know how stressful it is when our curious pups keep wandering into unsafe areas. You want to protect them, but expensive baby gates that don’t fit your space or match your decor feel like a waste of money.
I’ve built custom dog gates for various homes, and I can show you practical solutions that actually work for your space and budget.
In this guide, you will find DIY dog gate designs, from simple pressure-mounted options to sturdy hardware-mounted solutions.
Planning Your DIY Dog Gate the Right Way
Building a dog gate begins with measuring the space. Check the width of doorways or hallways where the gate will go. For height, small dogs need gates around 24 inches tall, while larger breeds do better with 36 inches or more.
Next comes picking the right spot. Popular places for a DIY dog gate indoors include doorways between rooms, hallway openings, or the bottom of stairs. Stairs need extra attention, and gates must be super secure there.
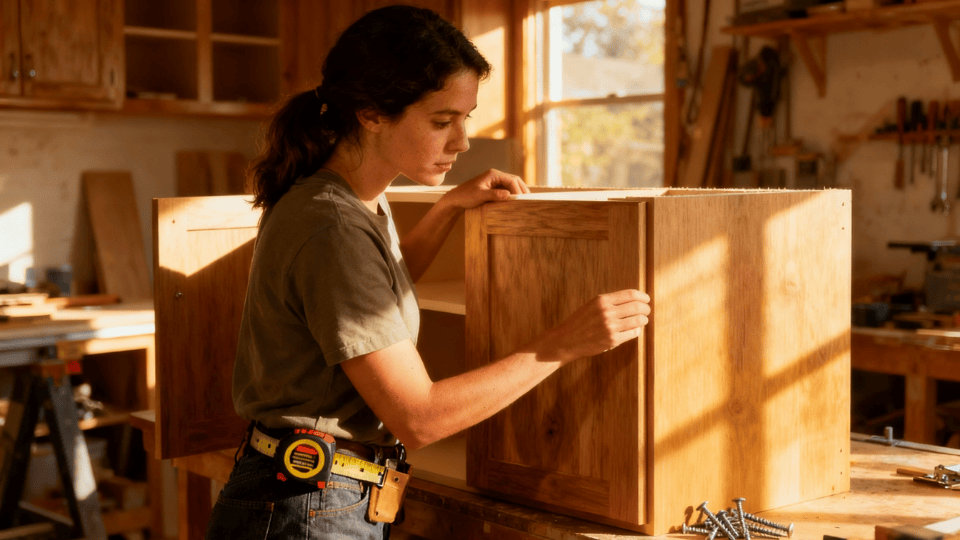
Material choice matters too. Wood looks nice and sturdy. PVC is light and easy to work with. Metal lasts the longest. Old baby gates or furniture pieces can be reused to save money.
Safety comes first. Avoid sharp corners and keep gaps between slats narrow so paws don’t get stuck. Use strong hinges and non-toxic paint or stain.
Tools and Materials You Will Need
A clear list of tools and materials helps you stay organized and ensures every part of the dog gate build goes smoothly, from measuring and cutting to installing hardware.
| Tools | Materials |
|---|---|
| Tape measure | Boards (vertical and horizontal) |
| Saw, Drill | Slats or plywood |
| Sandpaper | Hinges |
| Screws and Screwdriver | Latch |
| Paintbrush | Wood finish |
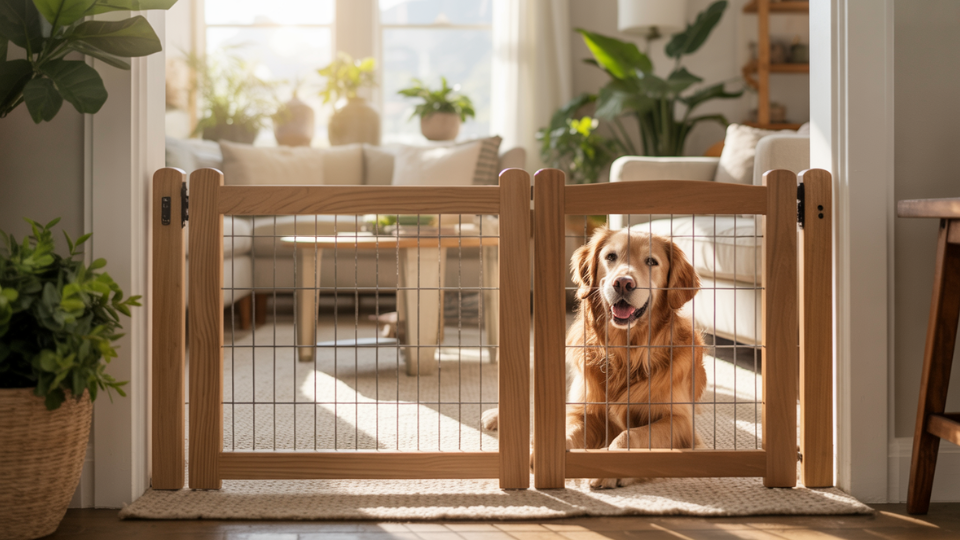
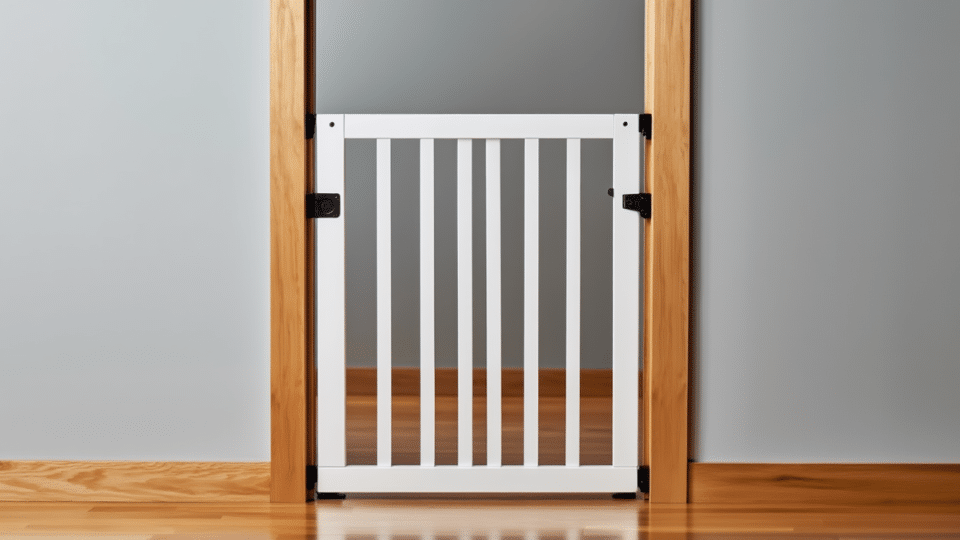
How to Build a Simple DIY Dog Gate
These straightforward steps guide you through building a sturdy DIY dog gate, showing exactly what to do at each stage so the project stays simple, safe, and manageable.
Step 1: Measure the Space and Cut the Wood
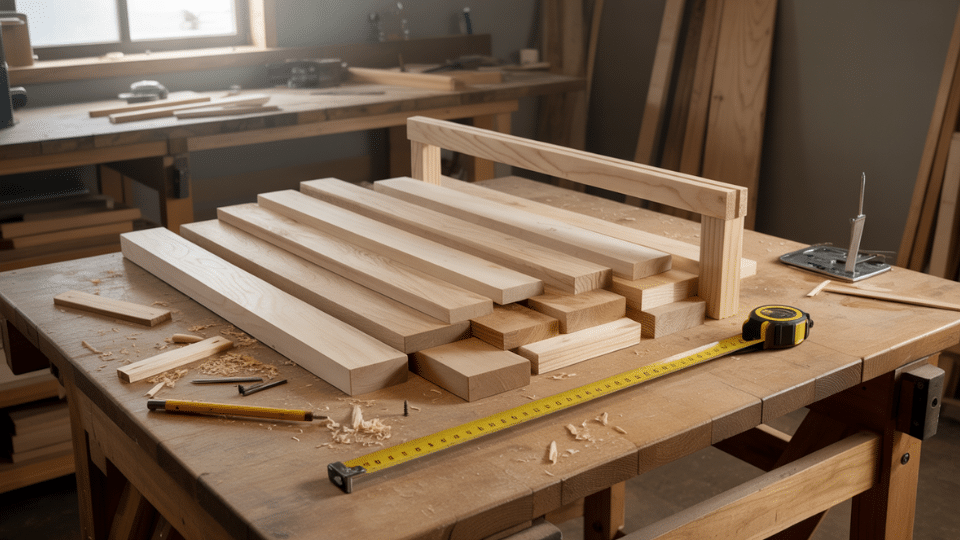
Start by measuring the width and height of the opening where the diy dog gate will be installed. Subtract a small amount from the width so the gate can swing freely.
Once the measurements are set, cut the vertical and horizontal boards to size, laying them out to confirm they form the planned frame dimensions.
Step 2: Build the Frame and Add Slats
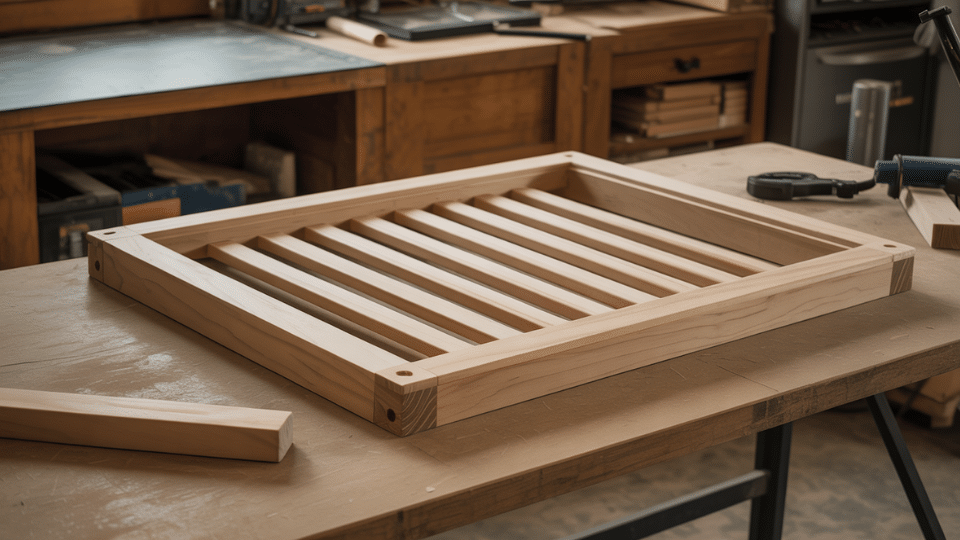
Assemble the cut boards into a rectangular frame by pre-drilling and securing the corners with screws.
Once the frame is stable, install either evenly spaced wooden slats to fill the center of the gate. Make sure gaps are small enough to prevent your pet from slipping through.
Step 3: Sand and Apply Finish on the Gate
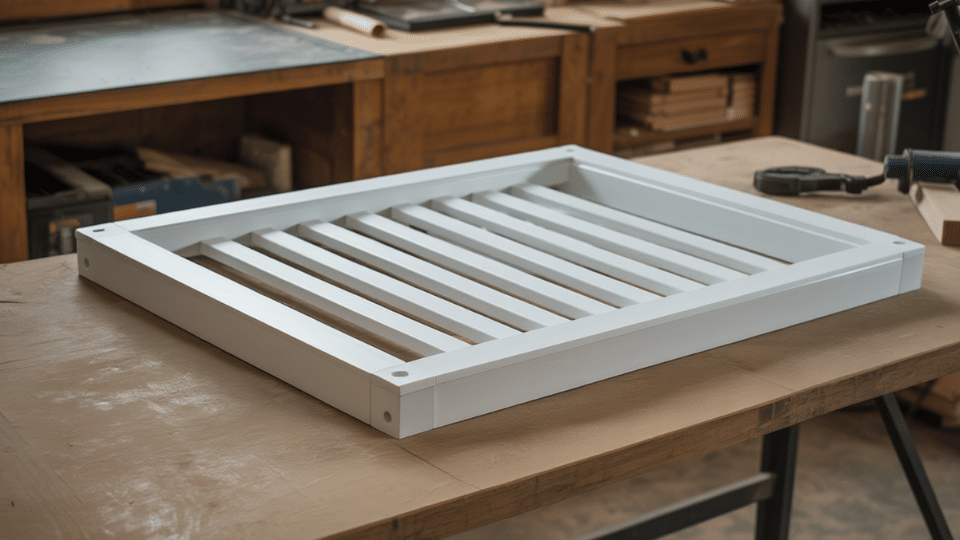
Smooth the entire gate using medium and then fine sandpaper, working along edges and surfaces to remove any splinters.
After sanding, apply your chosen finish, such as clear sealer, stain, or paint. Allow sufficient drying time before proceeding to installation.
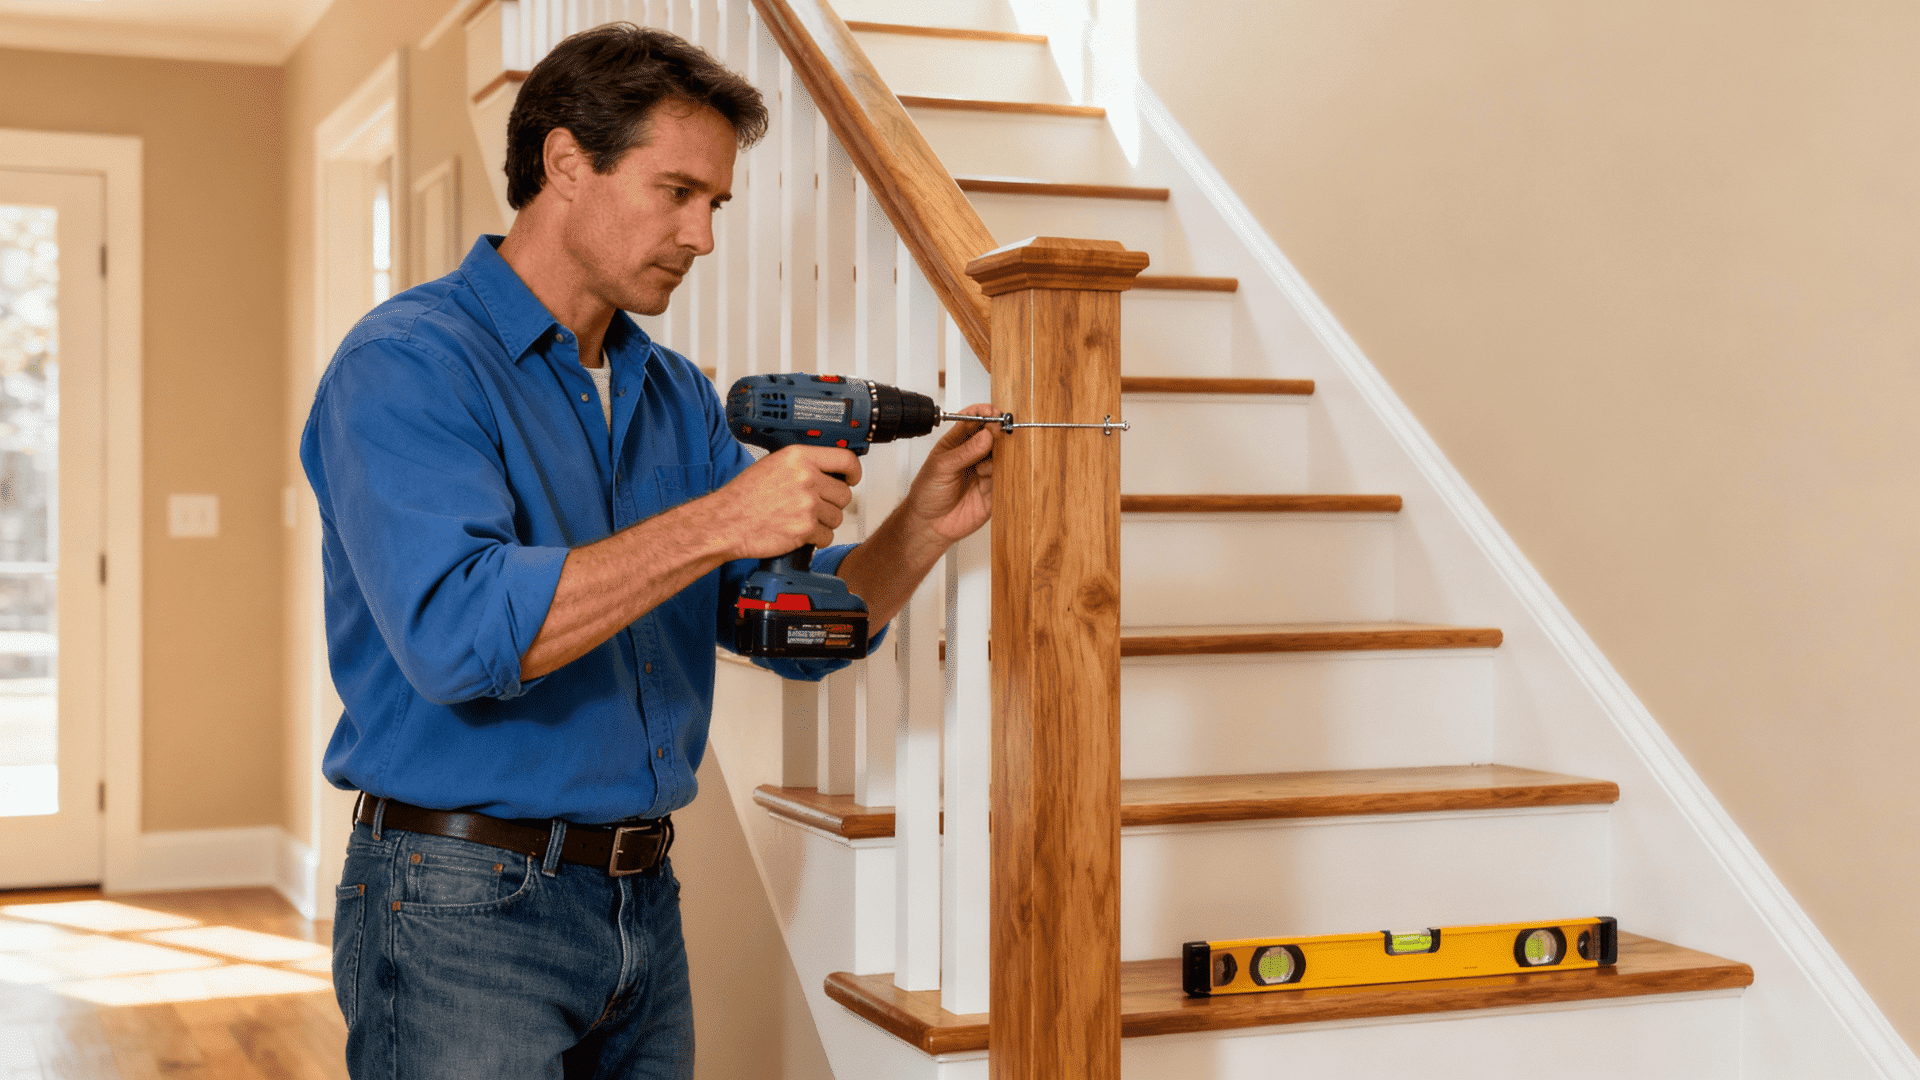
Step 4: Install Hinges and Latch
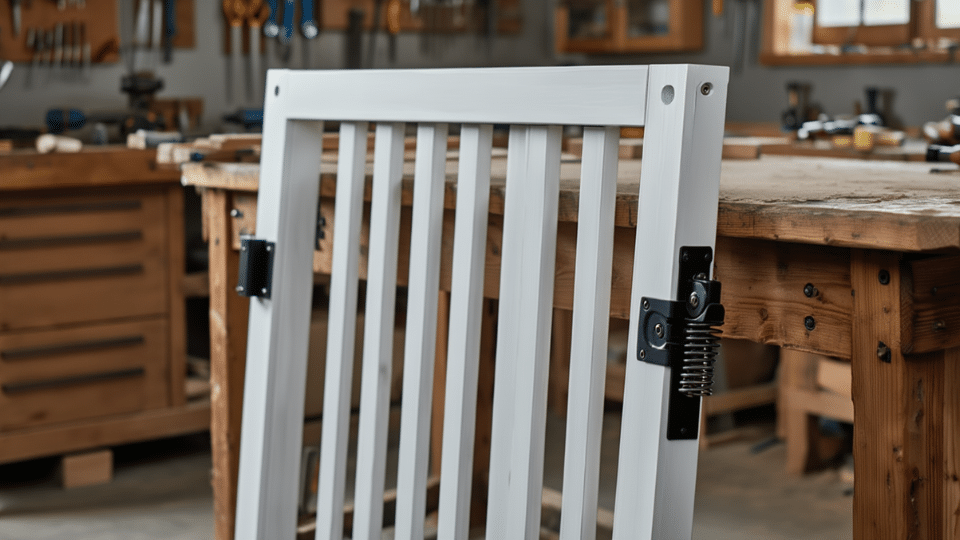
Hold the finished gate against the doorway with a slight gap at the bottom to avoid scraping the floor.
Attach the hinges to the gate first, then secure them to the wall or door frame. Once the gate swings freely, install the latch on the opposite side, making sure it aligns well and closes securely.
Step 5: Do a Final Safety Check
Inspect the entire diy dog gate for stability, checking that screws are tight, edges are smooth, and the latch and hinges operate properly.
Give the gate a gentle push to ensure it can handle daily use and that your dog cannot squeeze through or push past it.
Other Creative DIY Dog Gate Ideas
Looking for inspiration to build a stylish, budget-friendly, and functional barrier for your pet? Here are creative DIY dog gate ideas that suit every space and skill level.
1. Rustic Wooden Farmhouse Pet Gate
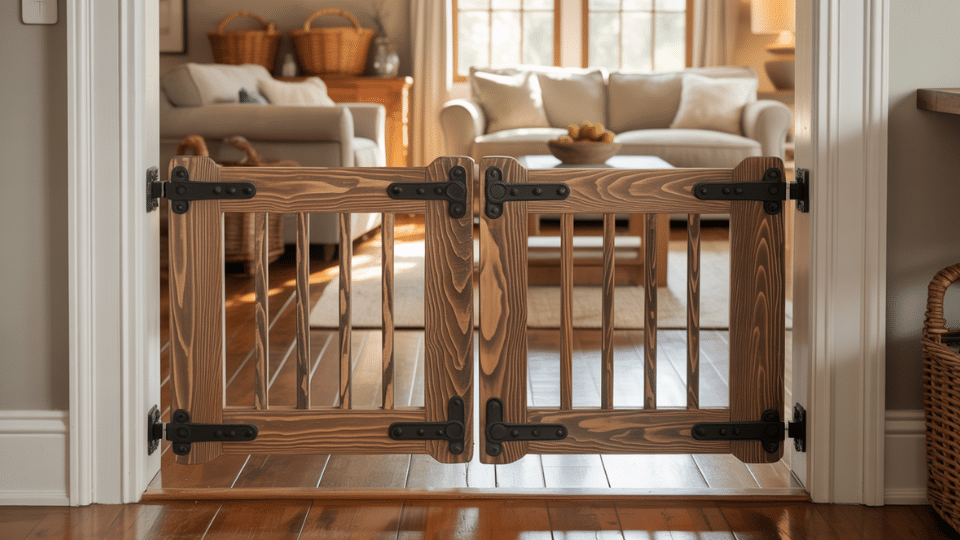
Change reclaimed wood or pallet boards into a charming farmhouse-style gate that adds character to any space. Secure metal hinges provide durability while the weathered wood brings warmth and authenticity.
This eco-conscious choice complements traditional interiors beautifully, offering both functionality and timeless appeal.
Perfect for homeowners seeking sustainable, budget-friendly solutions with vintage charm.
2. PVC Pipe Dog Gate
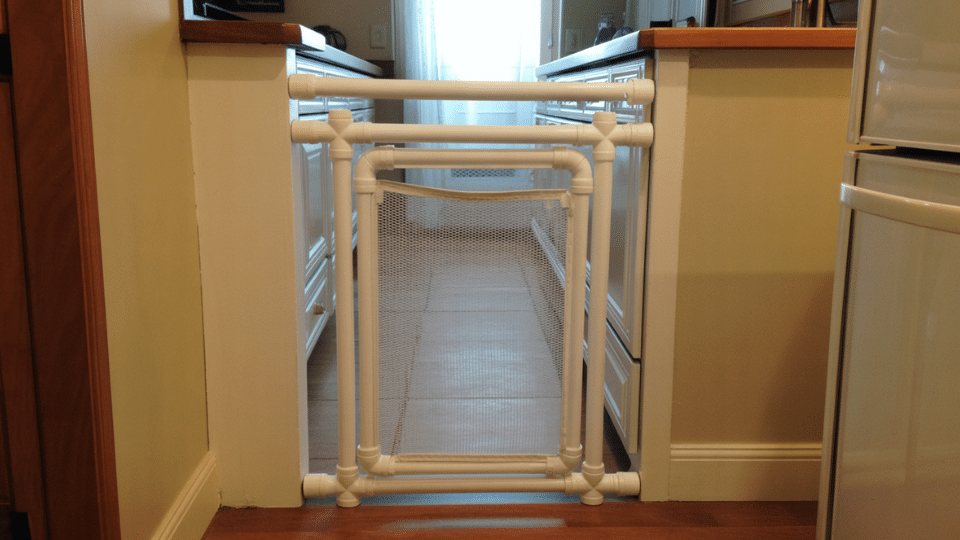
Lightweight PVC pipes and connectors create an affordable, portable gate solution for smaller breeds. The washable material stays hygienic and fresh, while the simple assembly requires no special tools.
Ideal for renters or temporary arrangements, this gate relocates easily and won’t damage walls or doorframes during installation or removal.
3. Fabric Tension Rod Pet Gate
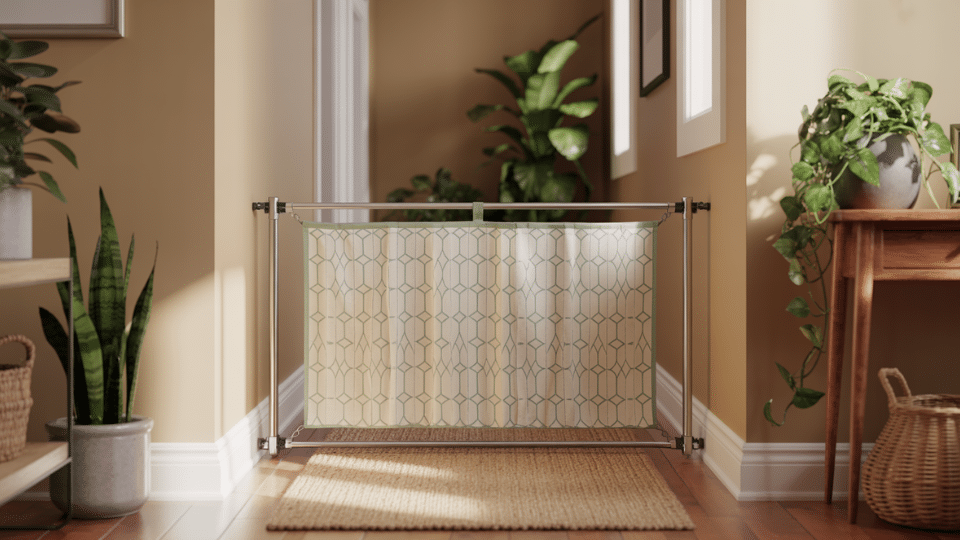
Two adjustable tension rods paired with durable fabric deliver a drill-free barrier that installs instantly. This renter-friendly option protects walls while adding soft texture to doorways.
Choose fabrics that match your décor for seamless integration. The lightweight design adjusts to various widths and removes quickly when guests arrive or cleaning begins.
4. Folding Wooden Dog Gate
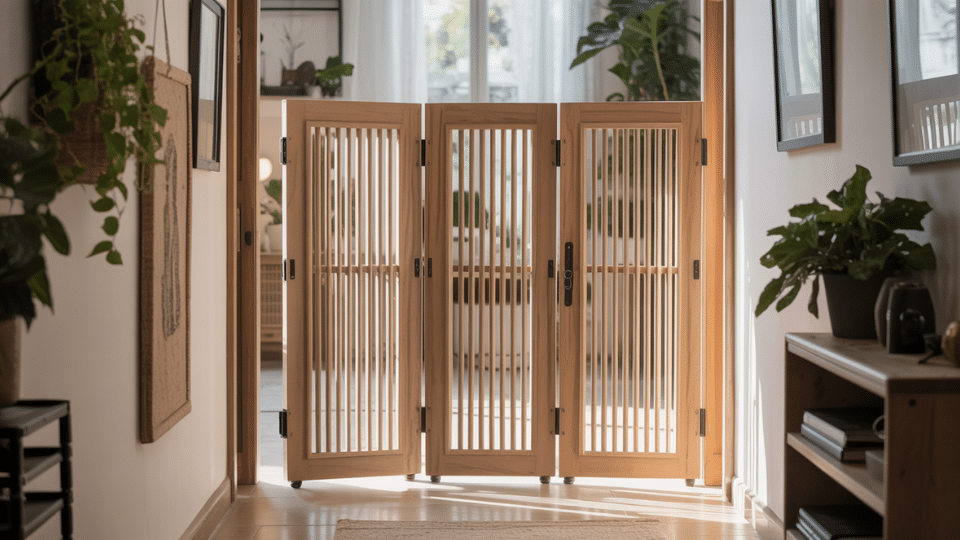
A three-panel accordion design expands to fit wide openings and collapses for compact storage.
Hinged panels provide flexibility for irregular spaces while maintaining stability. When not needed, fold it flat and tuck it away.
This adaptable solution works beautifully for large doorways, hallways, or open-concept areas requiring occasional separation.
5. Dutch-Style Outdoor Dog Gate
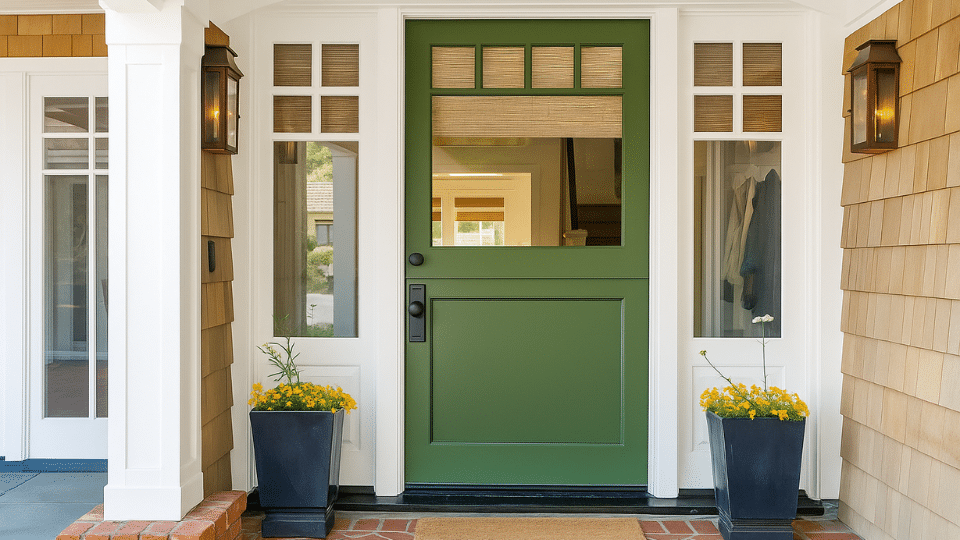
Cut an existing interior door horizontally and install sturdy hinges to create a stylish half-door gate. The lower section acts as a secure barrier, while the open top maintains visibility and airflow between rooms.
Inspired by traditional Dutch doors, this modern indoor adaptation offers separation without isolation. Ideal for keeping pets safe while preserving your home’s open, connected feel.
6. Clear Acrylic Pet Gate
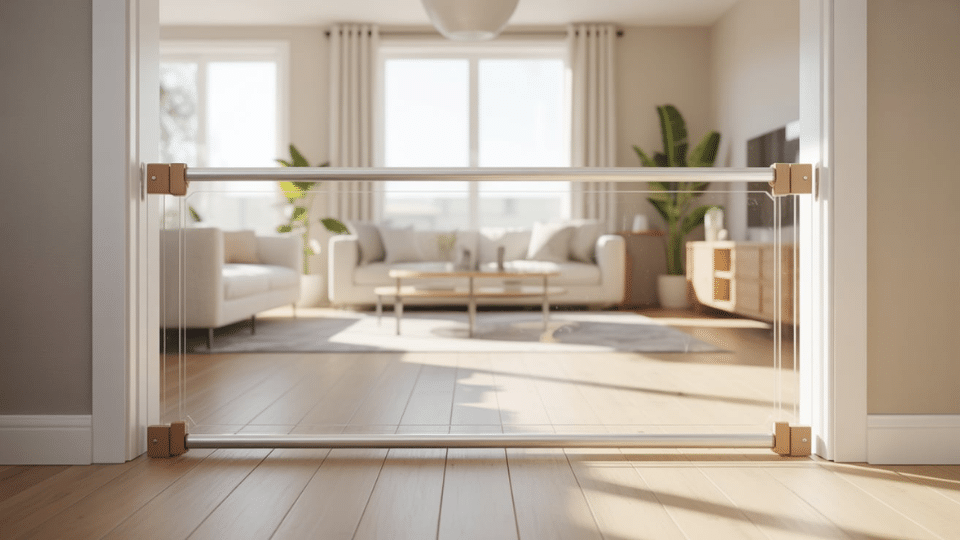
Transparent acrylic or plexiglass panels maintain visual flow while creating effective boundaries. This contemporary option suits modern homes where preserving open sightlines matters.
The clear material prevents spaces from feeling closed off or divided.
Easy to clean and maintain, it provides unobtrusive protection that blends seamlessly with minimalist or contemporary design schemes.
7. Upcycled Furniture Gate
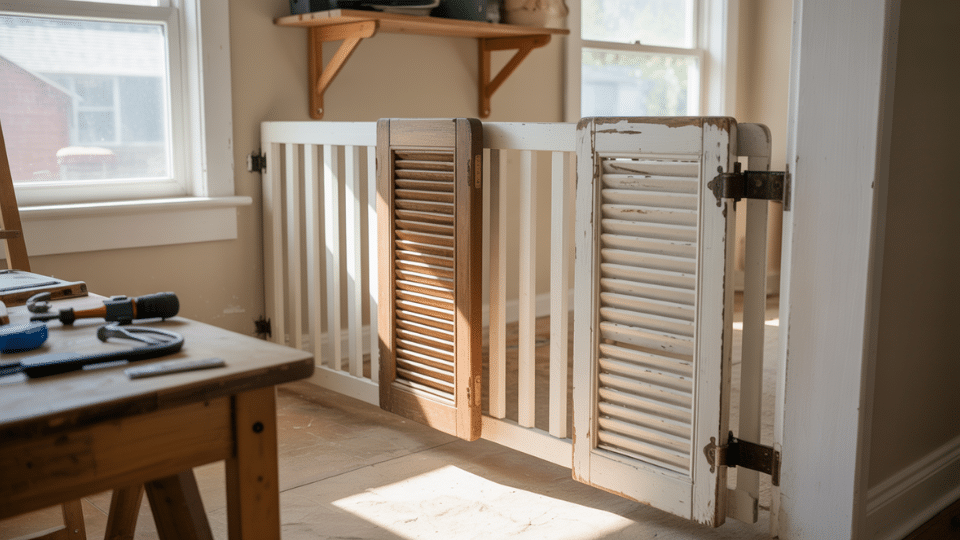
Old crib rails, decorative shutters, or salvaged cabinet doors gain new life as one-of-a-kind gates. This creative approach reduces waste while adding distinctive character to your home.
Each piece tells a story, bringing together personality and sustainability. Hunt thrift stores or repurpose family heirlooms for truly personalized barriers that spark conversation.
Easy Upkeep to Extend Your Dog Gate’s Lifespan
A DIY dog gate works best when kept in good shape. Regular checks catch small issues before they turn into safety problems. Simple upkeep extends the gate’s life.
- Check Hardware Monthly: Inspect hinges, latches, and brackets every few weeks. Tighten loose screws before they become bigger problems.
- Look for Chew Marks: Walk around and check for bite marks or splintered wood. Sand down rough spots and apply pet-safe sealant.
- Clean Surfaces Regularly: Wipe down with mild soap and water to remove dirt and drool. This keeps DIY pet gates looking fresh.
- Refresh the Finish: When the stain or paint looks dull, give it a fresh coat using non-toxic products.
- Test Stability: Give the gate a gentle shake once a month. It should feel solid. Reinforce weak spots immediately.
Final Thoughts
Building your DIY dog gate didn’t require expert carpentry skills or expensive tools; I even completed it in just one weekend with basic supplies.
I’ve learned that proper measurements, quality materials, and simple techniques create a functional barrier that keeps my pets safe without compromising my home’s appearance.
Regular maintenance, such as tightening screws, checking hinges, and inspecting the latch, ensures my gate stays sturdy for years of reliable use.
Now it’s your turn to build one that fits your home perfectly and meets your dog’s specific needs!