Wobbly railings are scary. They make every trip up and down the stairs feel risky, and nobody wants that kind of stress at home.
Stair railing installation doesn’t have to be complicated or expensive. With the right approach, anyone can get sturdy, safe railings that last for years.
I’ll show you what works when installing stair railing, from picking materials to securing posts. Each step matters, and getting it right means safer stairs that hold up over time.
Check Local Building Codes Before Installing a Stair Railing
Before starting any railing installation, local building codes need to be checked. Most areas require railings on stairs with four or more risers.
The standard height sits at 34-38 inches from the stair nosing, and that’s not negotiable. Balusters (those vertical spinners) must be spaced so a 4-inch sphere can’t pass through, and that’s for kid safety.
Handrails need to support 200 pounds of force in any direction. Some towns want permits for stair railing installation, while others don’t.
Call the local building department first, because redoing work that fails inspection costs twice as much and wastes weekends.
Tools and Materials Needed
Before starting the stair railing installation, it helps to have everything ready and within reach. The right tools make each step smoother and help avoid small mistakes that could slow down your progress.
| Item | Purpose |
|---|---|
| Tape measure and square | Measure and mark accurately for a precise fit |
| Miter saw | Cut clean, accurate angles on the railing |
| Drill with bits (3/8″, 1″) | Create pilot and bolt holes |
| Center punch | Mark drill points for better accuracy |
| Angled rail bolt / slip-fix kit | Secure the stair railing firmly to the posts |
| Zip Bolt or gear housing | Tighten and lock the railing connection |
| Wood glue and wax | Strengthen joints and smooth assembly |
| Sandpaper | Smooth edges and finish surfaces |
Steps for Stair Railing Installation
Getting ready to install a stair railing can feel like a big task, but with the right steps, it becomes a smooth and rewarding process.
Step 1: Measure, Mark, and Cut the Angles
Set the railing along the slope of the stairs so it rests naturally on the stair nosings. Mark the angle for your first cut (about 38.75°) using a calculator or stair-math method.
Cut one end of the railing at that angle, then tape the opposite end to mark the second cut where it meets the lower post. Leave about ⅛ inch of extra length for adjustments.
Always cut slightly long; it’s easier to trim than to replace a short railing.
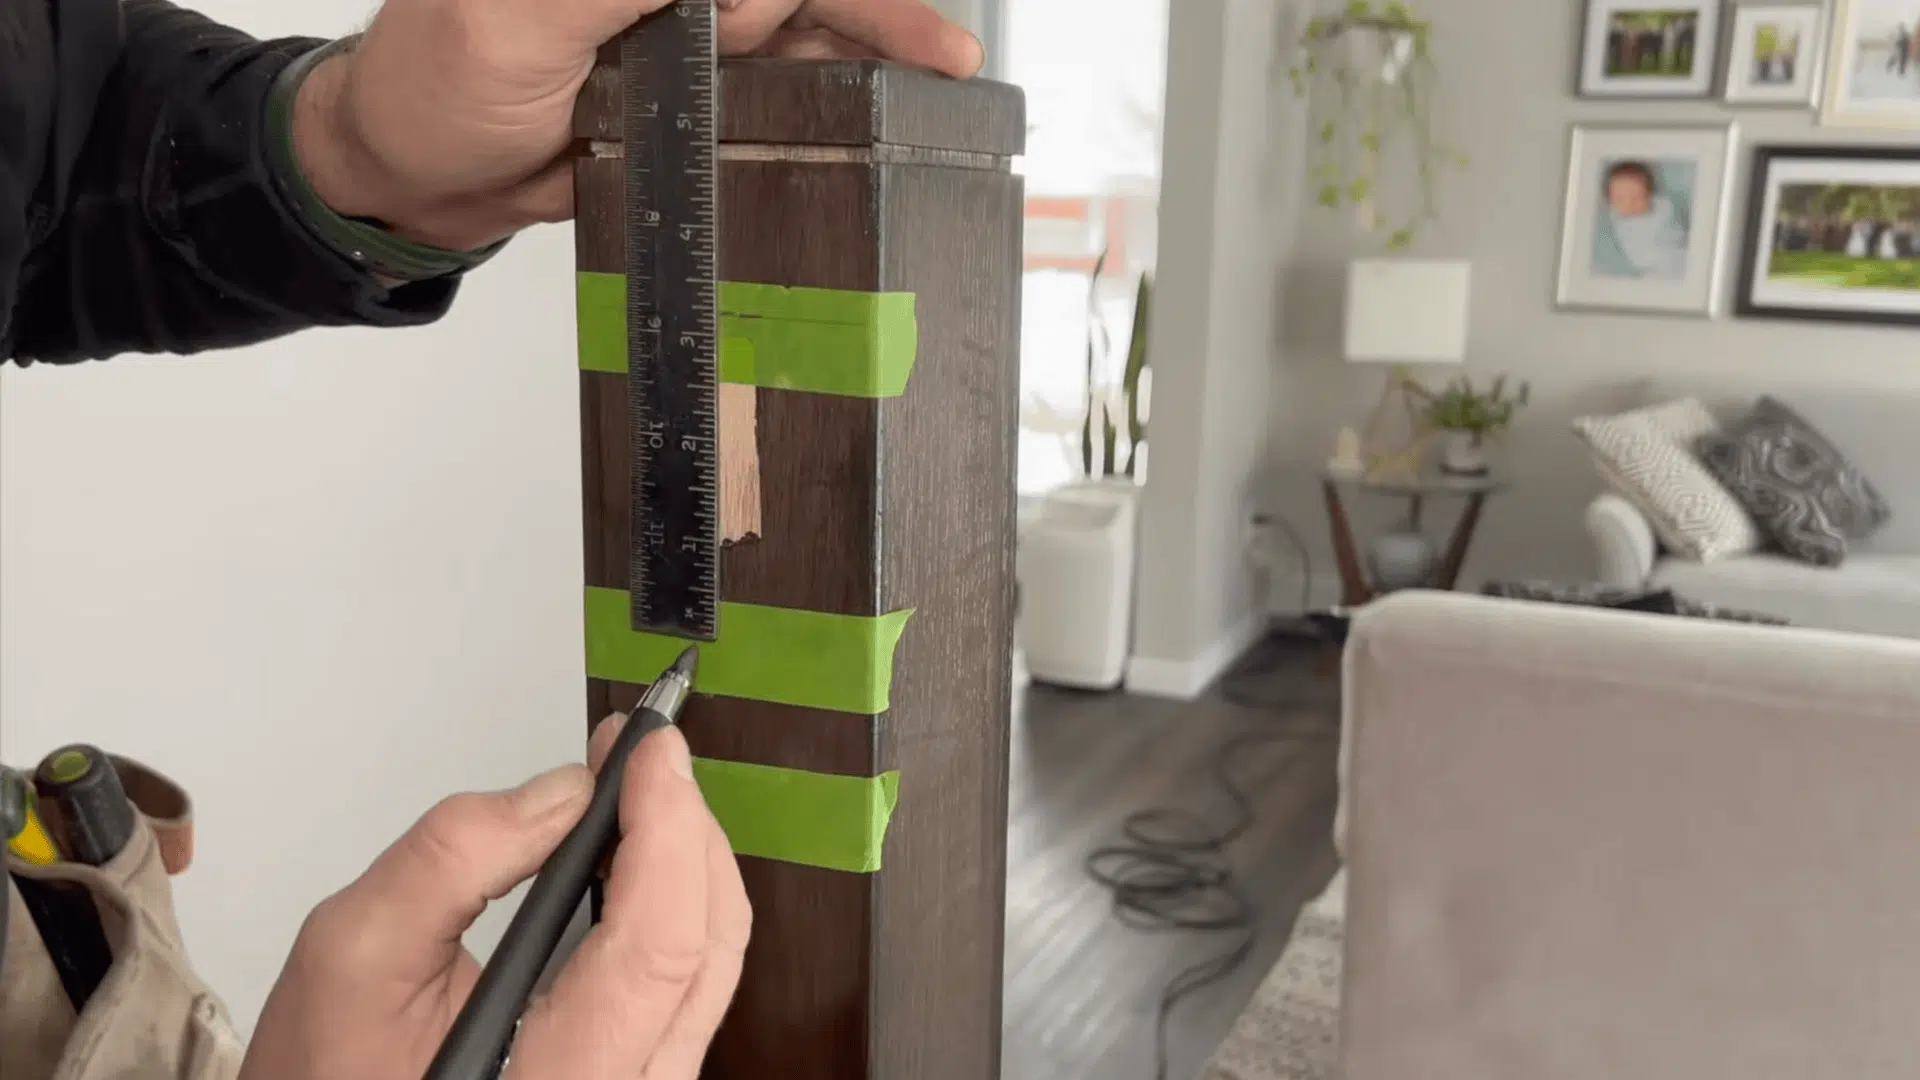
Step 2: Drill the Pilot and Bolt Holes

Measure 15/16 inch down from the bottom of the railing and mark both sides. Use a center punch to locate the midpoint between those marks, then drill a small pilot hole straight in.
Follow up with a 3/8-inch drill bit to create the main bolt channel. Keep the drill steady and straight so the bolt aligns correctly later.
For the bolt housing, use a 1-inch Forstner bit, drilling carefully to avoid breaking through the groove on the underside of the railing.
Step 3: Fit, Adjust, and Fine-Tune
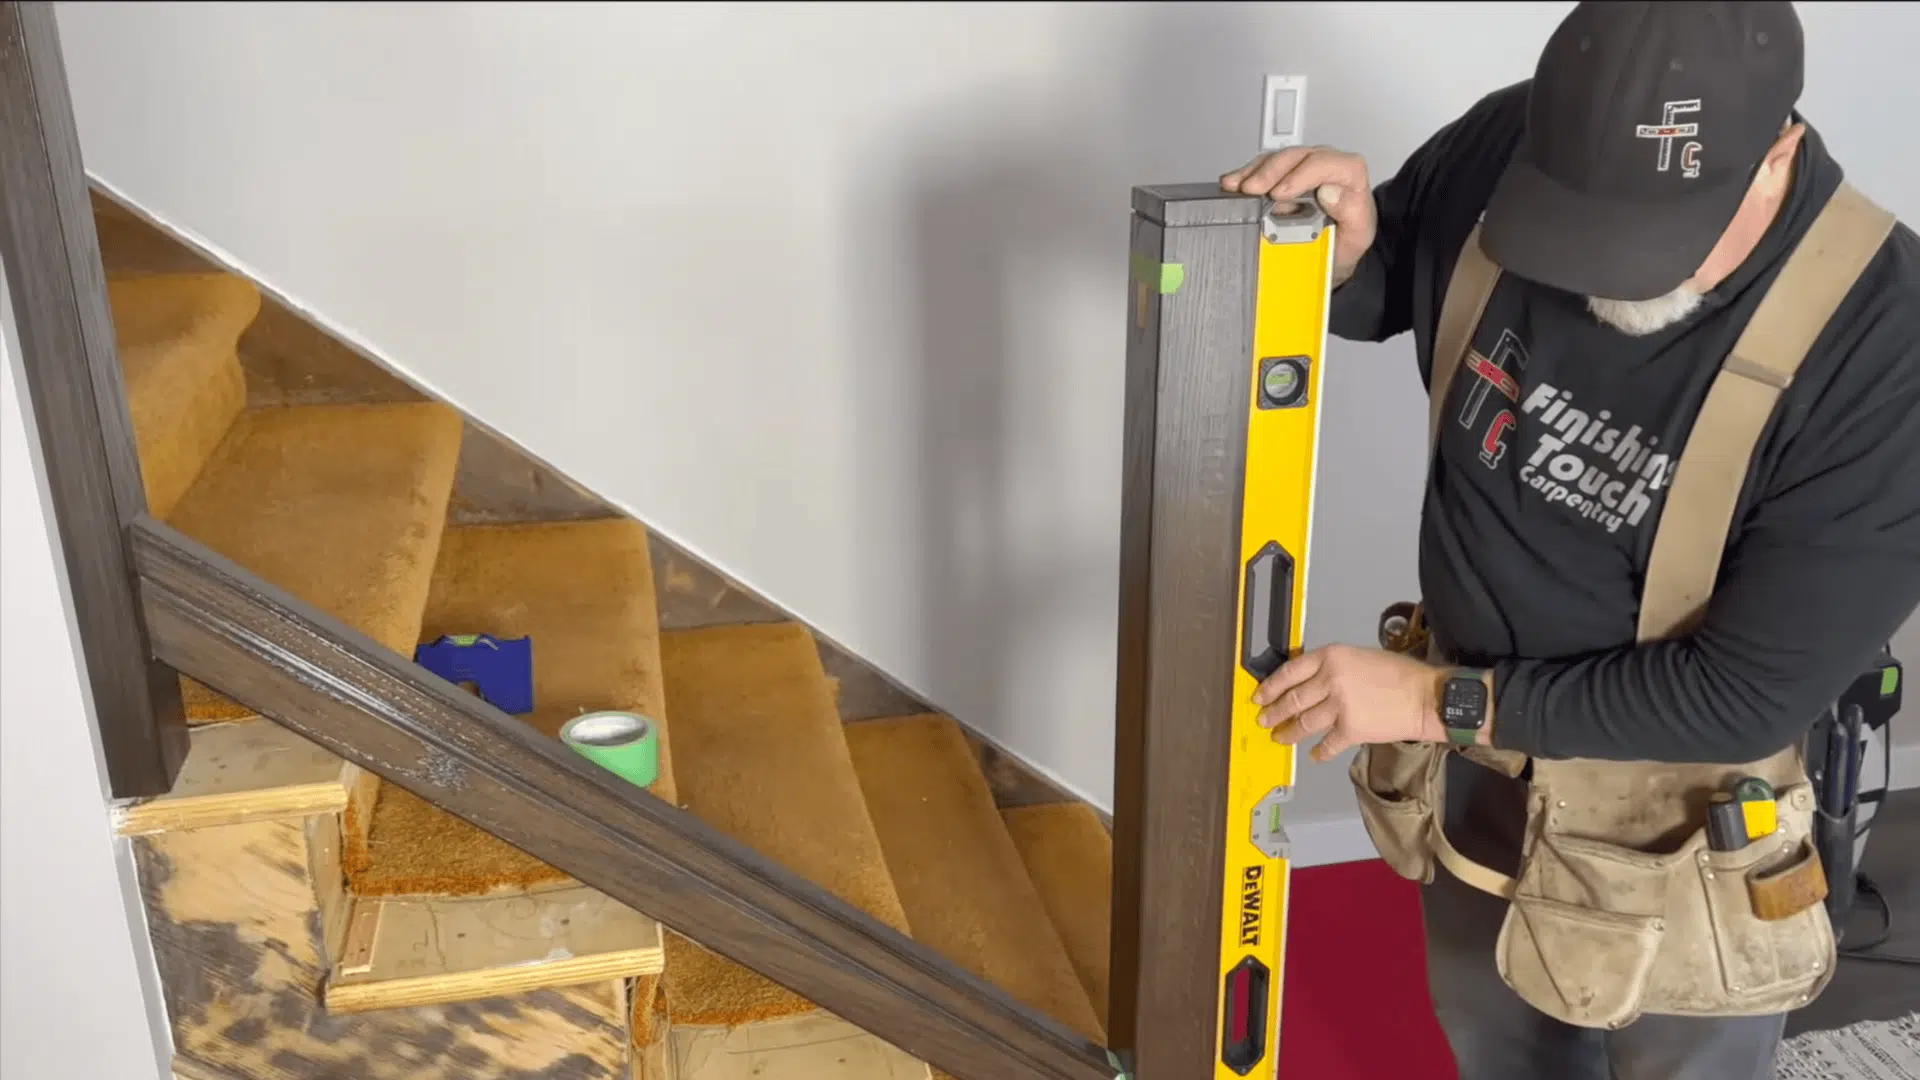
Dry-fit the railing between the two posts to check alignment. If it fits tightly on one side and leaves a small gap on the other, lightly trim the longer side; sometimes only 1⁄32 inch makes the difference.
Avoid chasing perfection by changing angles too often; usually, the issue is length, not angle.
Keep angles as they are unless the fit shows a clear mismatch. If the wall post isn’t perfectly plumb, mark tiny corrections and recut carefully.
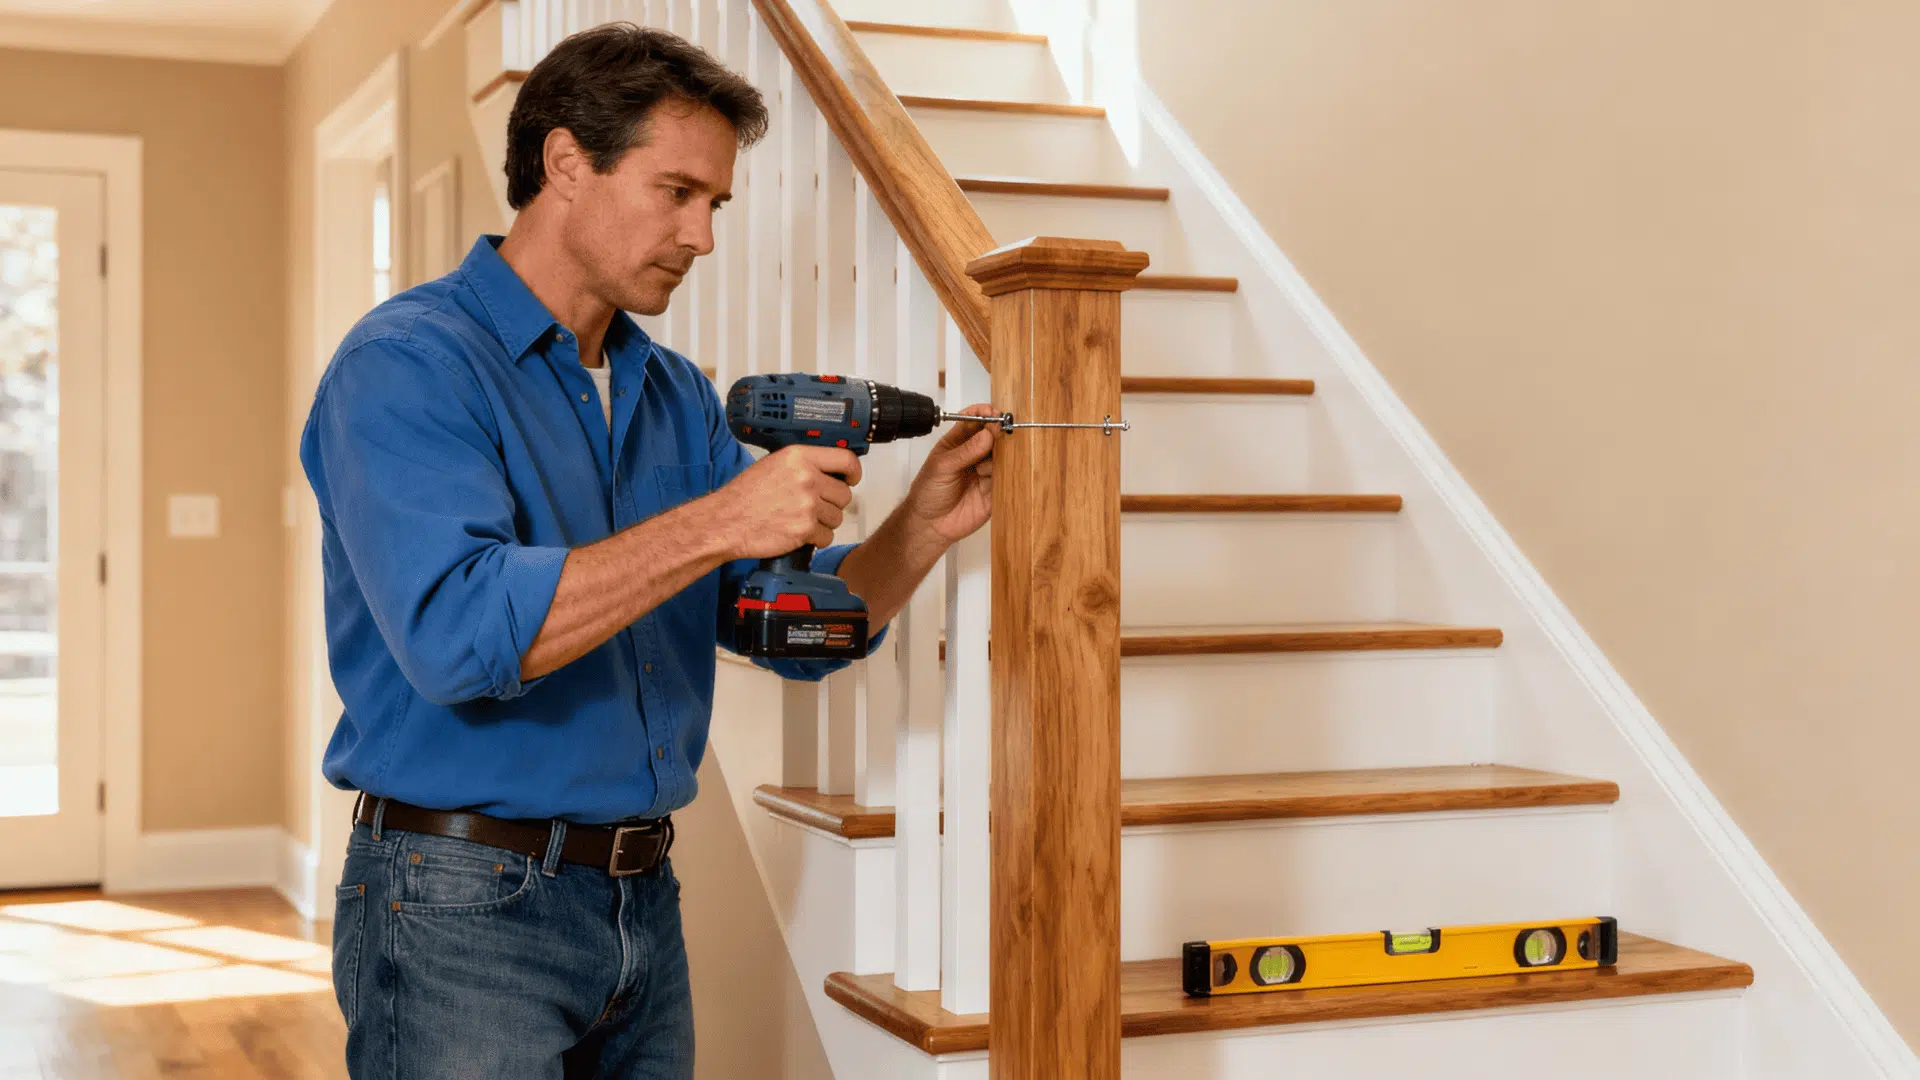
Step 4: Install the Angled Rail Bolt System
Once the railing fits neatly, install the angled slip-fix or rail bolt system. Insert the gear housing correctly; its slot must slide over the bolt head, not backward.
Tighten using a regular drill instead of an impact driver to avoid damaging the gear housing. Apply a bit of wax on the threads to make installation smoother.
For hardwood posts, pre-drill the post hole slightly larger than the bolt and use a stainless-steel rod to crank it in firmly but gently. Leave about 2 ⅞ inches of bolt protruding.
Step 5: Final Alignment and Assembly
Attach the railing by sliding the fittings together first, the top, then the bottom. Make sure both bolts line up perfectly before tightening fully.
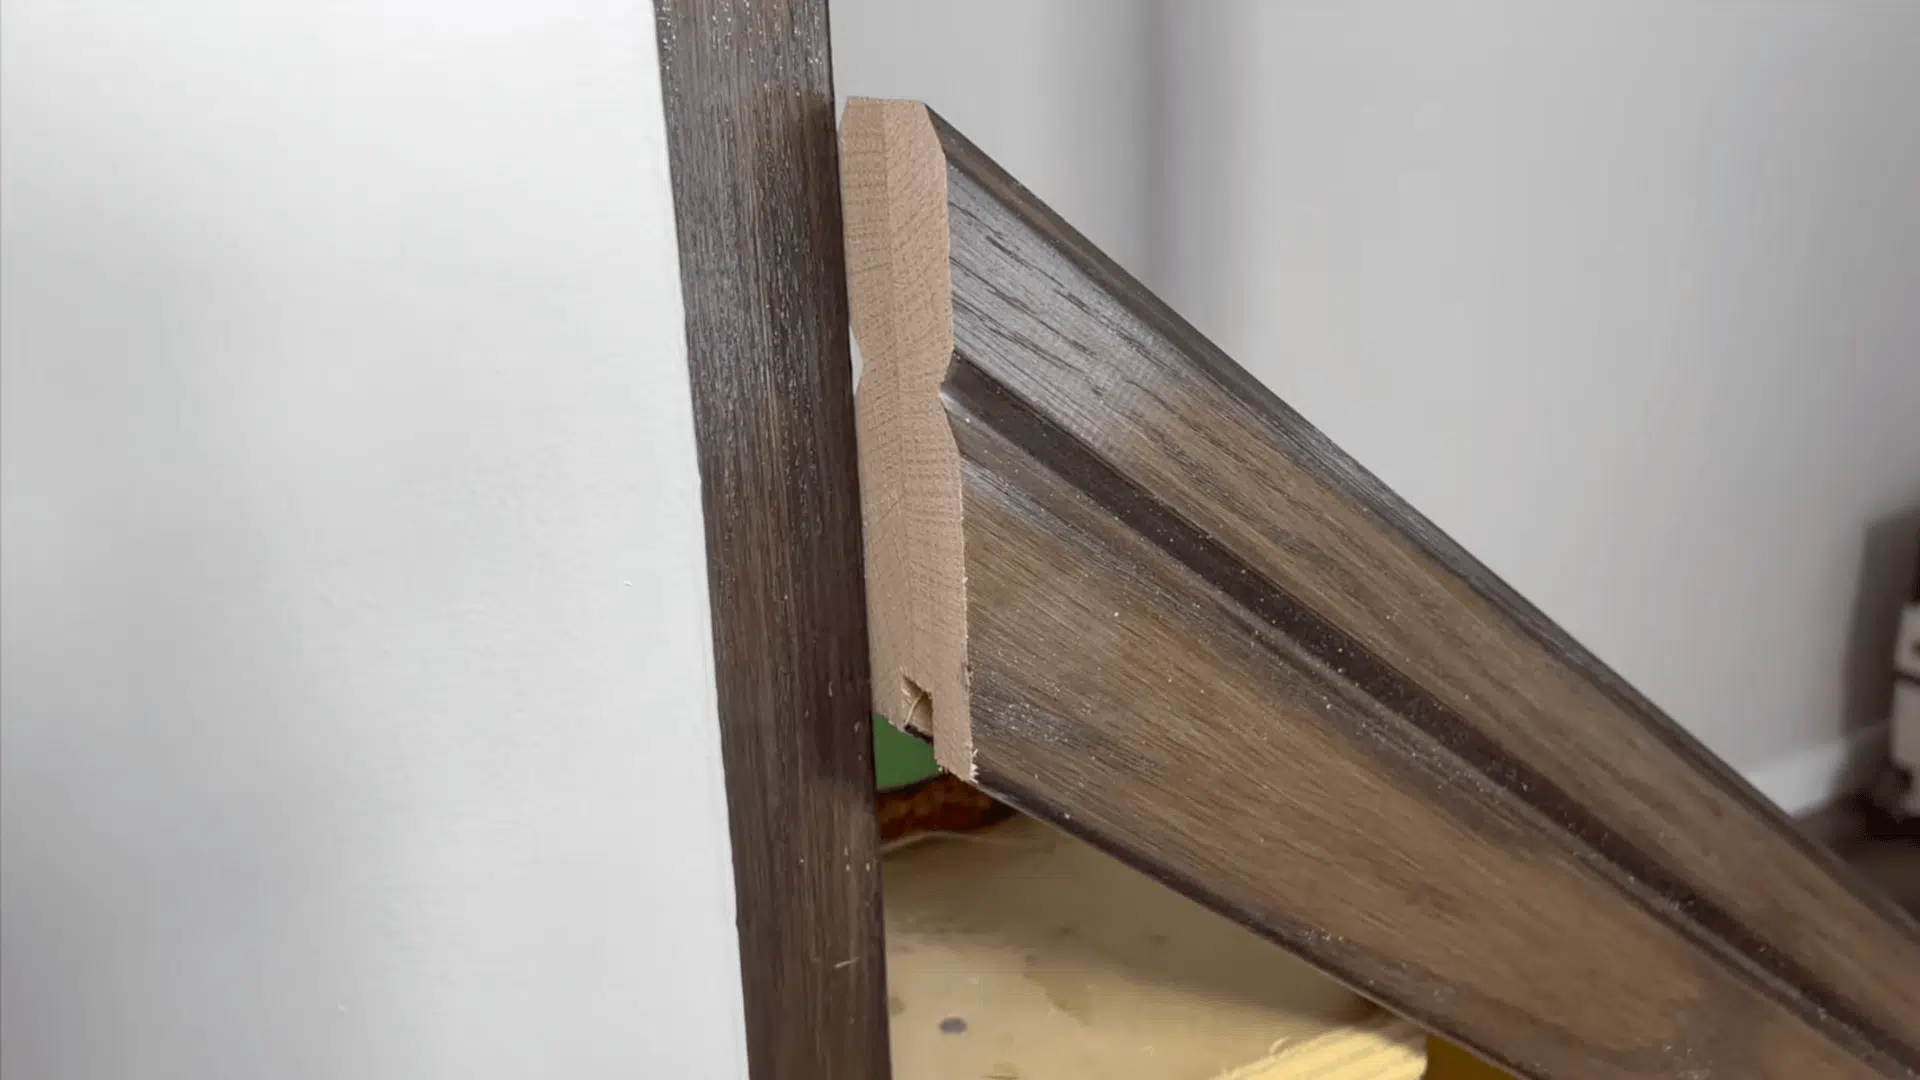
If the fittings don’t align, plug the hole with a small piece of oak and glue, trim it flush, and re-drill for a fresh fit.
Once the railing sits snugly, secure it, test for stability, and sand any sharp edges. The goal is a solid, clean connection that feels secure under your hand.
Special Considerations for Different Installation Types
Not all stair railing installation projects look the same. Indoor versus outdoor jobs need different materials, and concrete stairs demand totally different anchors than wooden ones.
| Installation Type | Key Consideration | Best Approach |
|---|---|---|
| Indoor Wood Stairs | Posts need solid anchoring into stringers or blocking; standard wood screws work fine, but must hit structural support | Drill pilot holes first, then use 3-inch wood screws directly into stringers and wall studs; add construction adhesive for extra hold |
| Outdoor Deck Stairs | Moisture causes rot and rust; UV rays fade finishes; temperature swings loosen fasteners over time | Choose composite or pressure-treated lumber rated for ground contact; use only stainless steel or coated hardware; seal all cut ends |
| Concrete Stairs | The surface is extremely hard and cracks easily if drilled wrong; standard drill bits won’t work | Rent a hammer drill with masonry bits; use sleeve anchors or wedge anchors rated for 200+ pounds; mark holes with tape first |
| Metal Stairs | Welding creates the strongest bond but requires special skills; bolt-on systems work but need precise measurements | Self-tapping screws work for thin metal; through-bolts with backing plates for thicker gauge; or hire a certified welder for a permanent install |
Common Mistakes to Avoid When Installing Stair Railing
Even experienced folks mess up railing install projects, and those mistakes usually happen at the same spots. Fixing errors after everything’s mounted takes three times as long as doing it right the first time.
- Skipping the layout step means posts end up crooked or uneven, which looks terrible and fails inspections every time
- Using drywall screws instead of structural screws causes railings to pull loose within months under normal use
- Putting posts more than 6 feet apart makes railings wobble dangerously and violates most local building codes
- What looks straight to the eye often isn’t level, and sloped railings feel weird to grip going up or down
- Forcing screws through hardwood without pre-drilling splits the material and weakens the entire railing system
Maintenance Tips for Long-Lasting Stair Railings
Finishing your railing install doesn’t mean the work stops forever. Regular upkeep keeps railings solid and safe for decades, plus it’s way cheaper than replacing them.
- Check All Fasteners Twice a Year: Tighten any that feel loose, especially on outdoor railings, where weather causes movement
- Wipe Down Railings Monthly: Use mild soap and water to remove dirt buildup and hand oils that damage finishes
- Inspect Wood Railings for Cracks: Check every spring, then sand and reseal problem spots immediately before they spread
- Apply a Fresh Coat of Sealant: Do this every 2-3 years on exterior installations to block moisture damage
- Test Railing Stability: Push hard at the center span between posts to catch weakness early, before someone falls
- Replace Worn Weather Stripping: Check around base plates on outdoor stairs to keep water from rotting the post
The Bottom Line
I’ve walked you through the complete stair railing installation process, from checking local codes to tightening that final bolt.
You know which tools work best and how to avoid common mistakes that can derail your project. You’ve learned proper spacing, secure mounting techniques, and what keeps railings strong and stable for years to come.
The railing installation is totally doable with some patience and the right approach. Take your time with measurements, double-check your work as you go, and don’t rush through the crucial steps.
Ready to tackle your project? Grab your tools and carve out a weekend.