Planning an outdoor kitchen can feel overwhelming with so many design choices and construction steps to consider.
You want a functional cooking space that fits your budget and skill level, but don’t know where to start. In reality, building an outdoor kitchen yourself is totally doable with the right guidance and outdoor kitchen plans.
In this DIY outdoor kitchen blog, I will cover every essential step, from initial planning and material selection to construction techniques.
You’ll learn practical tips for building your outdoor kitchen that works for your space, cooking style, and budget. It’s time to turn that backyard into your new favorite gathering spot.
Benefits of a Well-Planned Outdoor Kitchen
Designing the perfect kitchen plans starts with inspiration and smart planning. I’ve seen homeowners revamp backyards into living spaces that feel like natural extensions of their homes.
Beyond style, an outdoor kitchen saves energy, keeps cooking heat outside, and brings people together. When planning yours, think about layout, budget, and materials; choose durable options like stone or stainless steel.
Always check permits and plan safe access to utilities, such as gas and water. A thoughtful design balances beauty with function, adding shade, storage, and comfort.
Good planning turns effort into enjoyment, ensuring your kitchen becomes a lasting centerpiece for outdoor gatherings.
Tools and Materials Required for DIY Outdoor Kitchen
Before getting into your outdoor kitchen plans, here is what you will need for a pressure-treated framed build with concrete countertops and built-in gas appliances.
| Item | Purpose |
|---|---|
| Circular saw, miter saw, and drill/driver set | To cut lumber and assemble framing components |
| Level and laser level | To check the plumb and keep the countertop framing perfectly level |
| Pressure-treated 2x lumber | Primary structure for walls and countertop joists |
| Pressure-treated 1/2 in plywood sheathing | To stiffen the framing and back the stone veneer |
| 1/2 in cement board | To Deck for concrete countertop underlayment |
| Zero-clearance liners for grill, griddle, and side burner | To protect combustible framing around built-in appliances |
| Ramset or concrete anchors | To secure the bottom plates to the concrete slab |
Difficulty: Intermediate; you will need solid carpentry skills.
Time Required: About 3–5 weekends, depending on complexity and weather.
Step-by-Step Guide to Building Your Outdoor Kitchen
Building from your outdoor kitchen plans can feel intimidating at first, but with the right mindset and a bit of patience, you’ll have a backyard kitchen you’ll love showing off.
Sketch detailed uplifment and layouts for your outdoor kitchen, noting appliance placements, plumbing, and gas lines. Verify all local building codes before purchasing materials or beginning construction.
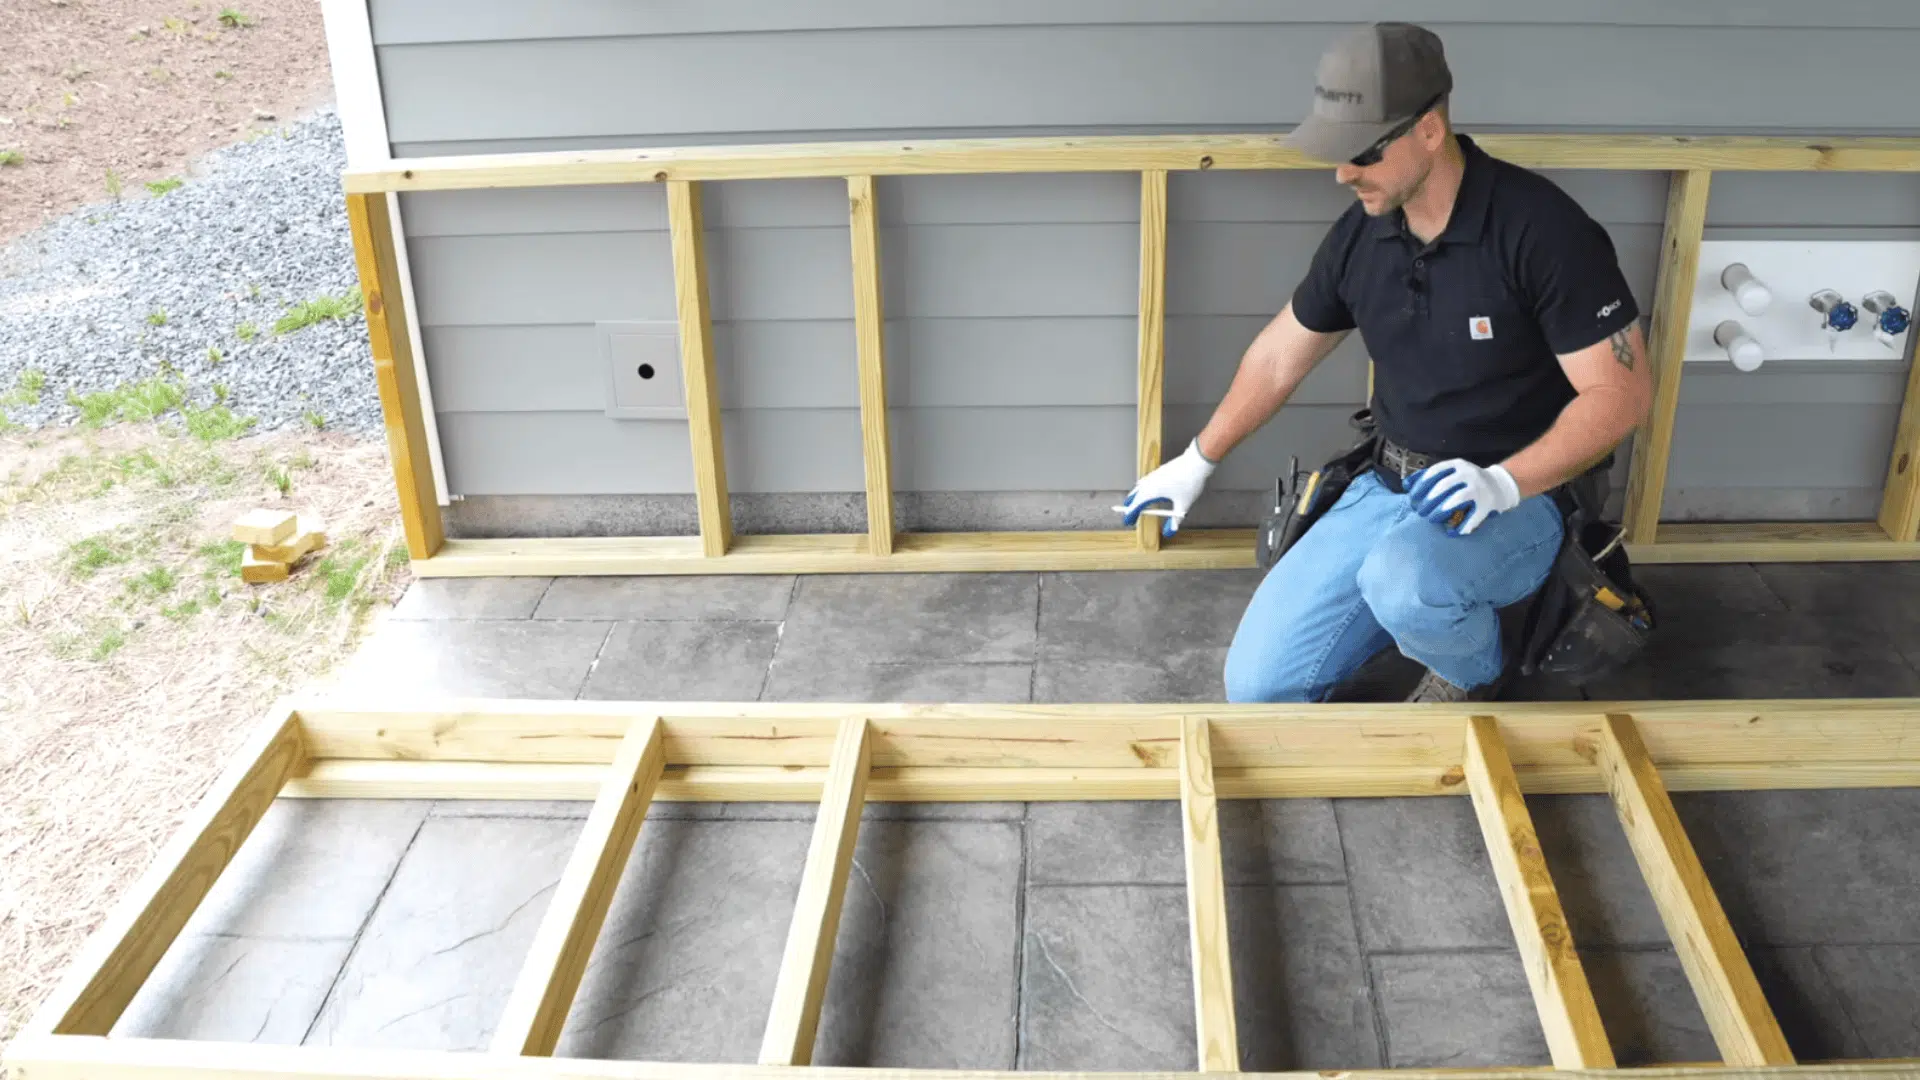
Step 1: Framing the Base
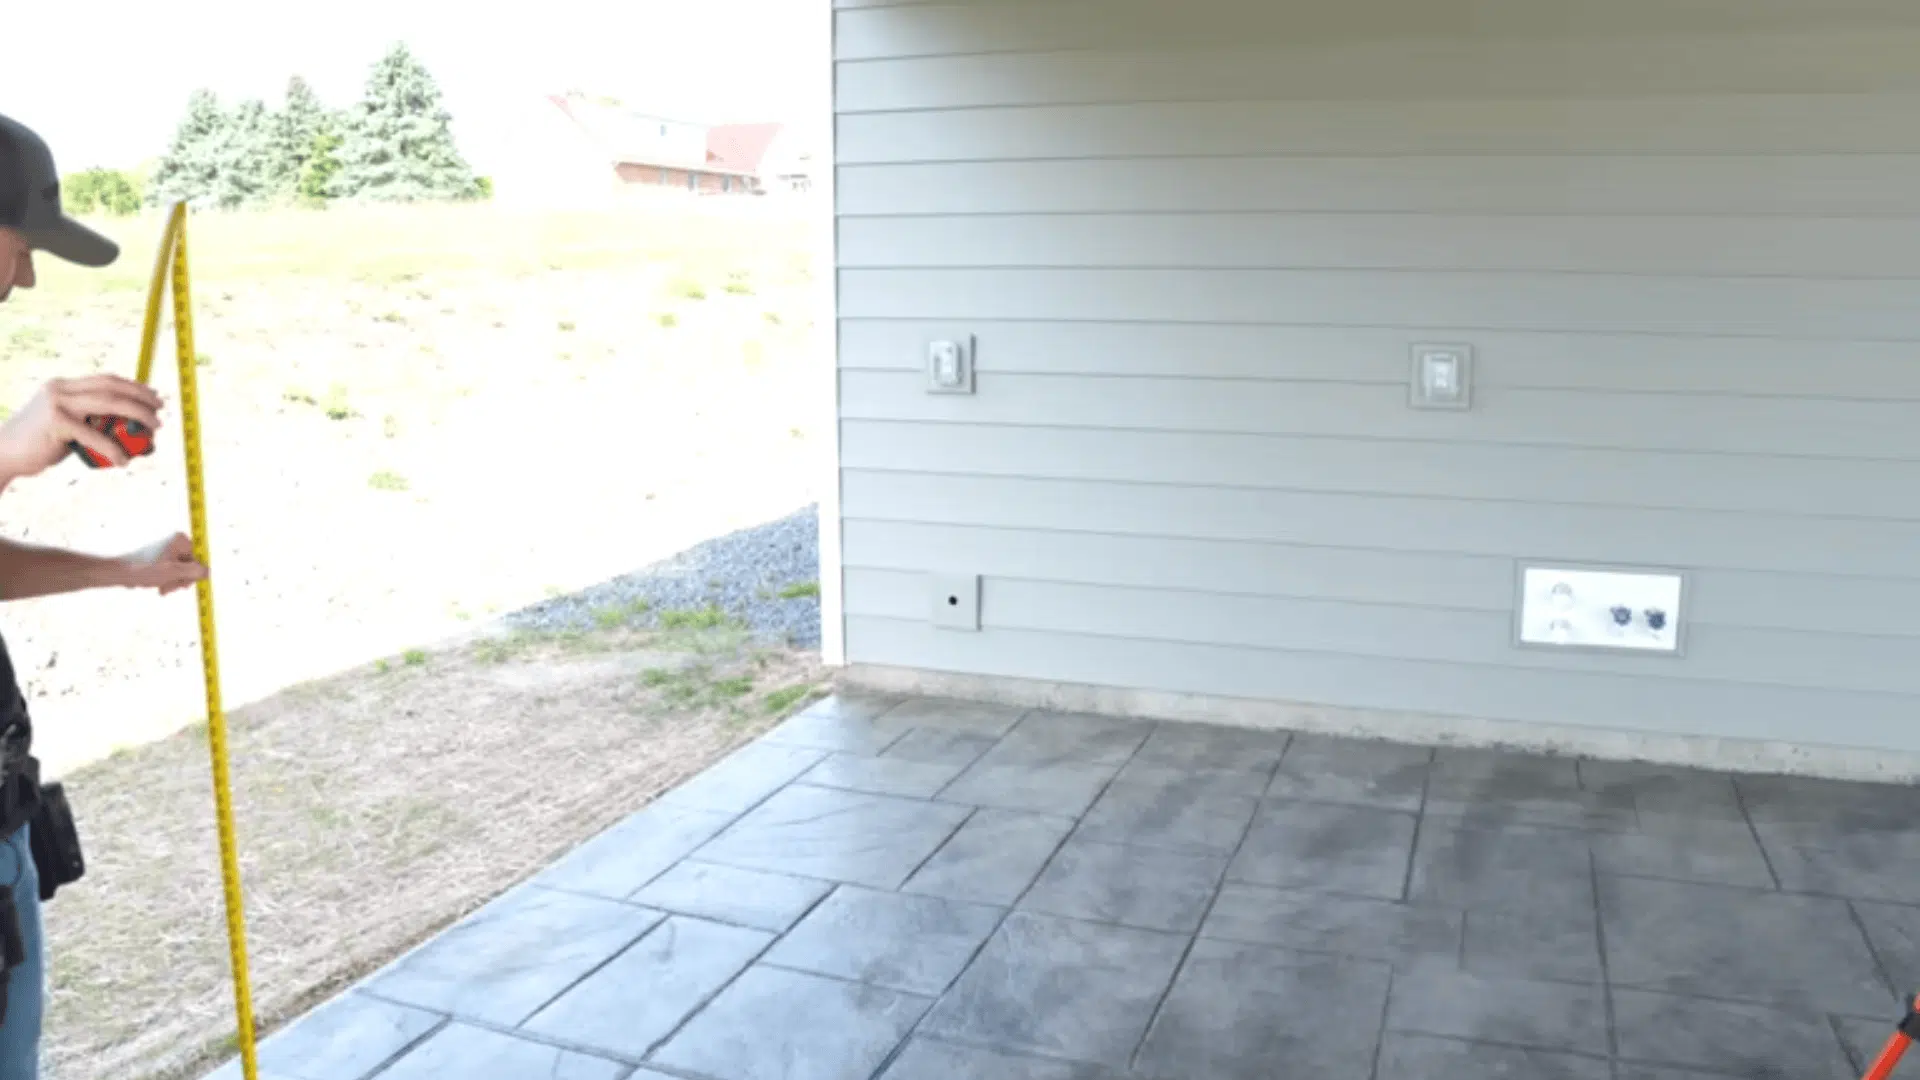
Order your appliances early to ensure accurate cutout measurements. Decide whether to use pressure-treated lumber or metal studs and finalize countertop and veneer finishes.
Mark the kitchen footprint on the concrete slab with chalk lines and use a laser level to measure the slope. Build the base frame from pressure-treated 2x4s, cutting to a finished height of 35 inches.
Anchor the framing securely to the slab using a ramset or concrete anchors. Make sure each wall section is level, square, and aligned with the layout.
Step 2: Structural Assembly and Utilities
Frame rough openings for all doors, drawers, the sink, and the refrigerator, ensuring correct sizing for easy installation.
Add blocking between studs for additional strength and stability. Install black iron gas lines, electrical wiring, and plumbing vents as required, and pressure-test the gas lines for safety.
This step forms the kitchen’s internal structure and connects all essential utilities.
Step 3: Countertop Framing and Leveling
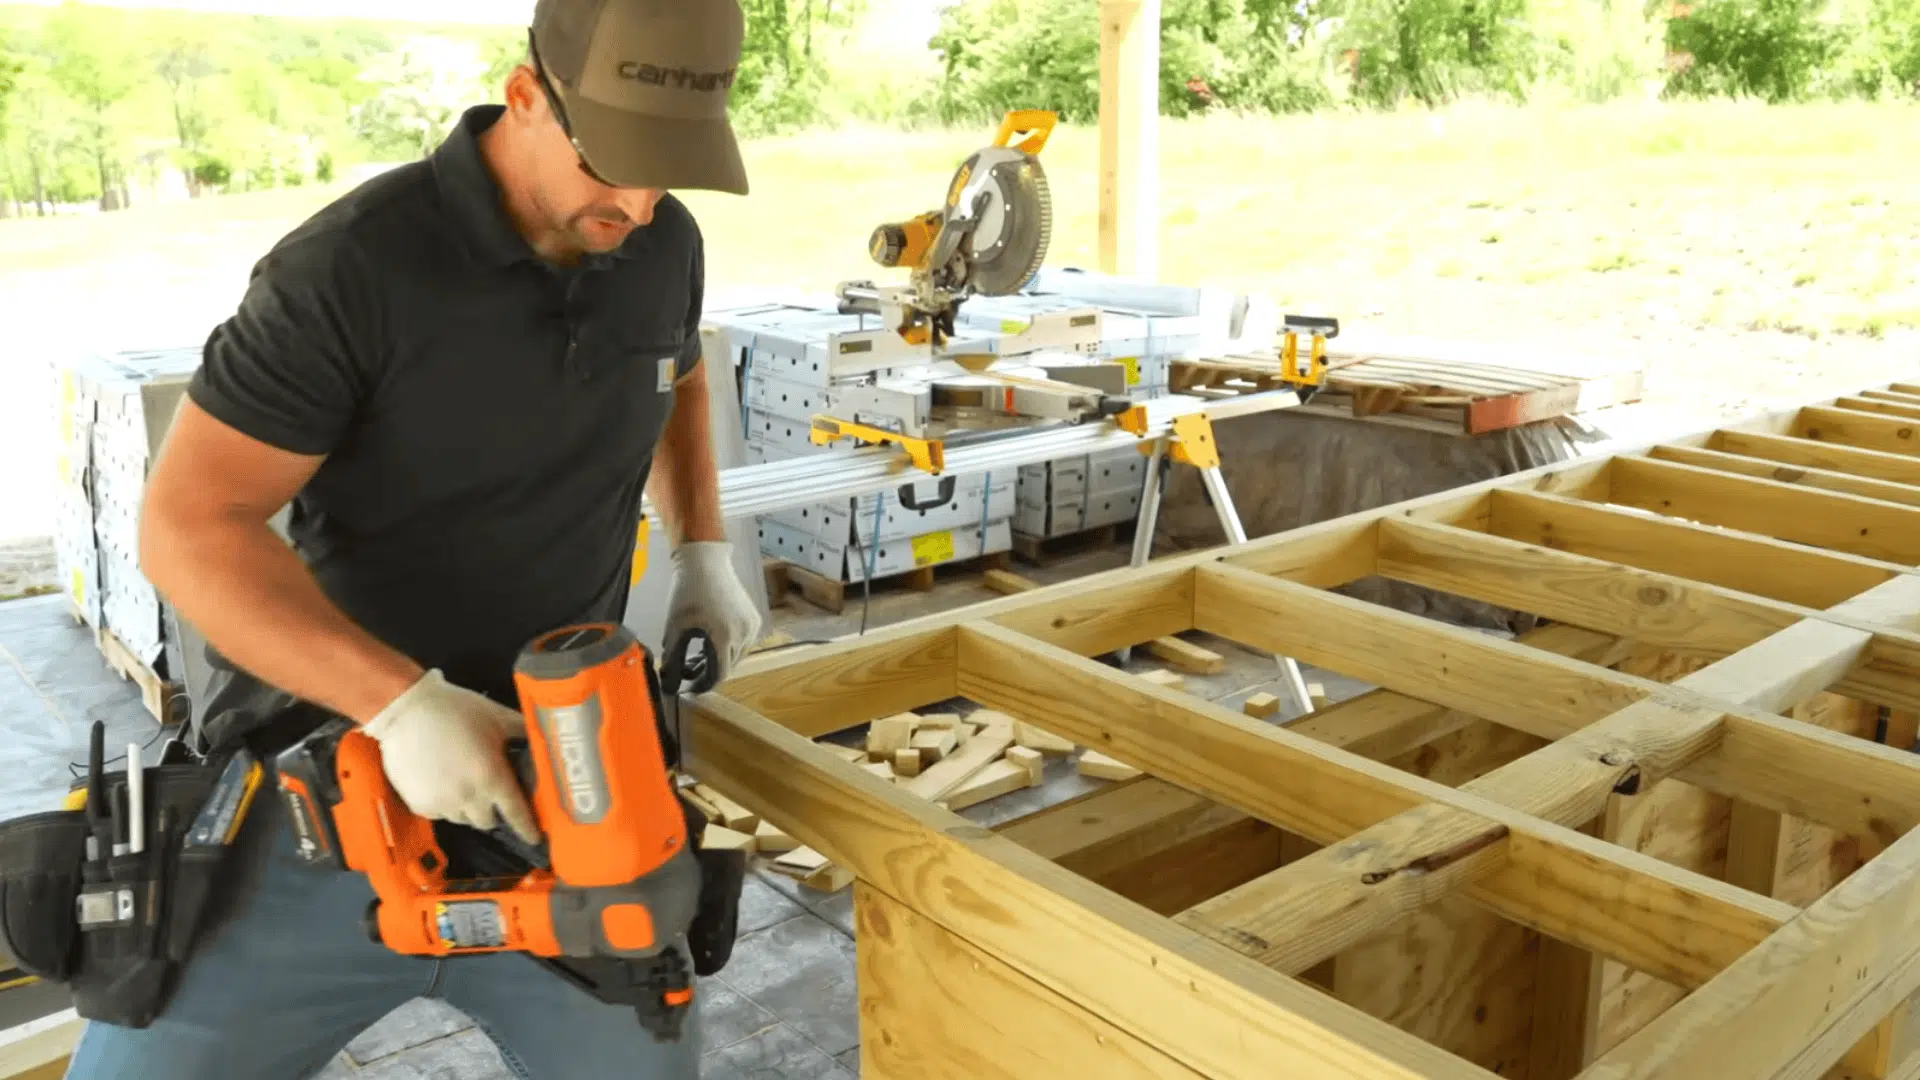
Build the countertop framework using 2×4 joists spaced 16 inches on center for support. Integrate cutouts and support blocks for the grill, griddle, and sink areas.
Level the top precisely with a laser level and composite shims for accuracy. Reinforce overhangs and edges to prepare for the installation of a heavy concrete or granite countertop.
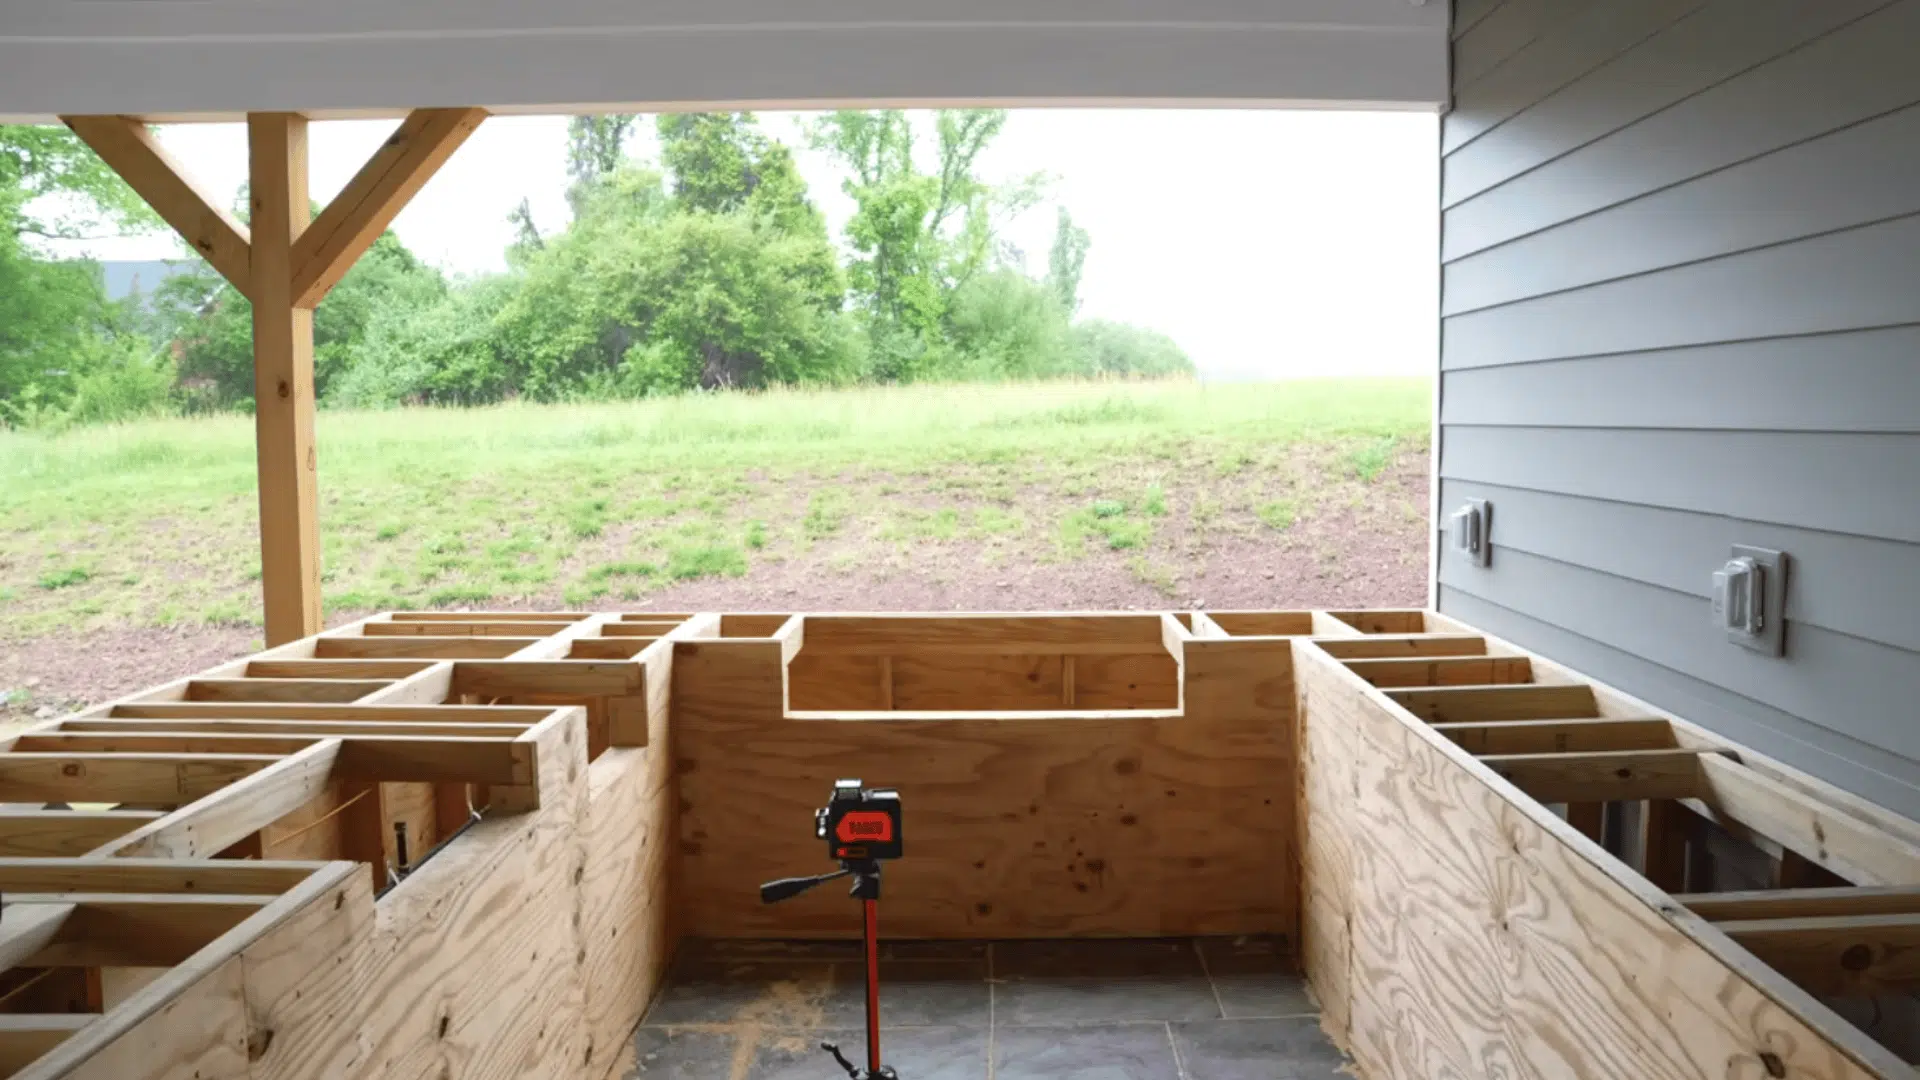
Step 4: Sheathing and Utility Protection
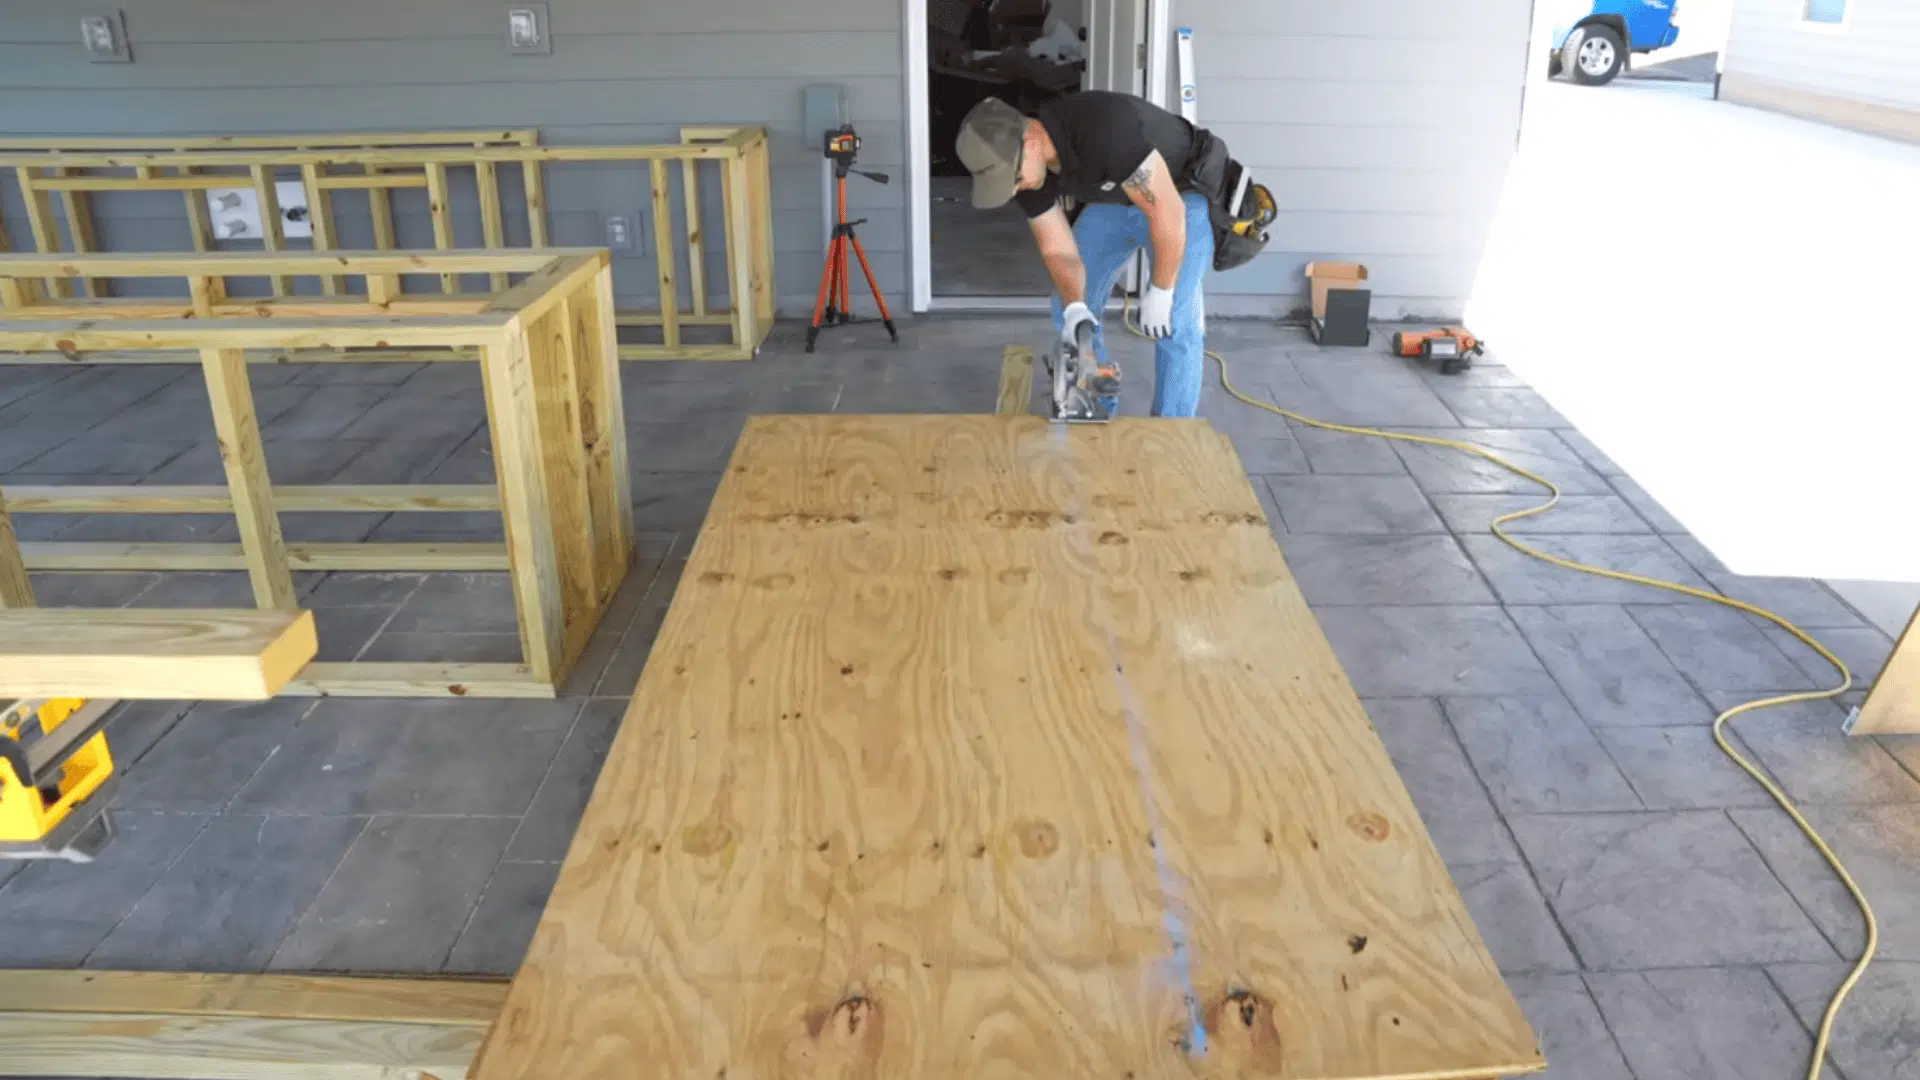
Once the countertop framing is secure and level, cover all exposed framing with pressure-treated plywood or cement board.
This strengthens the structure and provides a surface for attaching the stone veneer or tile finish.
Cut precise openings for doors, drawers, and vents to keep everything aligned. Next, seal and coat all exposed gas lines and wiring with weather-resistant paint or protectant.
Step 5: Finishing and Final Setup
After the base and top are complete, install your appliances, countertop, and stone veneer for a polished finish. Add ventilation panels, cabinet doors, and any decorative trim or lighting for a refined look.
Securely connect all utilities, then test the grill, sink, and electrical systems to ensure everything runs safely.
Once complete, your fully established outdoor kitchen is ready for entertaining; functional, durable, and built to match your personal outdoor kitchen plans perfectly.
For a More Real-Time Walkthrough, Refer to This YouTube Video Tutorial.
Inspiring Outdoor Kitchen Ideas for Every Backyard
Doesn’t matter if you’re refining your outdoor kitchen plans or just exploring possibilities, these ideas will help you combine functionality, comfort, and style.
From compact layouts to resort-style setups, there’s something here for every home and budget.
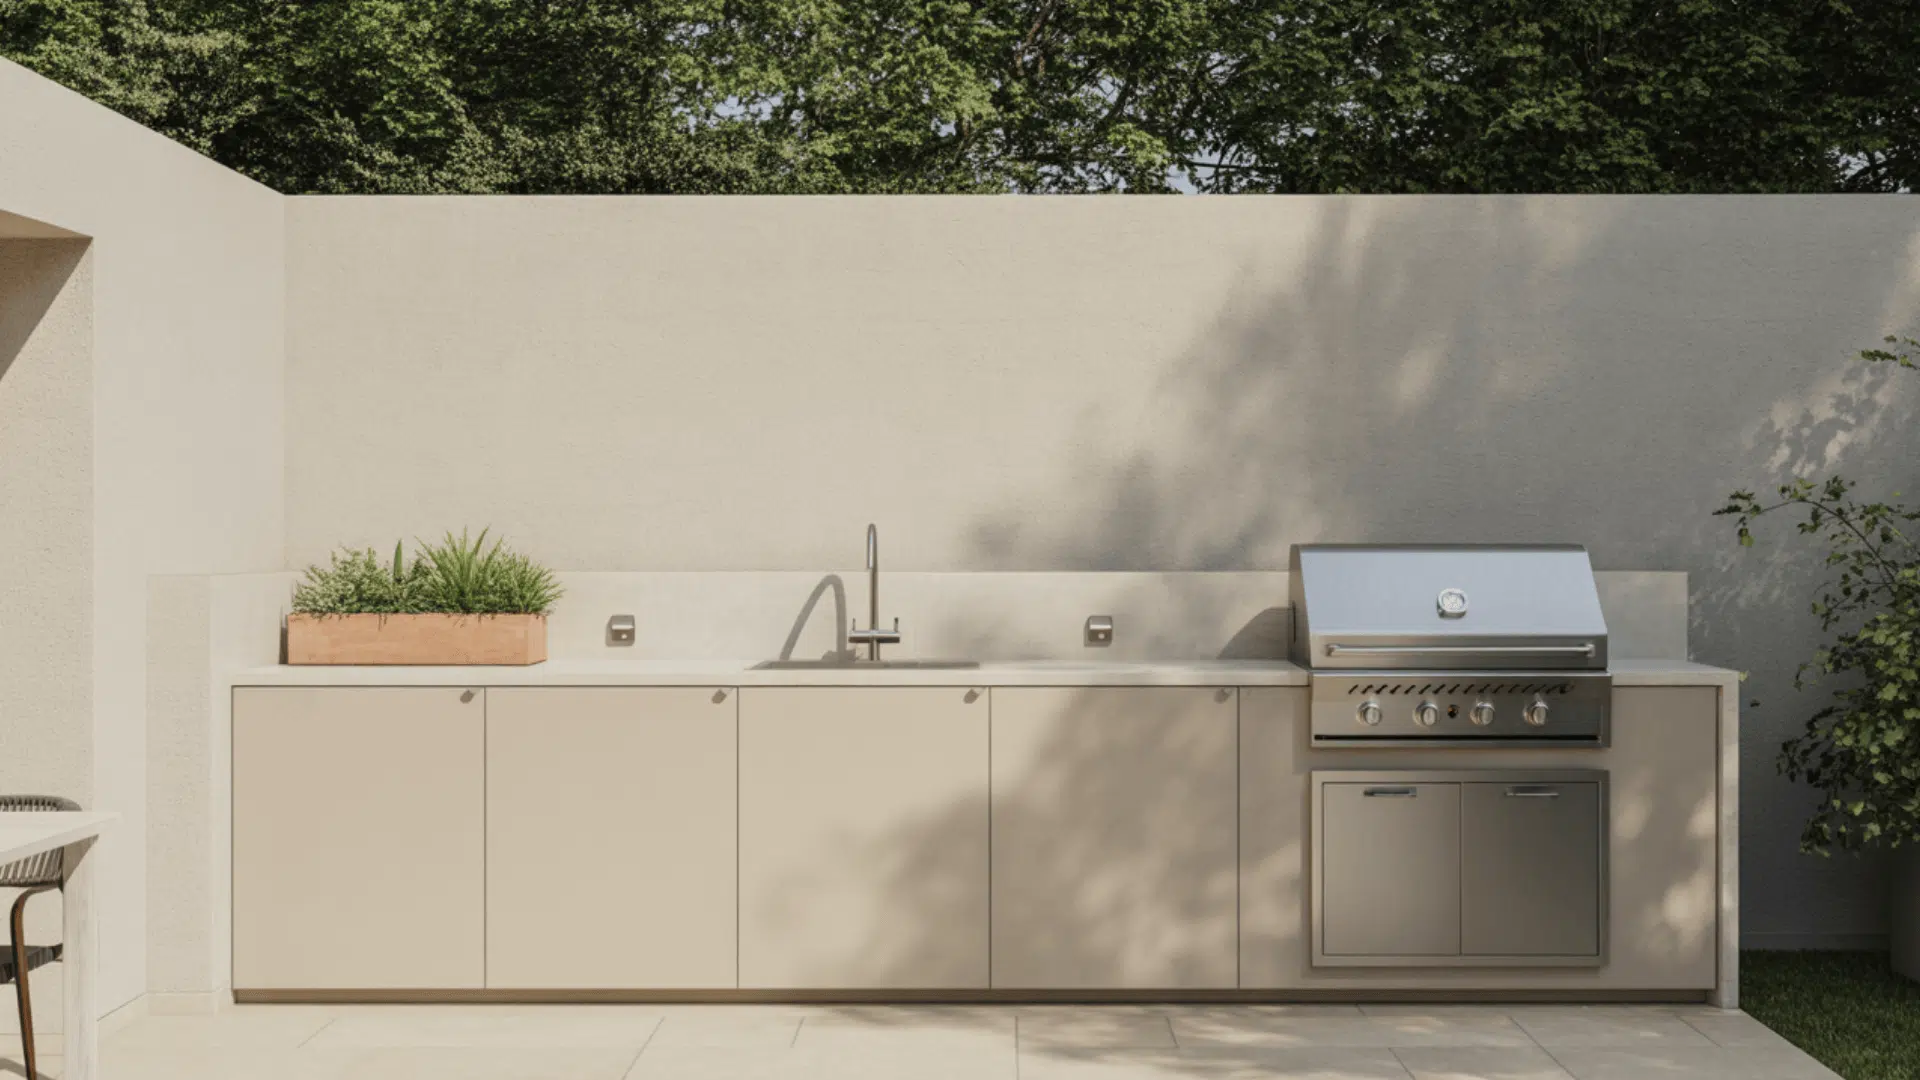
1. One-Wall Outdoor Kitchen
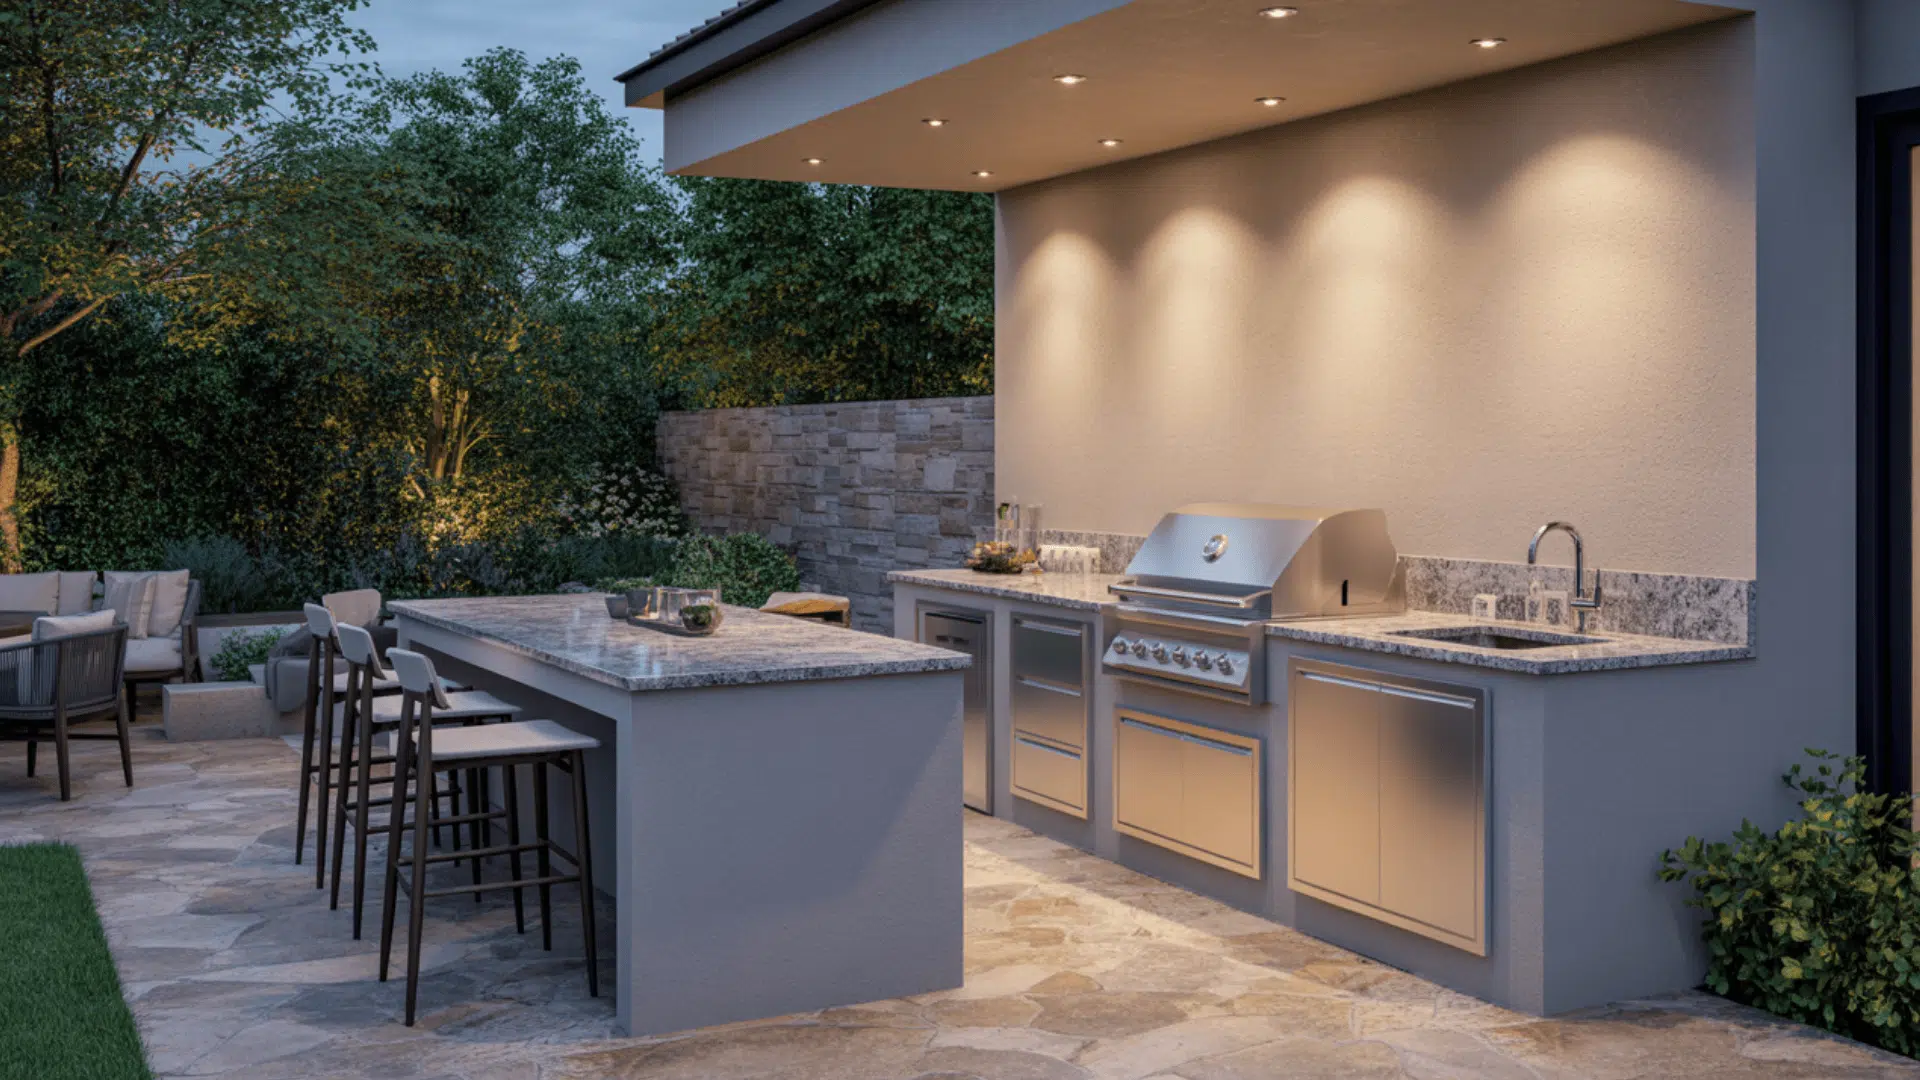
A one-wall layout keeps everything: grill, sink, and prep space, organized in one clean line. It’s ideal for small patios or side yards with limited space.
When creating your outdoor kitchen plans, focus on built-in storage and compact appliances to keep it sleek and efficient. Add accent lighting or a backsplash to elevate the look.
2. Rooftop Barbecue Kitchen
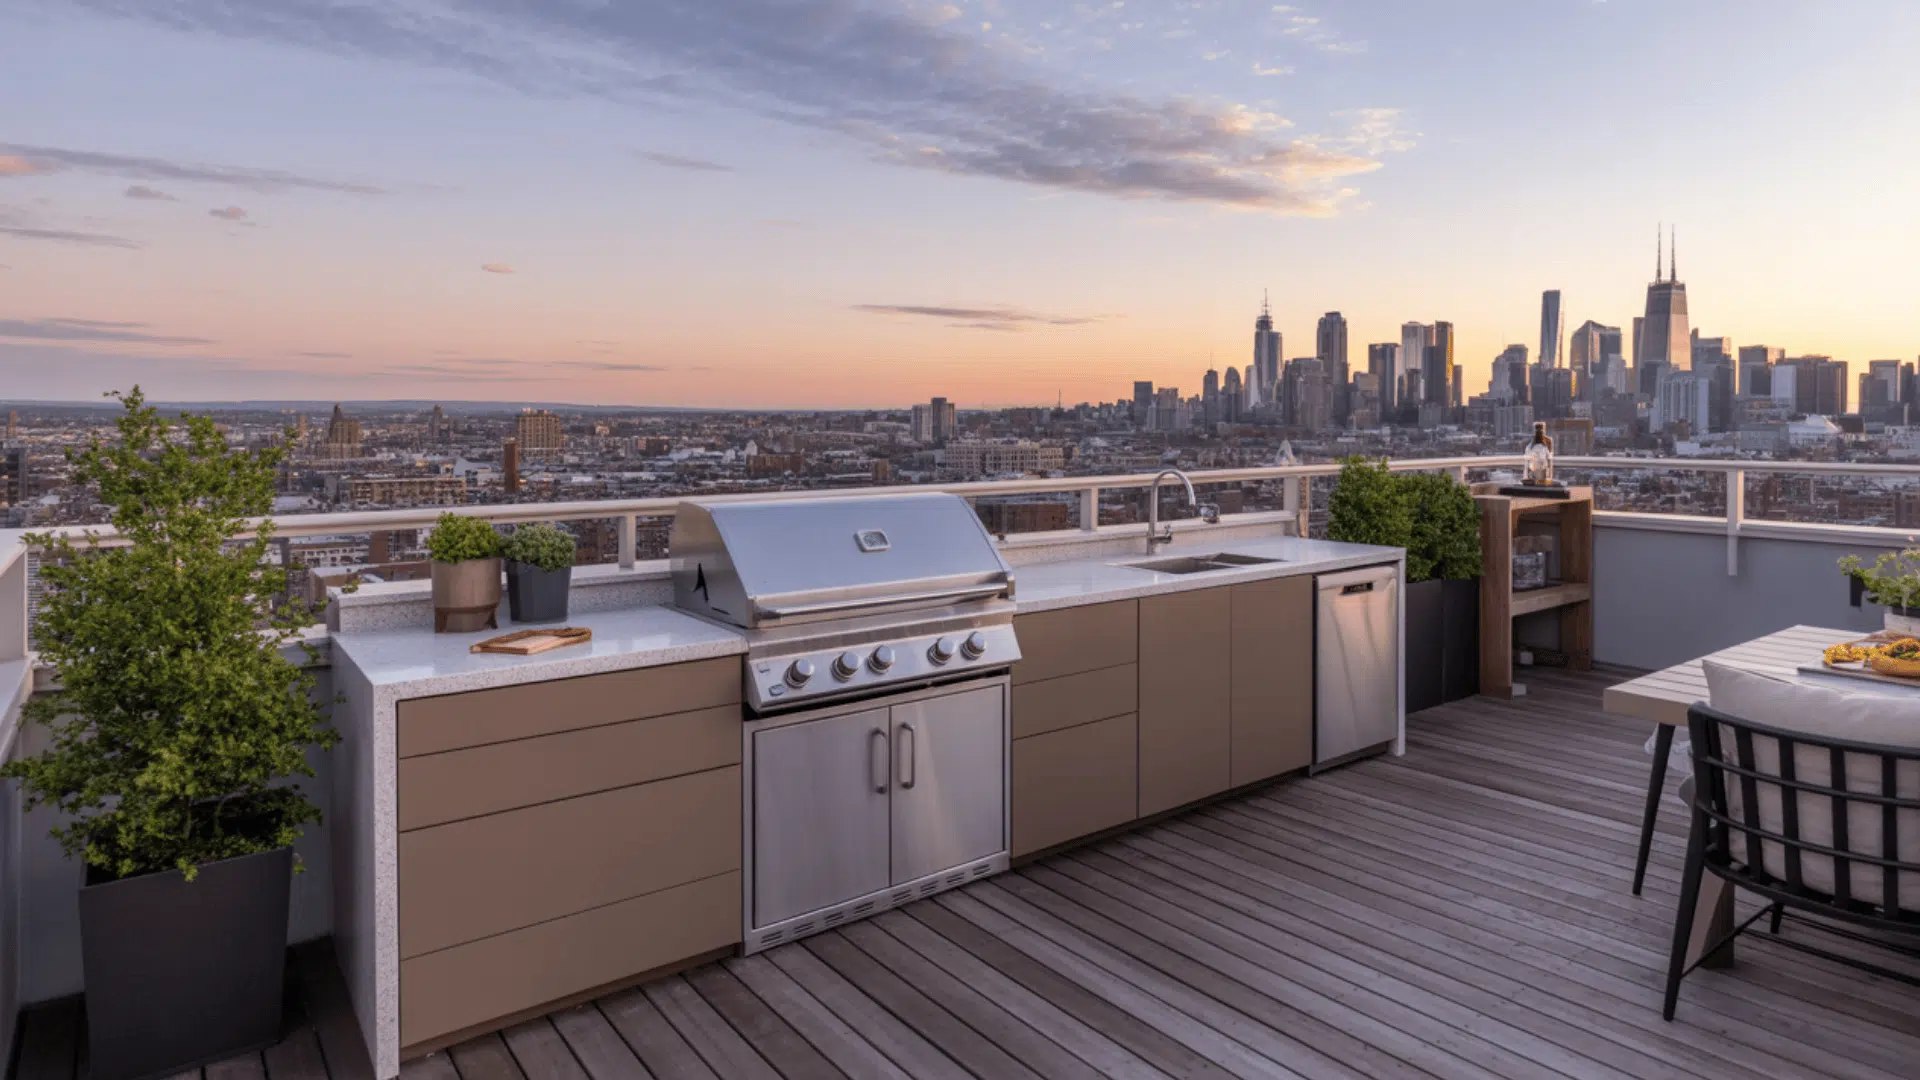
Take outdoor dining to new heights with a rooftop barbecue kitchen. Lightweight counters, durable flooring, and safety railings are key to this setup. It’s perfect for city living with a great view and good vibes.
Keep it cozy with built-in seating and greenery for a relaxed rooftop retreat. Add ambient lighting for an inviting evening atmosphere.
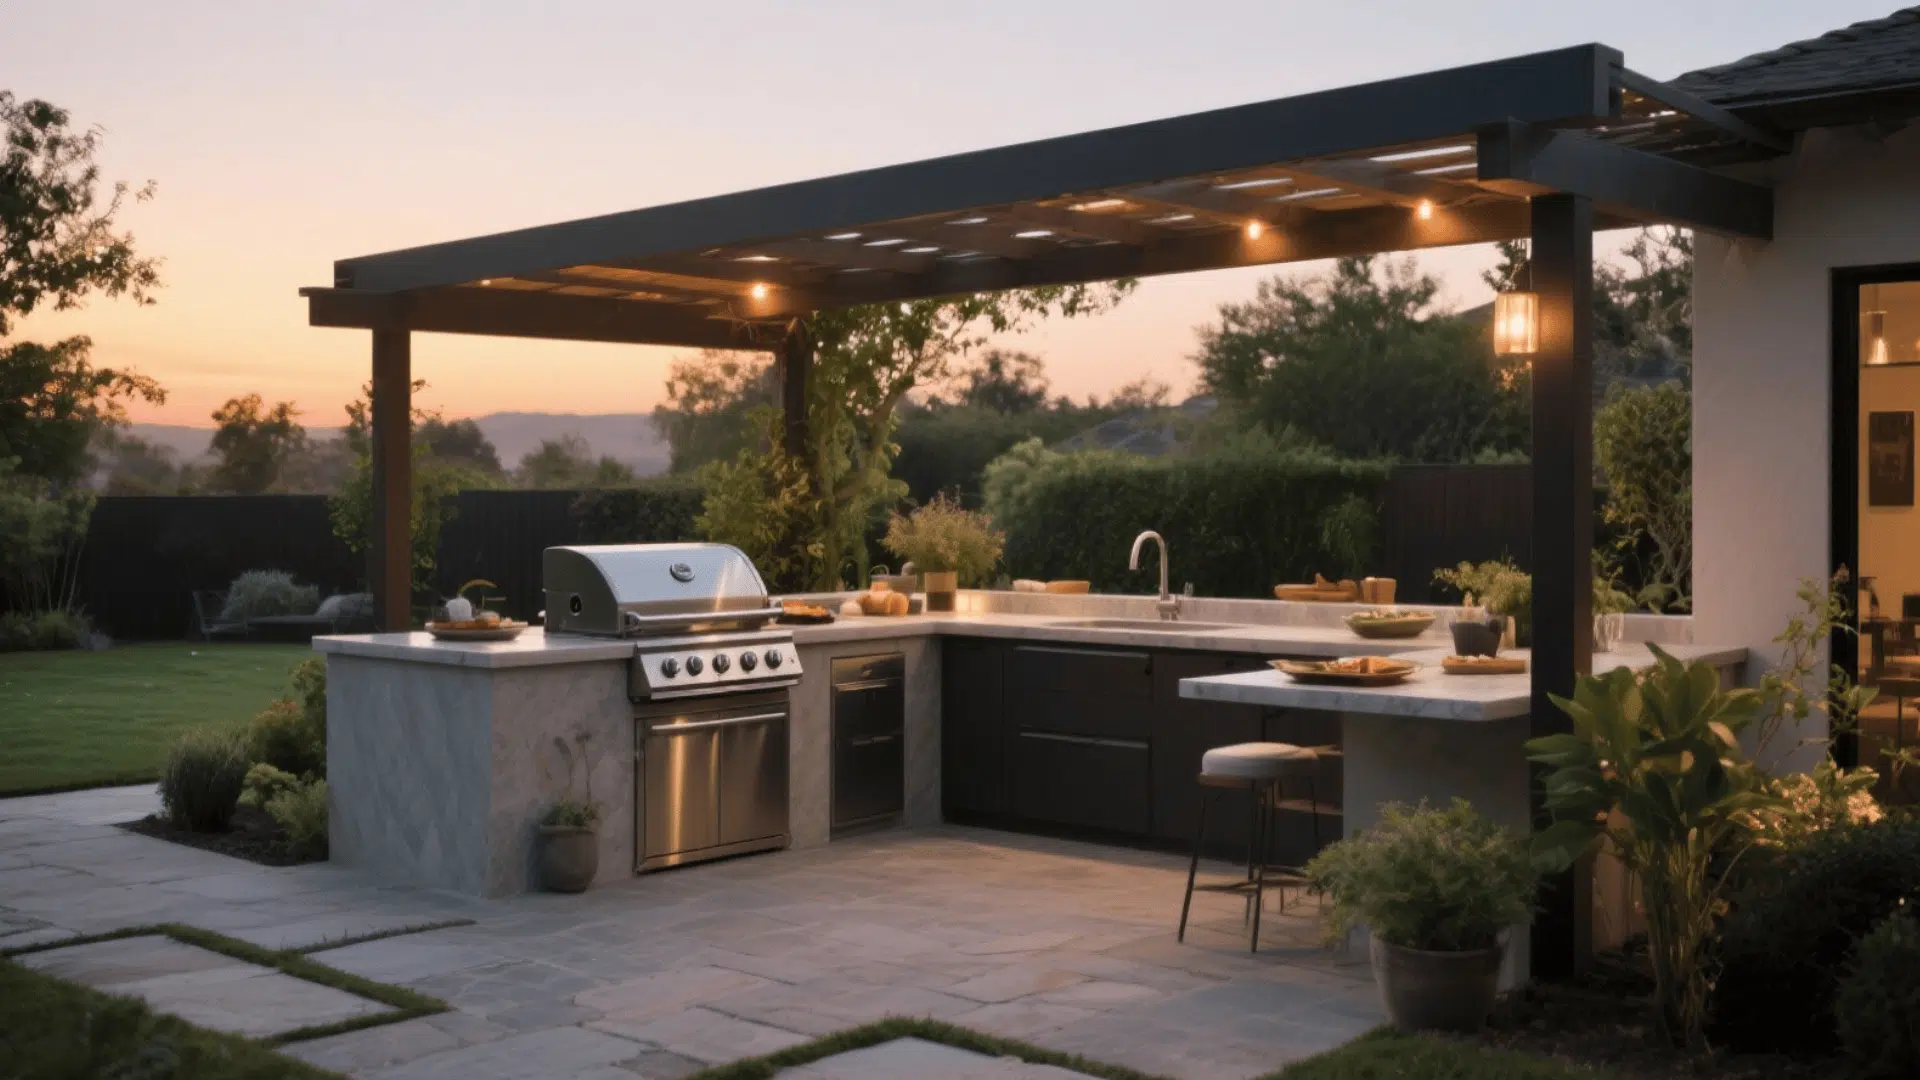
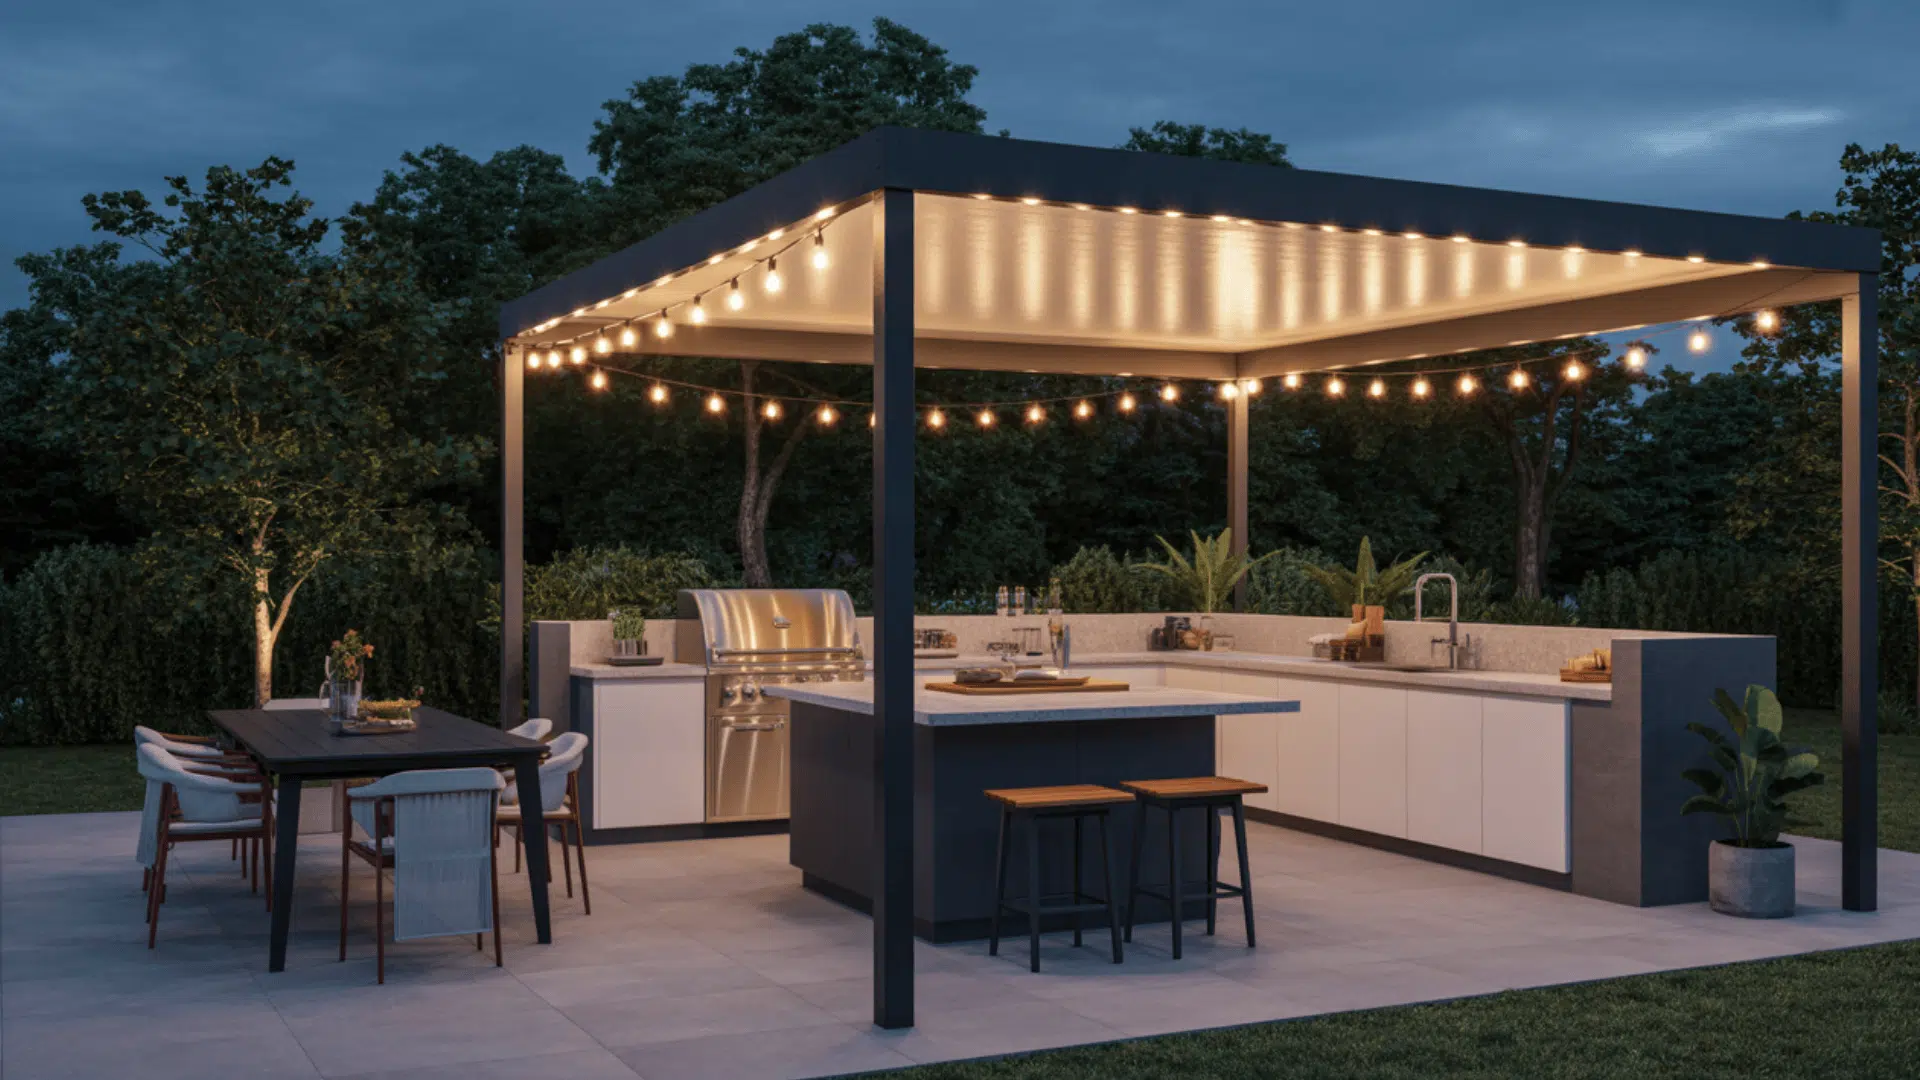
3. Pergola-Covered Outdoor Kitchen
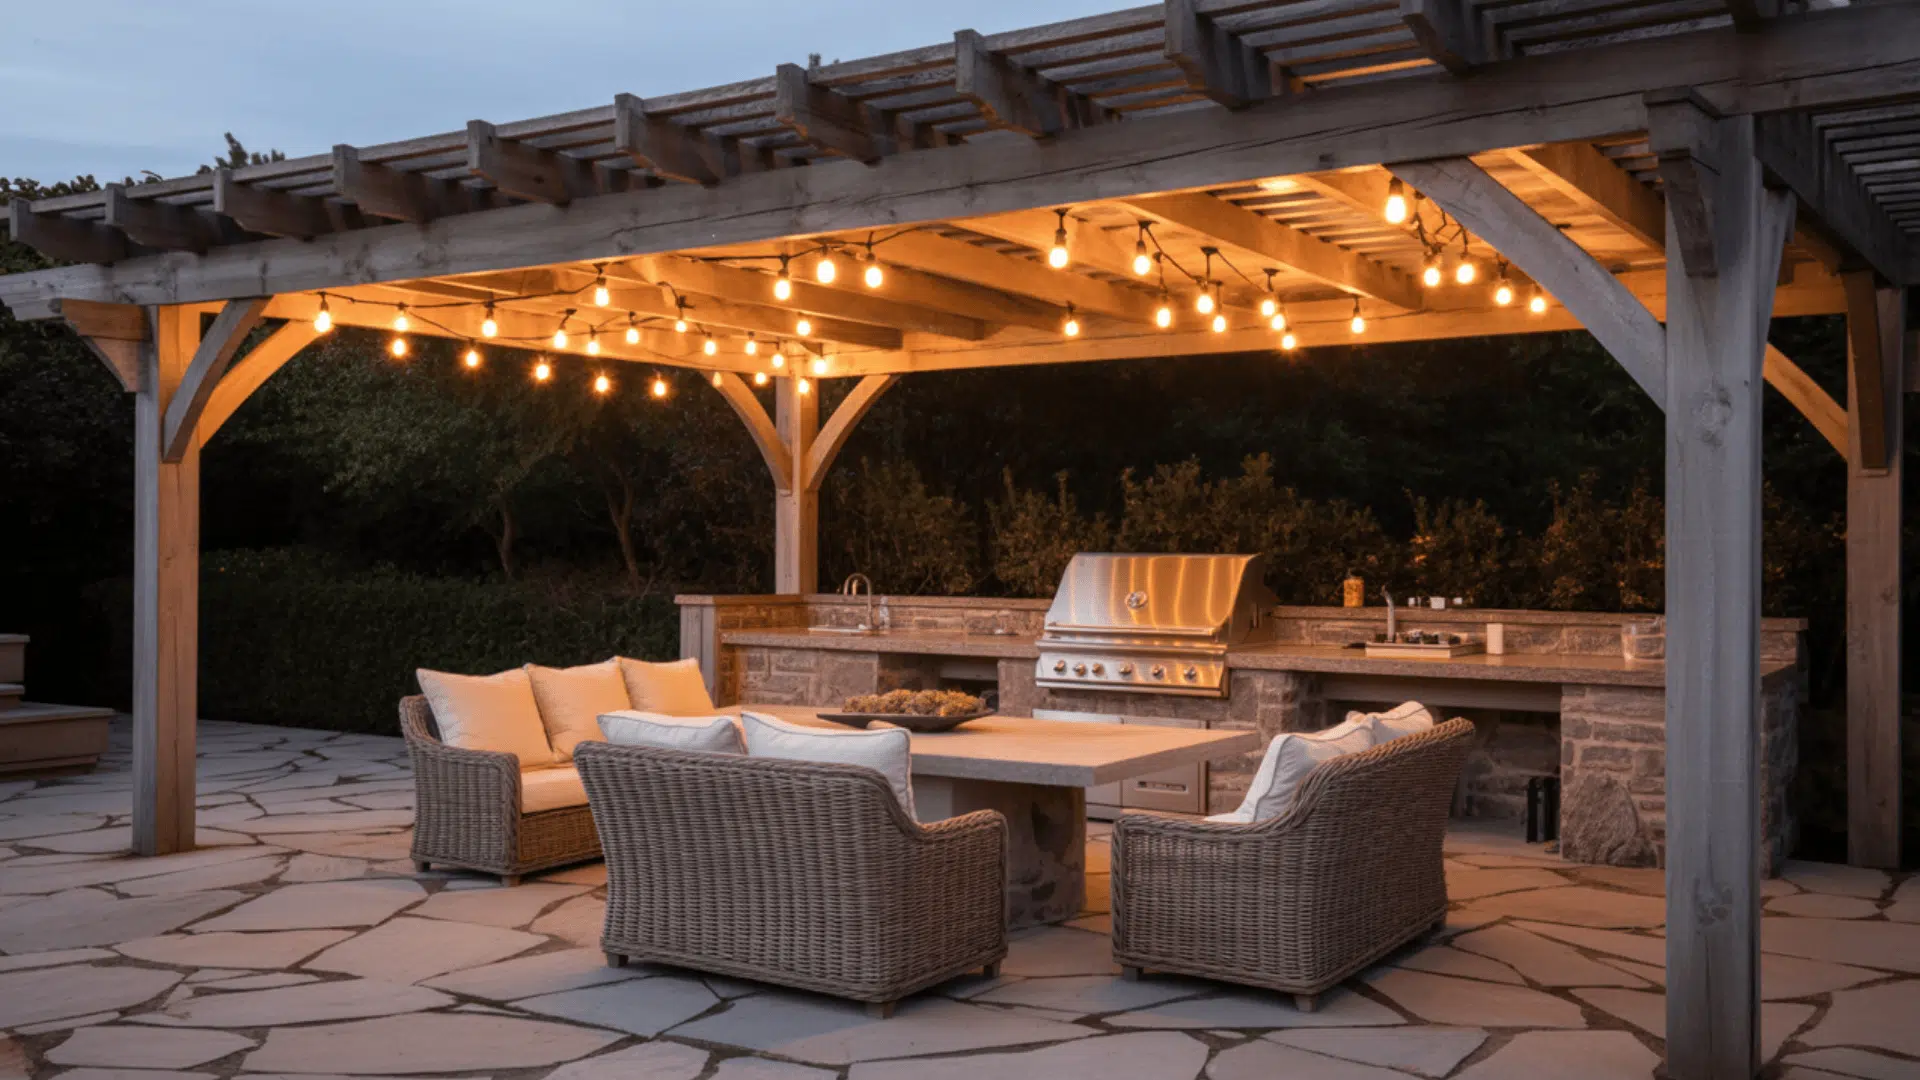
A pergola adds charm and practicality, keeping you shaded while cooking or dining. Include ventilation gaps and hanging lights for function and style.
When designing your outdoor kitchen, set the pergola height to allow smoke to escape easily. You can even train vines or string lights across the beams for a cozy touch.
4. Industrial Outdoor Kitchen
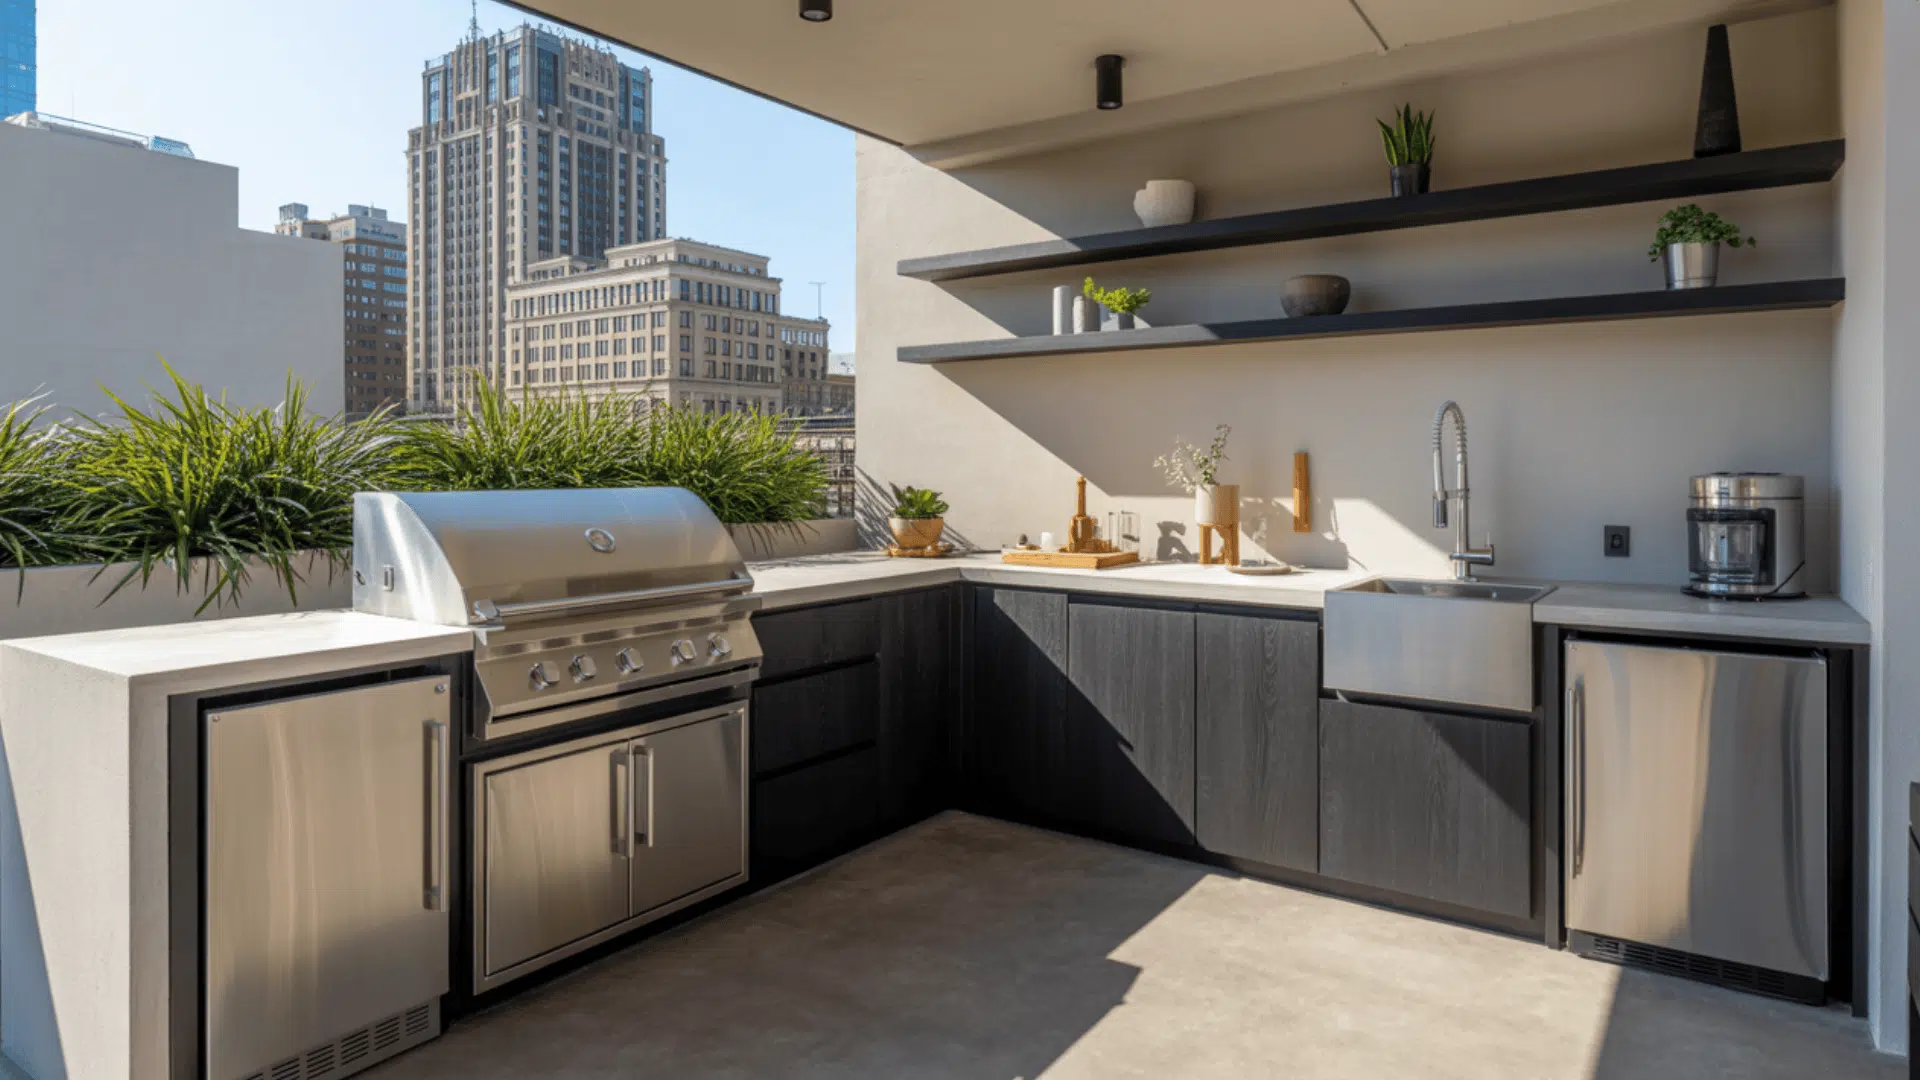
Sleek, urban, and modern, the industrial look uses materials like concrete, steel, and stone. It’s durable and low maintenance, perfect for serious grillers.
Include task lighting in your outdoor kitchen and clean lines for a contemporary vibe.
A few greenery touches can soften the bold textures beautifully. Pair with minimalist bar stools and matte finishes for a refined edge.
5. Discreet Side-Wall Kitchen
Tuck your cooking station along a side wall to maximize open space for lounging. This layout keeps your patio tidy and organized.
While planning your outdoor kitchen, consider recessed storage and appliances that blend into the structure. It’s ideal for minimalist homes that prefer subtle sophistication.
6. Outdoor Kitchen Lounge with Dining Zone

Combine your kitchen with a lounge-style seating area for the ultimate entertainment setup. Guests can relax and dine nearby as you cook.
In your kitchen plans, prioritize an open layout with wide counters and durable furniture. Add soft lighting and cozy cushions for a relaxed social vibe. Include a fire pit or small bar area to make it a true hangout spot.
7. U-Shaped Outdoor Kitchen with Bar Seating
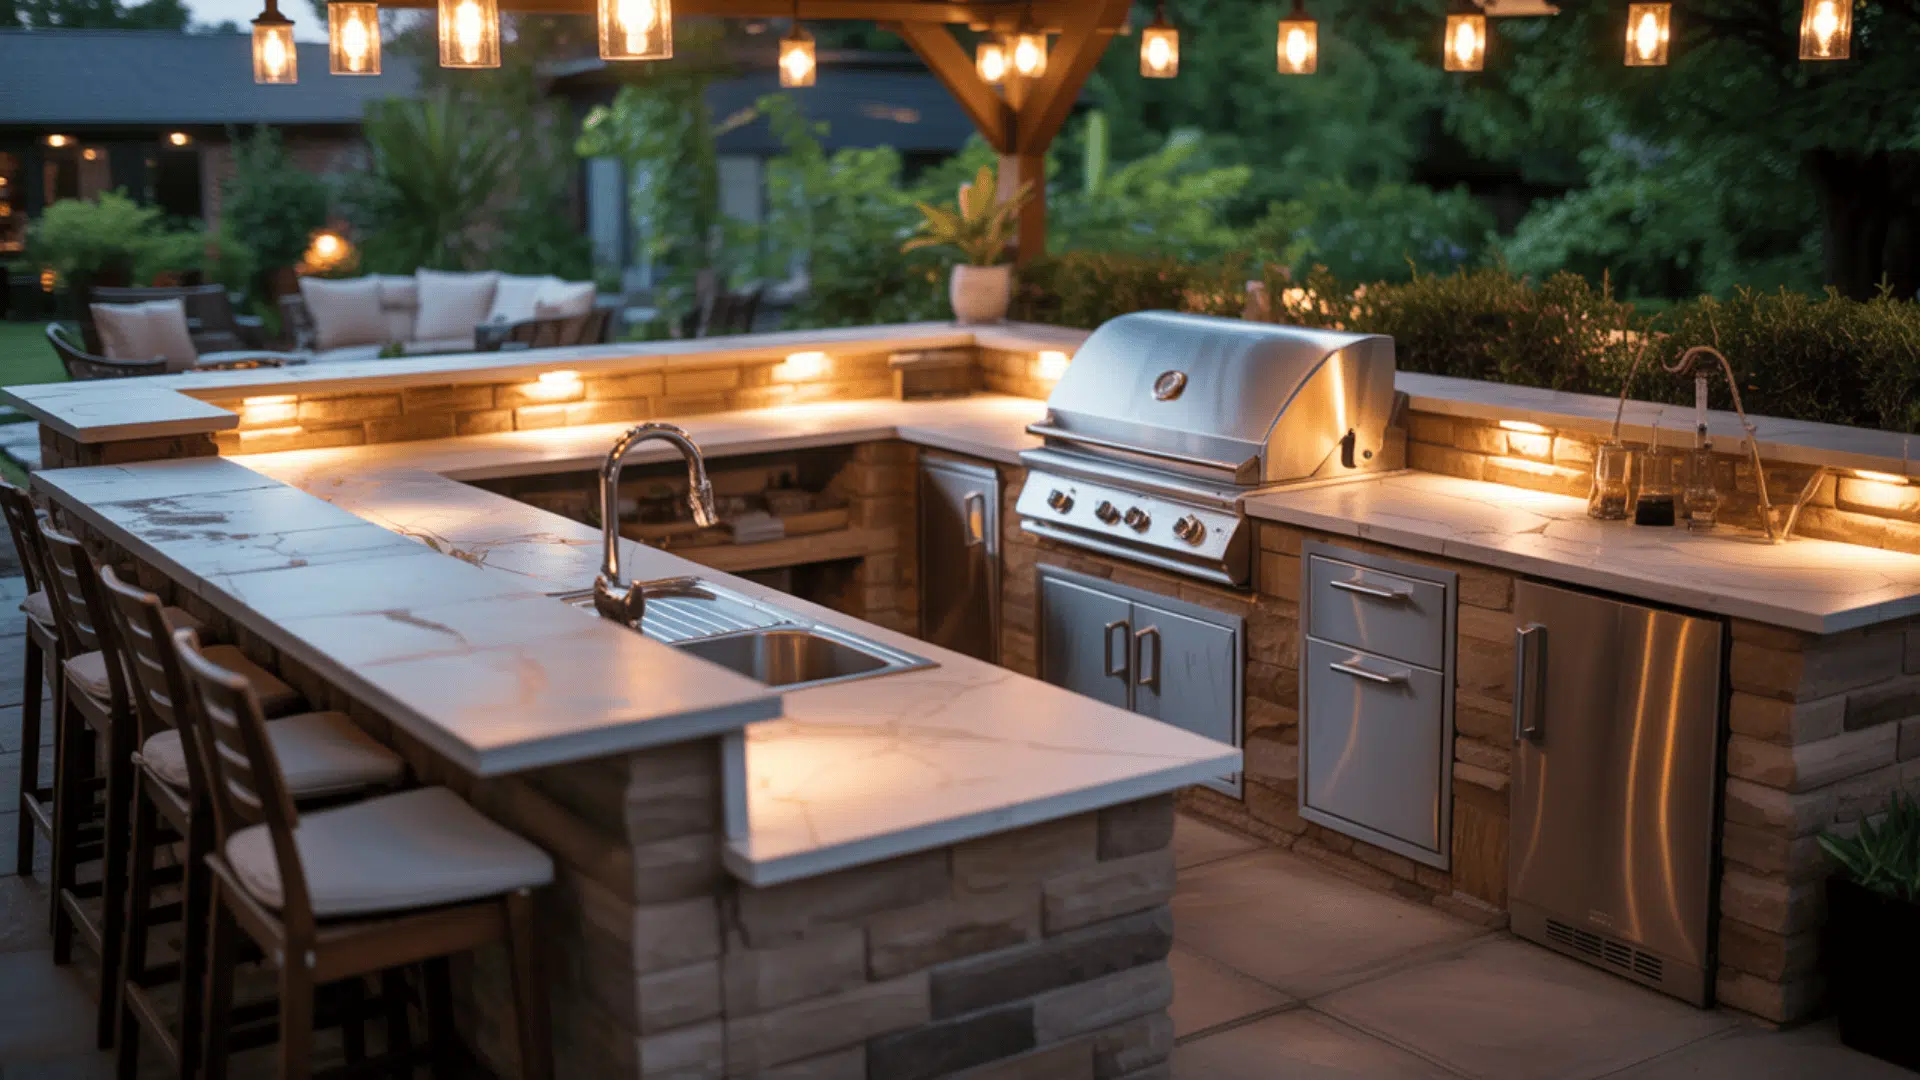
This layout gives you plenty of prep space and an inviting bar area for guests. It encourages interaction while keeping your cooking zone efficient.
Your kitchen plans should include raised counters and weatherproof seating. It’s great for big families or anyone who loves to host. Add pendant lighting above the bar for ambiance and visibility.
8. Outdoor Kitchen Illumination
Lighting changes your space from day to night. Combine task lighting for cooking areas with ambient LEDs under counters or shelves.
When drafting your outdoor kitchen plans, think about both function and atmosphere. Smart lighting can even set the mood for evening gatherings.
9. Outdoor Kitchen Location Near Indoor Access
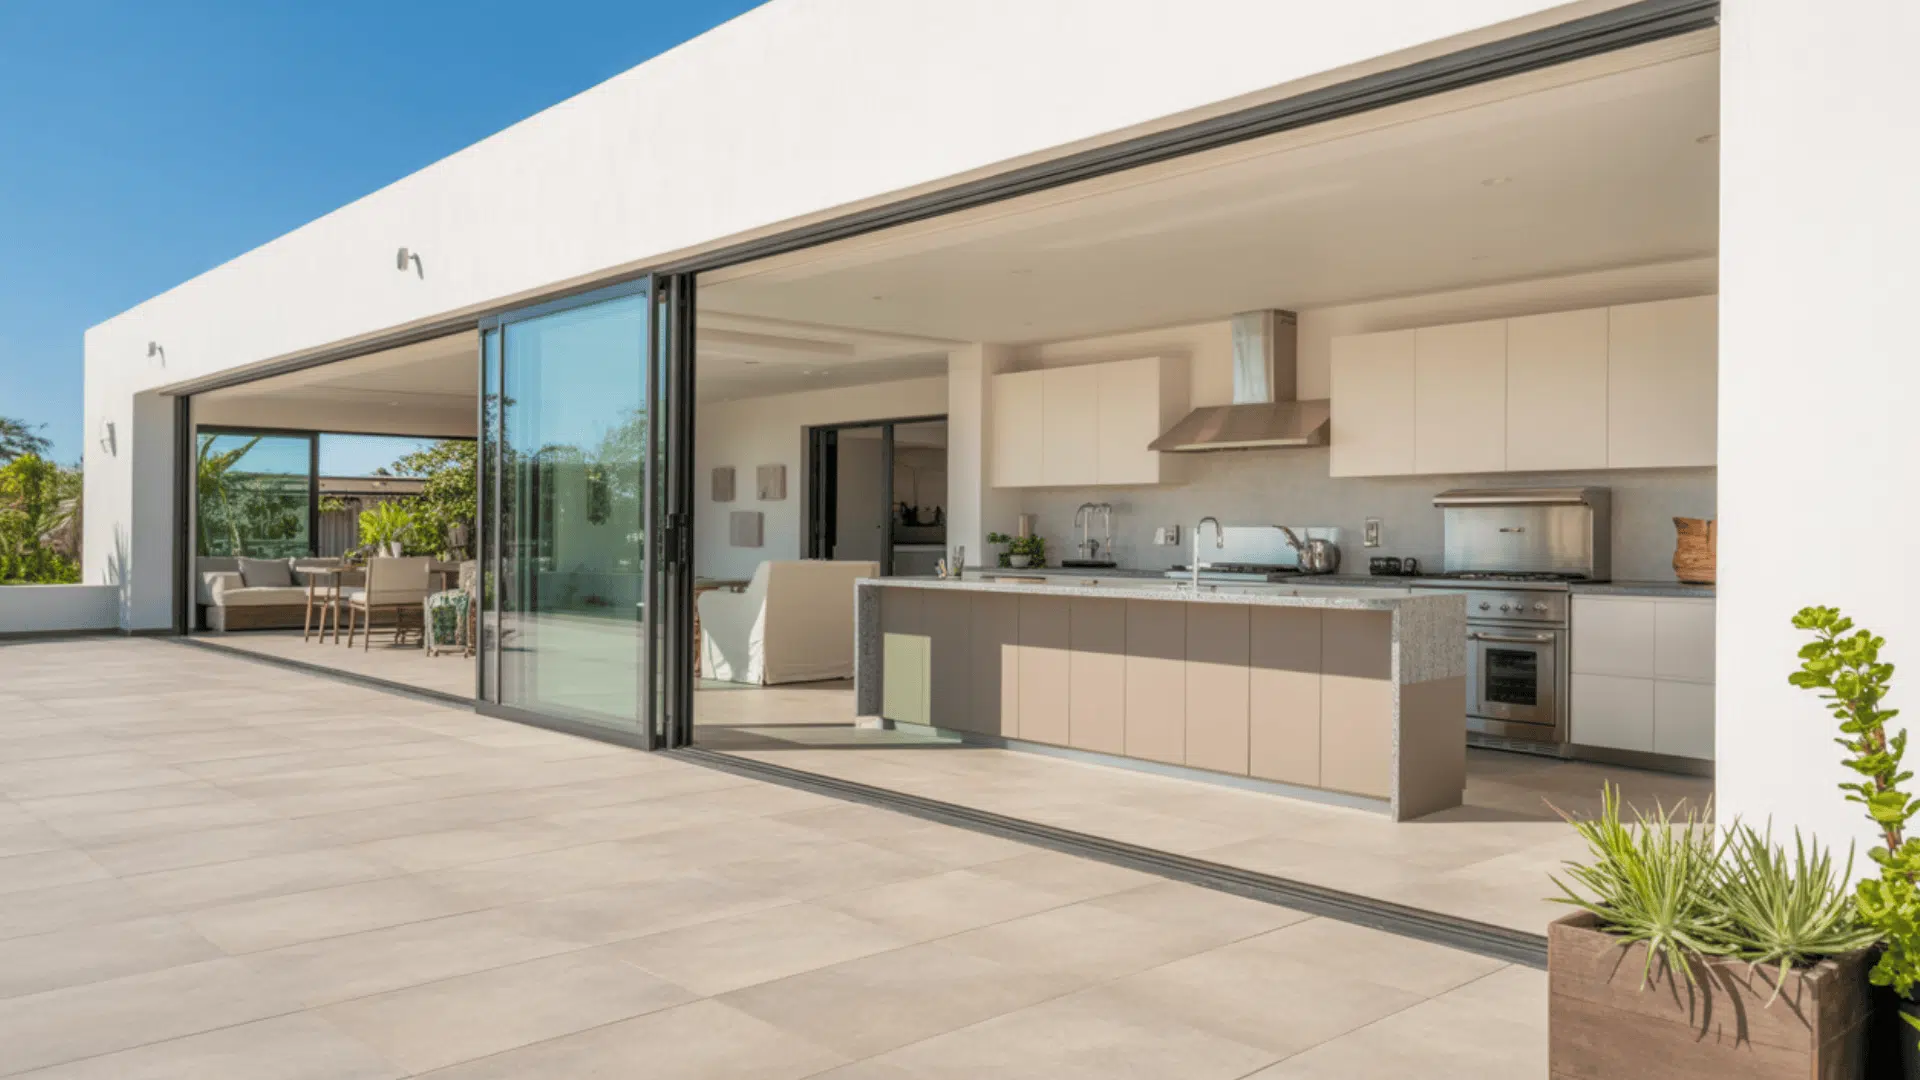
Building close to your indoor kitchen ensures quick trips for ingredients or dishes.
It saves time and effort while cooking outdoors. Include easy access pathways and weatherproof flooring in your outdoor kitchen.
This layout makes everyday outdoor dining more practical and smooth. Add a serving window for easy pass-throughs during meals. It’s efficient, stylish, and boosts your hosting flow.
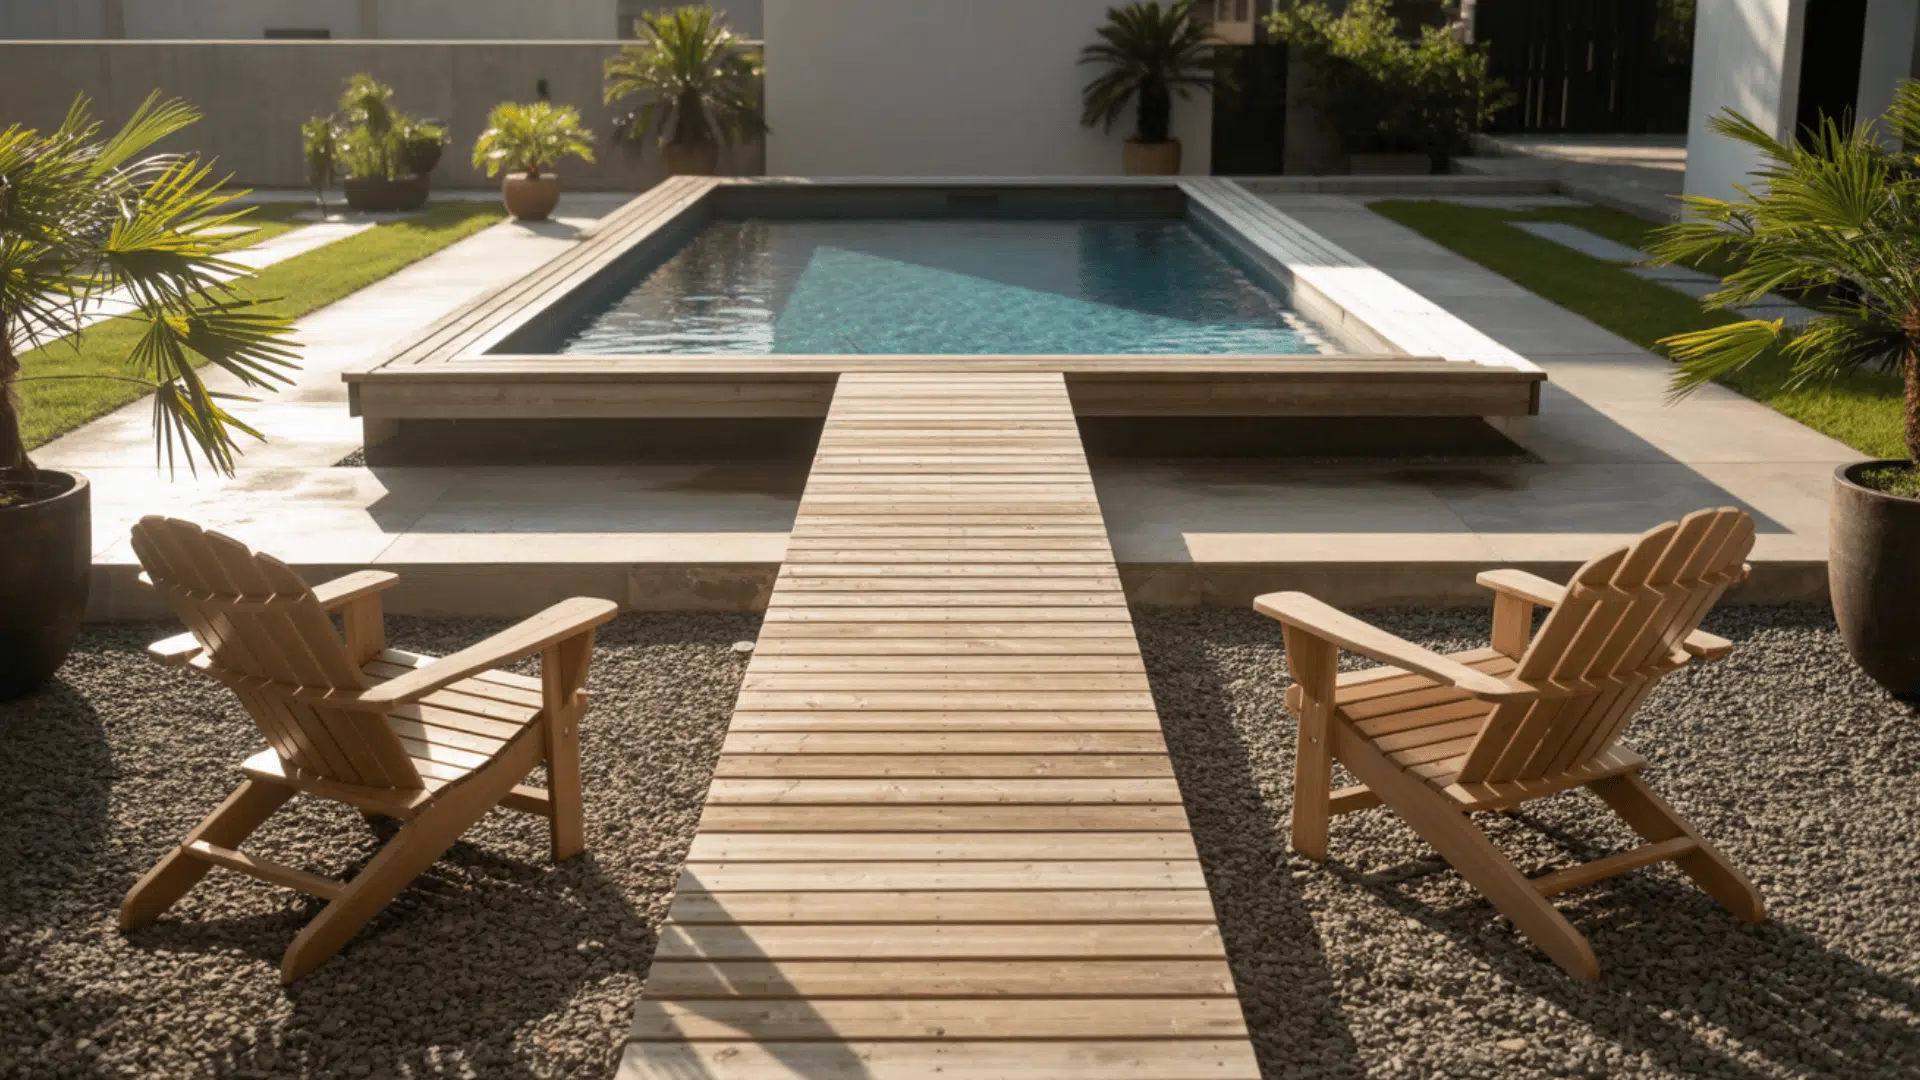
10. Poolside Outdoor Kitchen with Refreshing Features
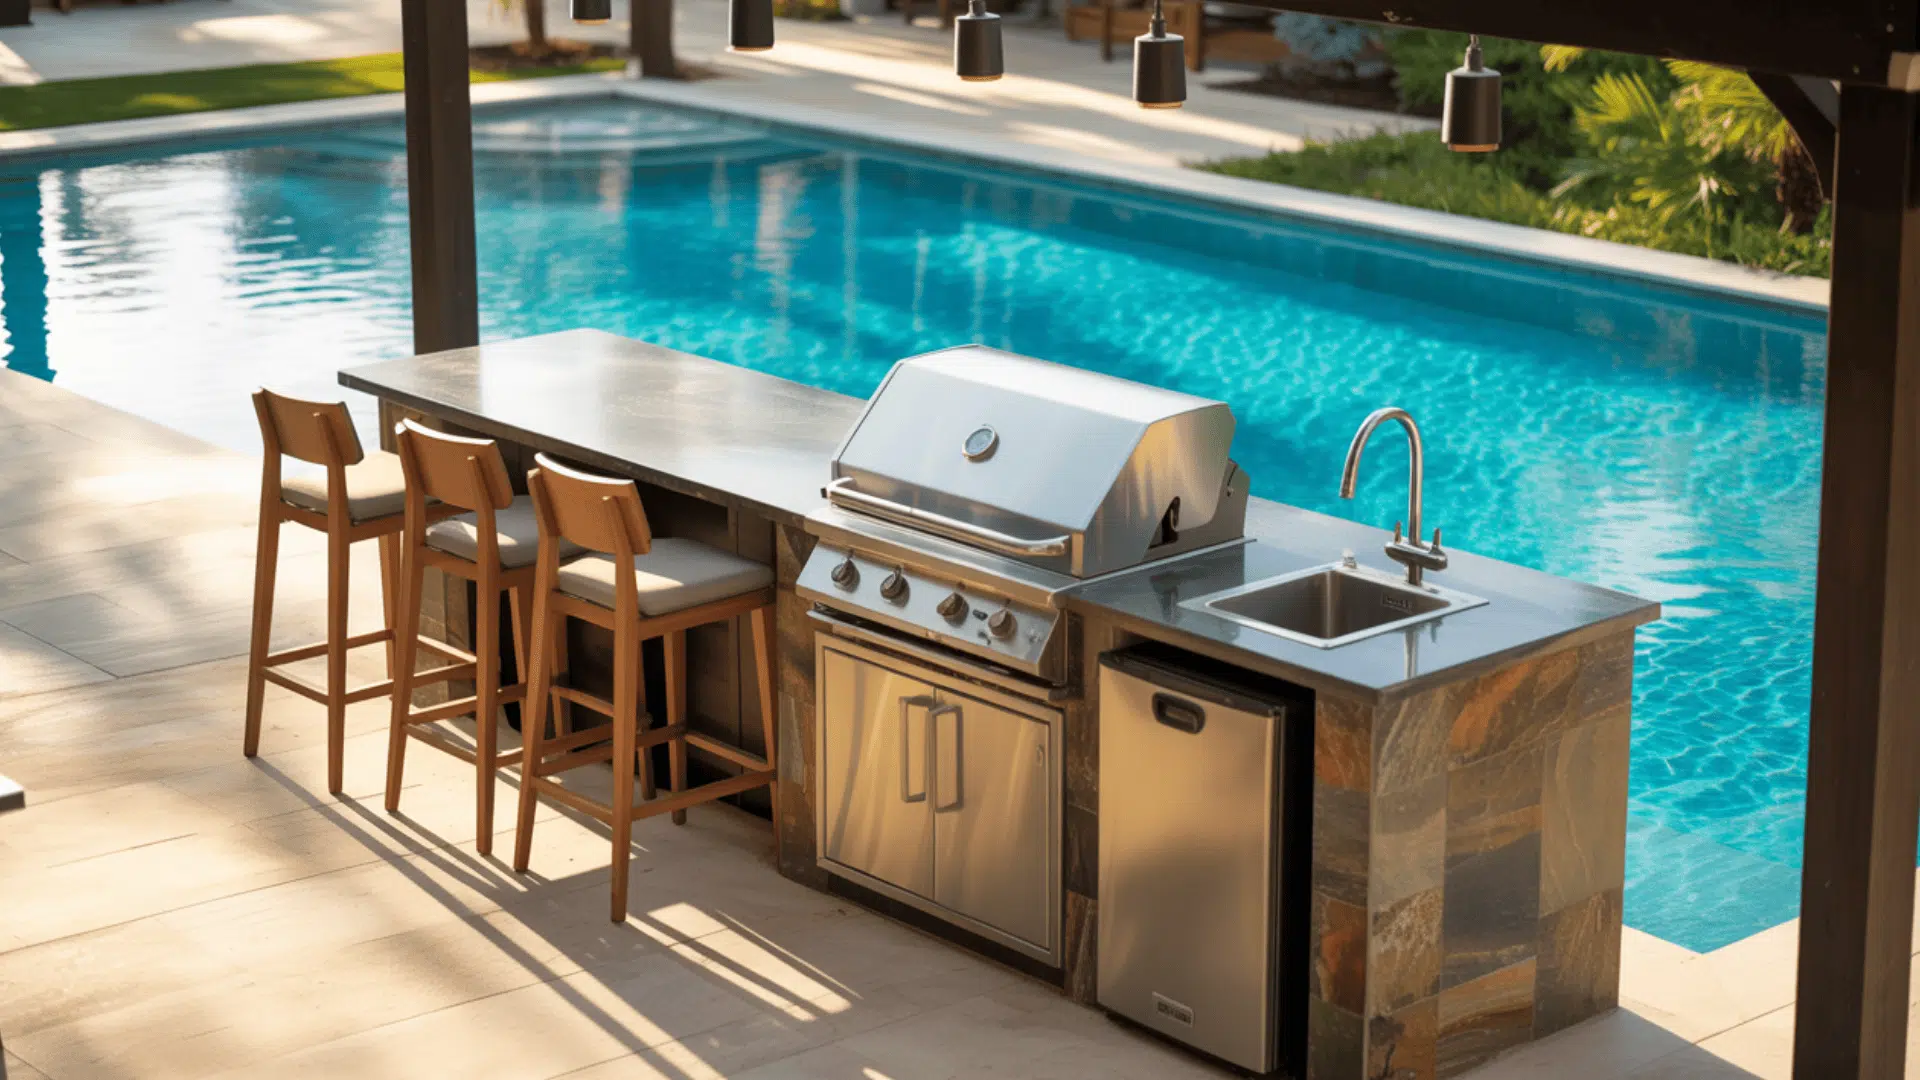
Bring your grill to the poolside for a resort-style experience. Design your outdoor kitchen with splash-resistant surfaces and shaded seating.
Stone or concrete counters stay cool under the sun. Add a mini fridge or bar area to keep drinks chilled while guests lounge nearby.
Consider non-slip flooring and waterproof cabinets for safety. It’s the perfect summer setup for relaxation and fun.
11. Outdoor Kitchen with a Built-In Beverage Station
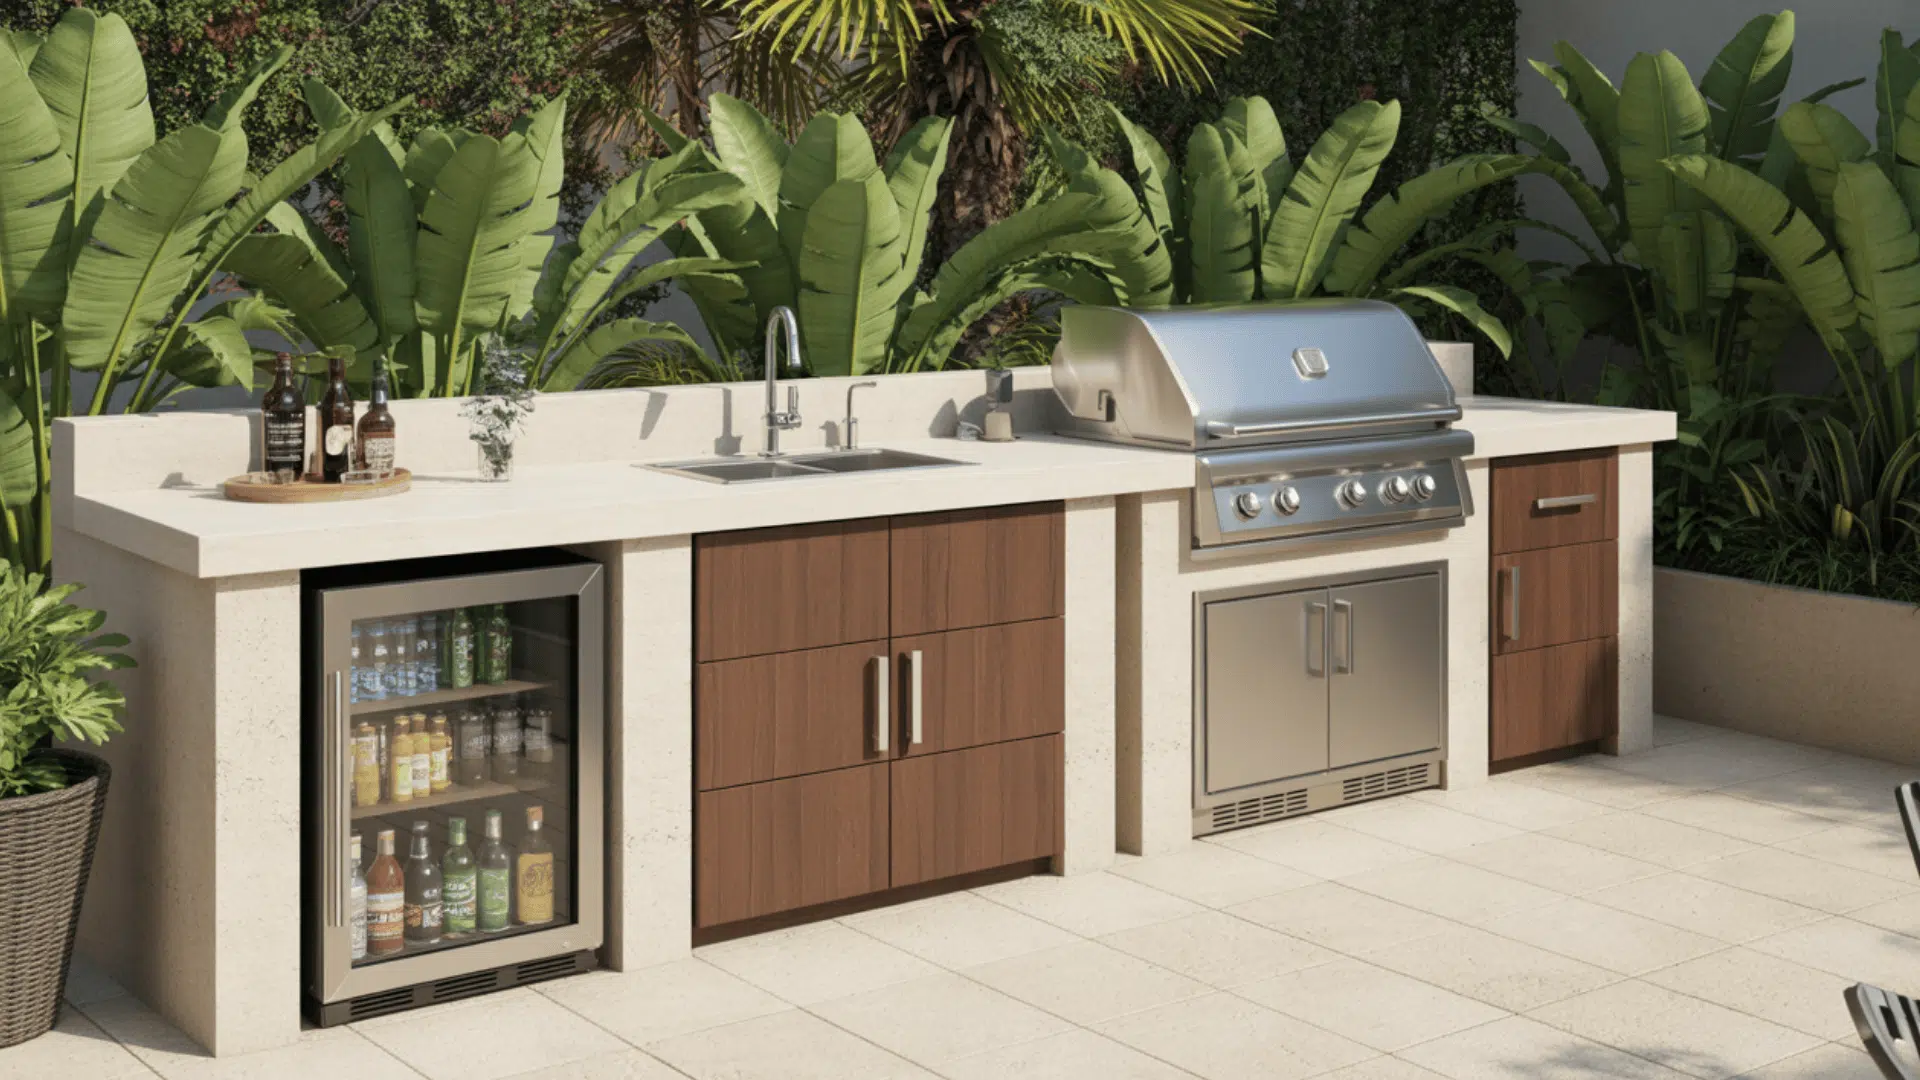
Add convenience and class with a dedicated drink station featuring a wine cooler, mini-fridge, or ice maker. Include it in your outdoor kitchen near your main prep area for easy access.
Stylish shelving for glasses and mixers completes the setup. Perfect for weekend parties or family gatherings.
You can also add a sink or tap for easy rinsing. It’s a small addition that makes every outdoor event special.
12. Outdoor Kitchen with Unique Tile Backsplash Designs
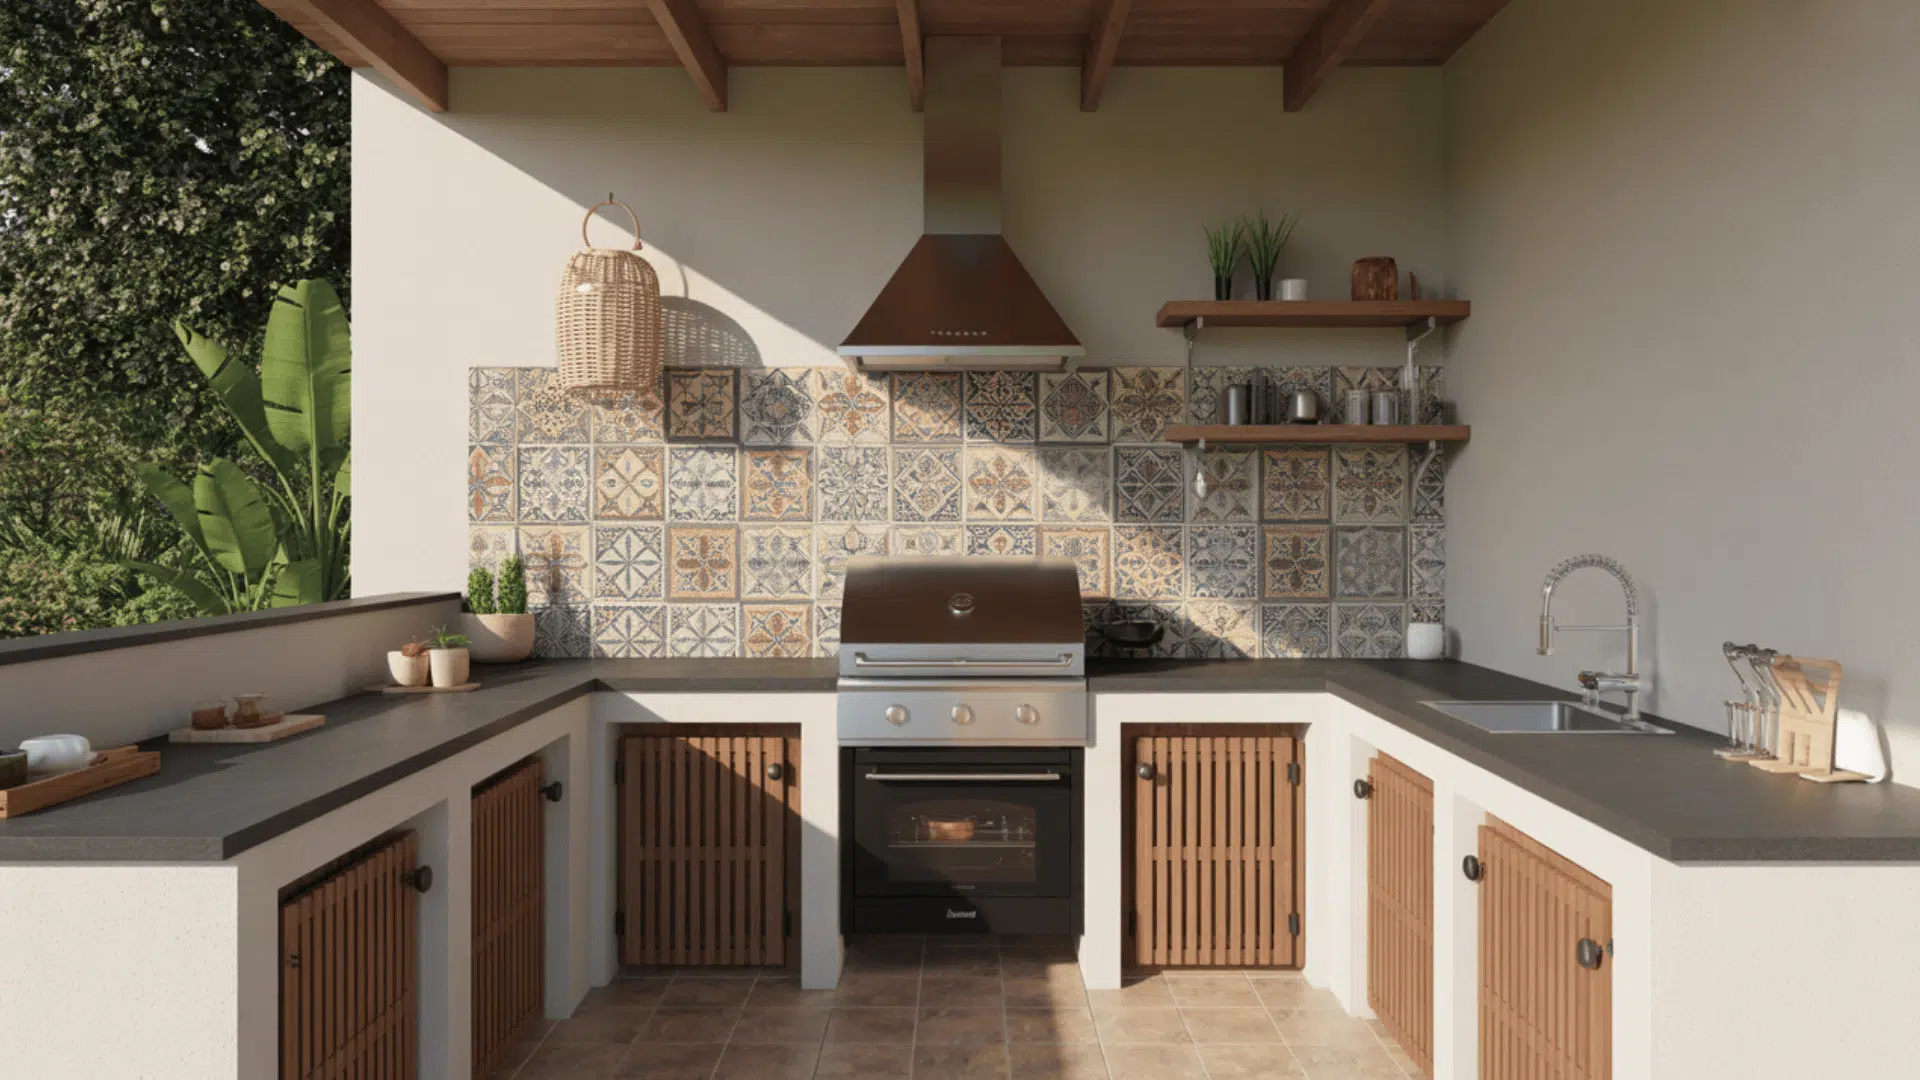
A statement backsplash can transform your cooking space into a designer feature. Weather-resistant tiles add personality and flair.
When building from your outdoor kitchen plans, coordinate backsplash colors with your countertop or cladding. It’s a small detail that makes a lasting impression. Mix textures like stone, ceramic, or glass for a custom look.
13. Built-In Outdoor Kitchen Seating
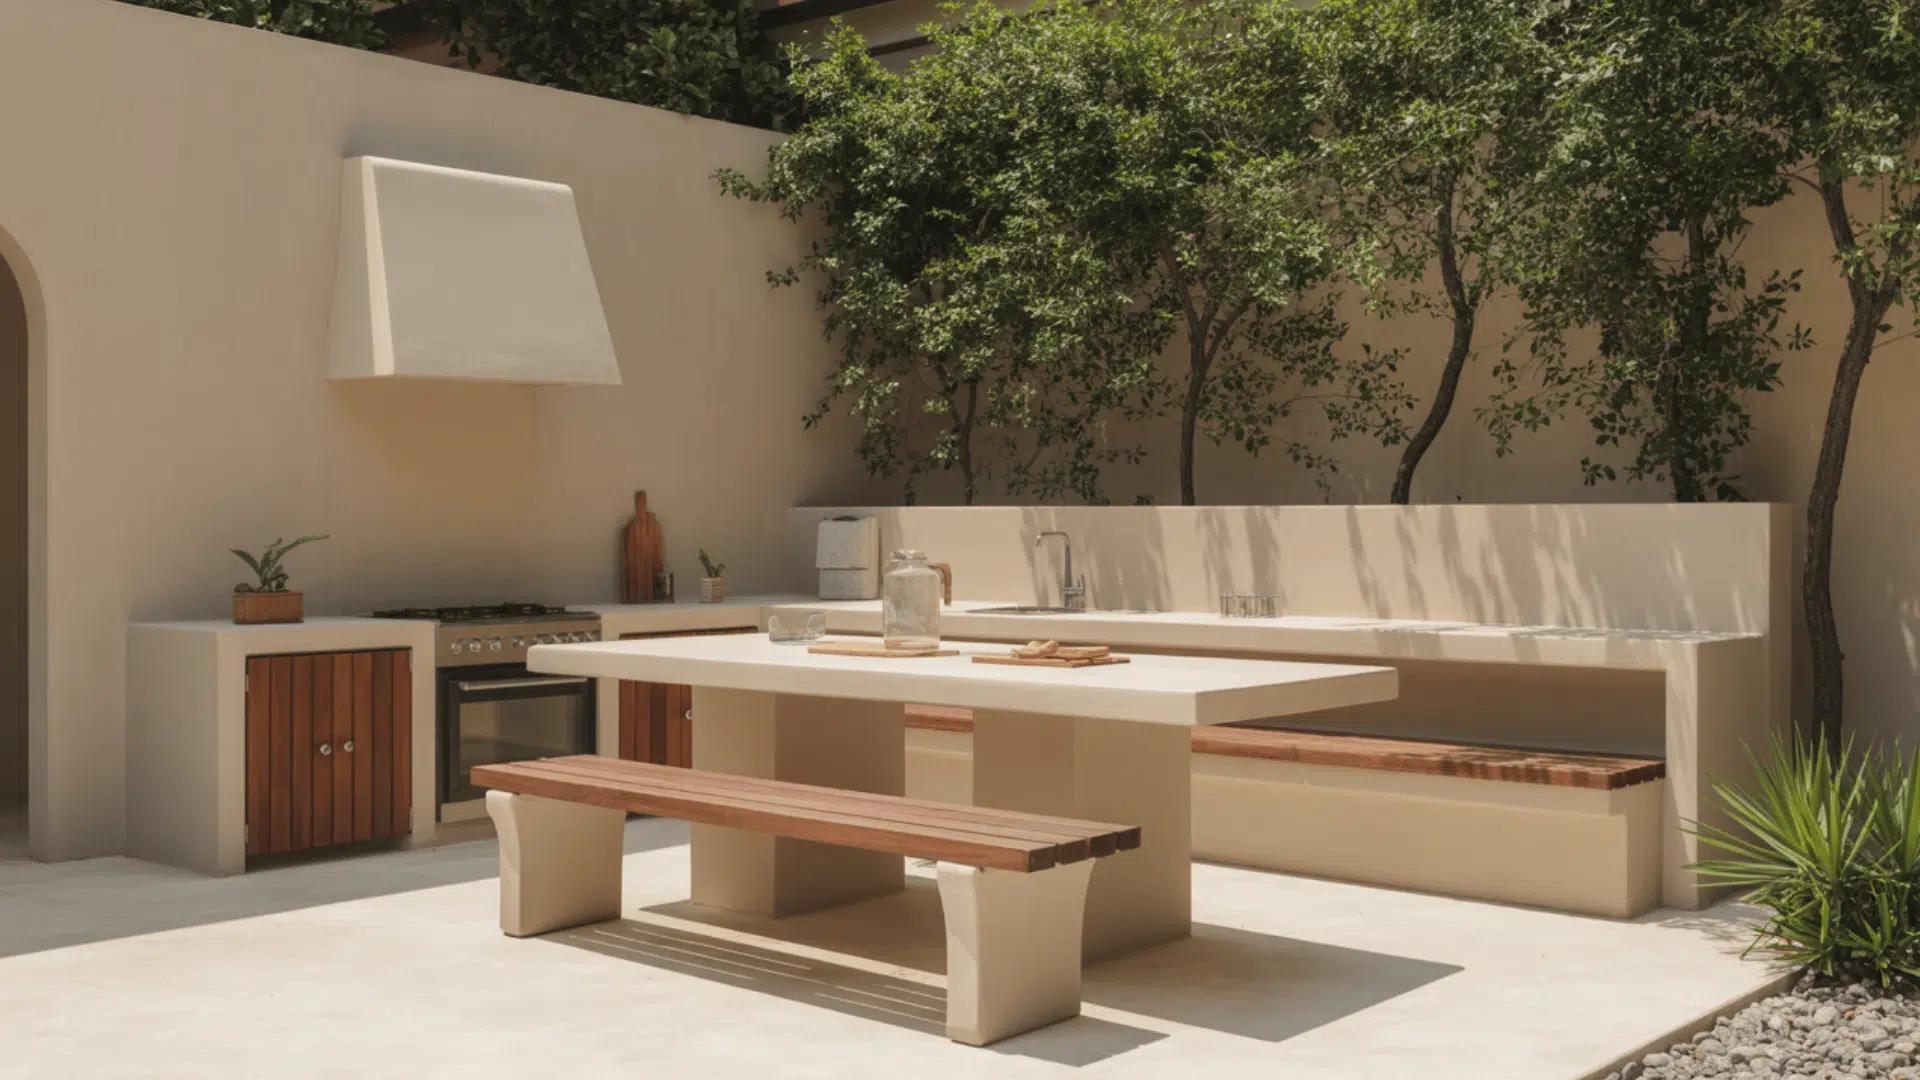
Integrate benches or bar seating right into your kitchen island for a social, connected setup. It allows guests to chat while you cook. Plan seating height and material durability in your outdoor kitchen.
Add cushions or stools for comfort and a casual dining vibe. Use weatherproof fabrics to keep the space low-maintenance.
14. Outdoor Kitchen with Fire Pit and Prep Zone
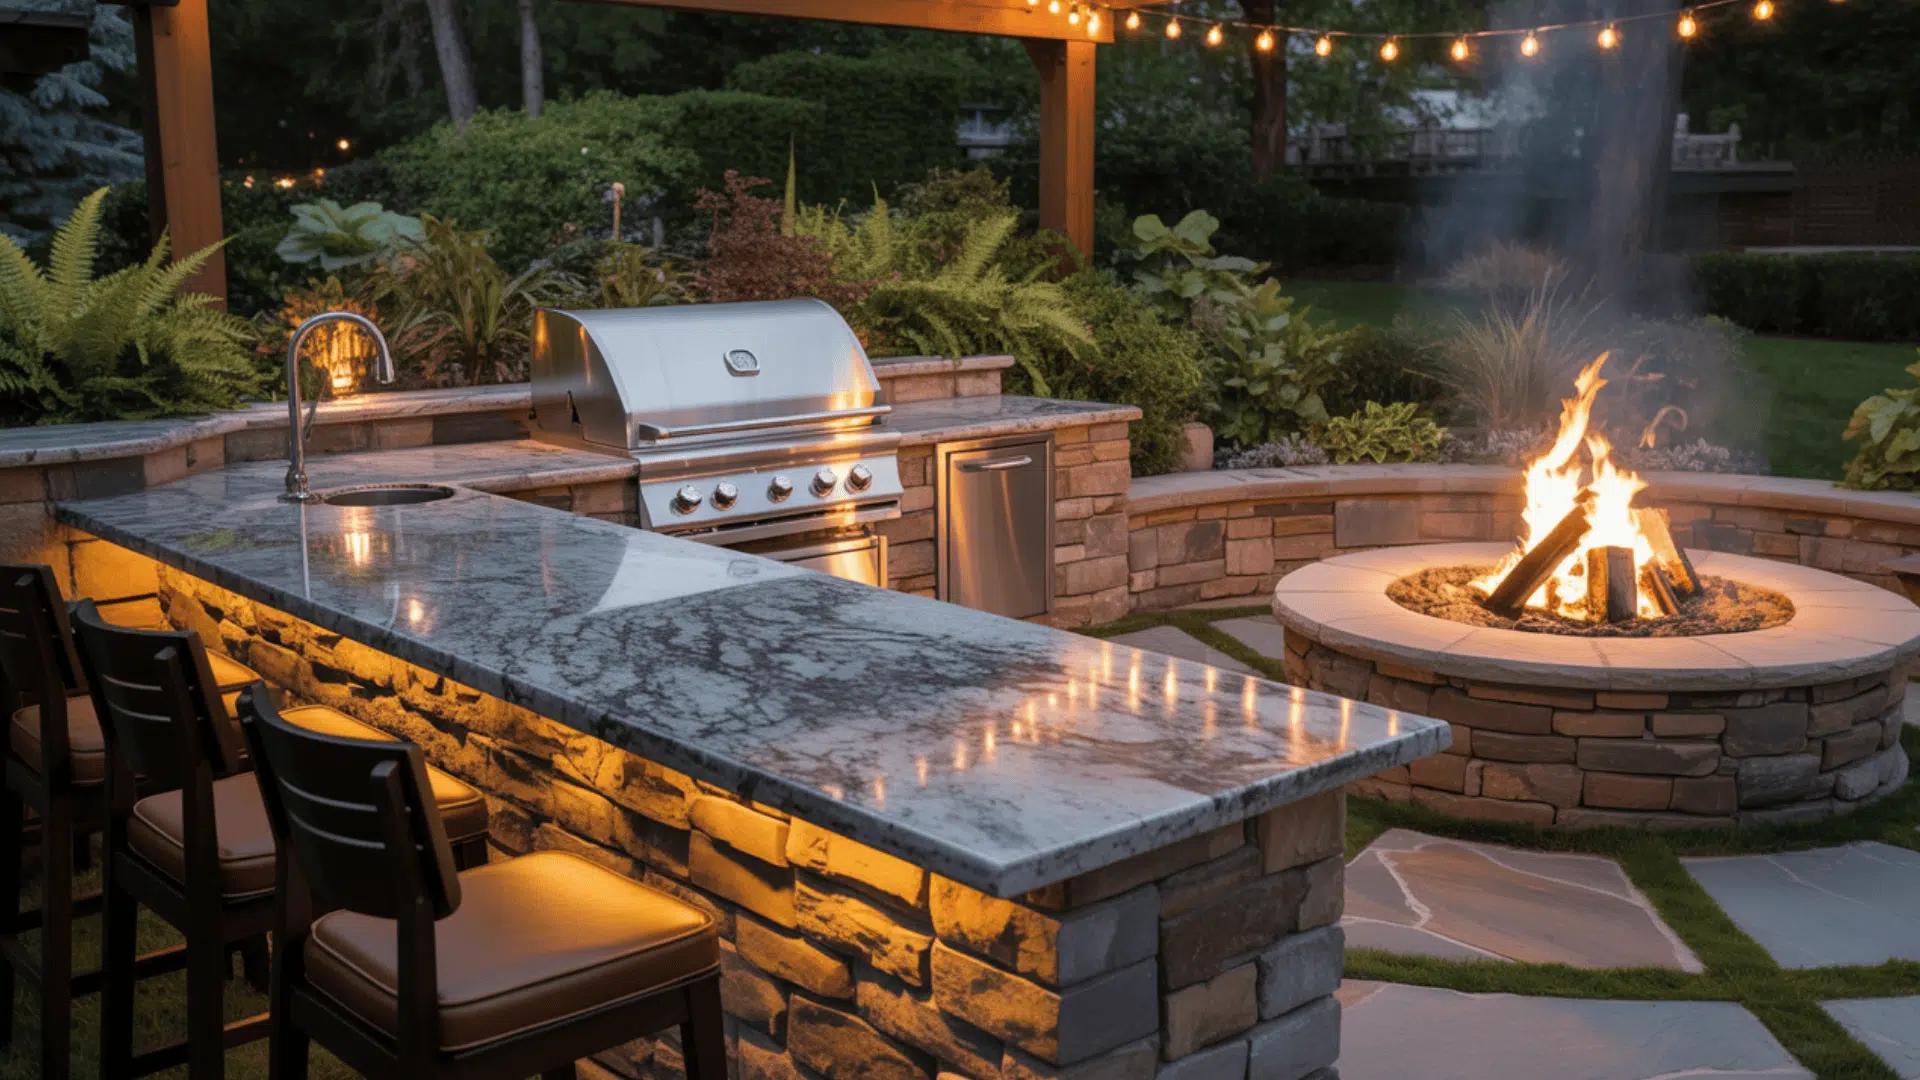
Add warmth and style by combining your cooking area with a cozy fire pit setup. It creates a smooth transition between meal prep and relaxation.
Use the fire pit for warmth on cool nights or even light grilling. This dual-purpose setup turns your backyard into an inviting gathering space year-round.
15. Sheltered Outdoor Kitchen
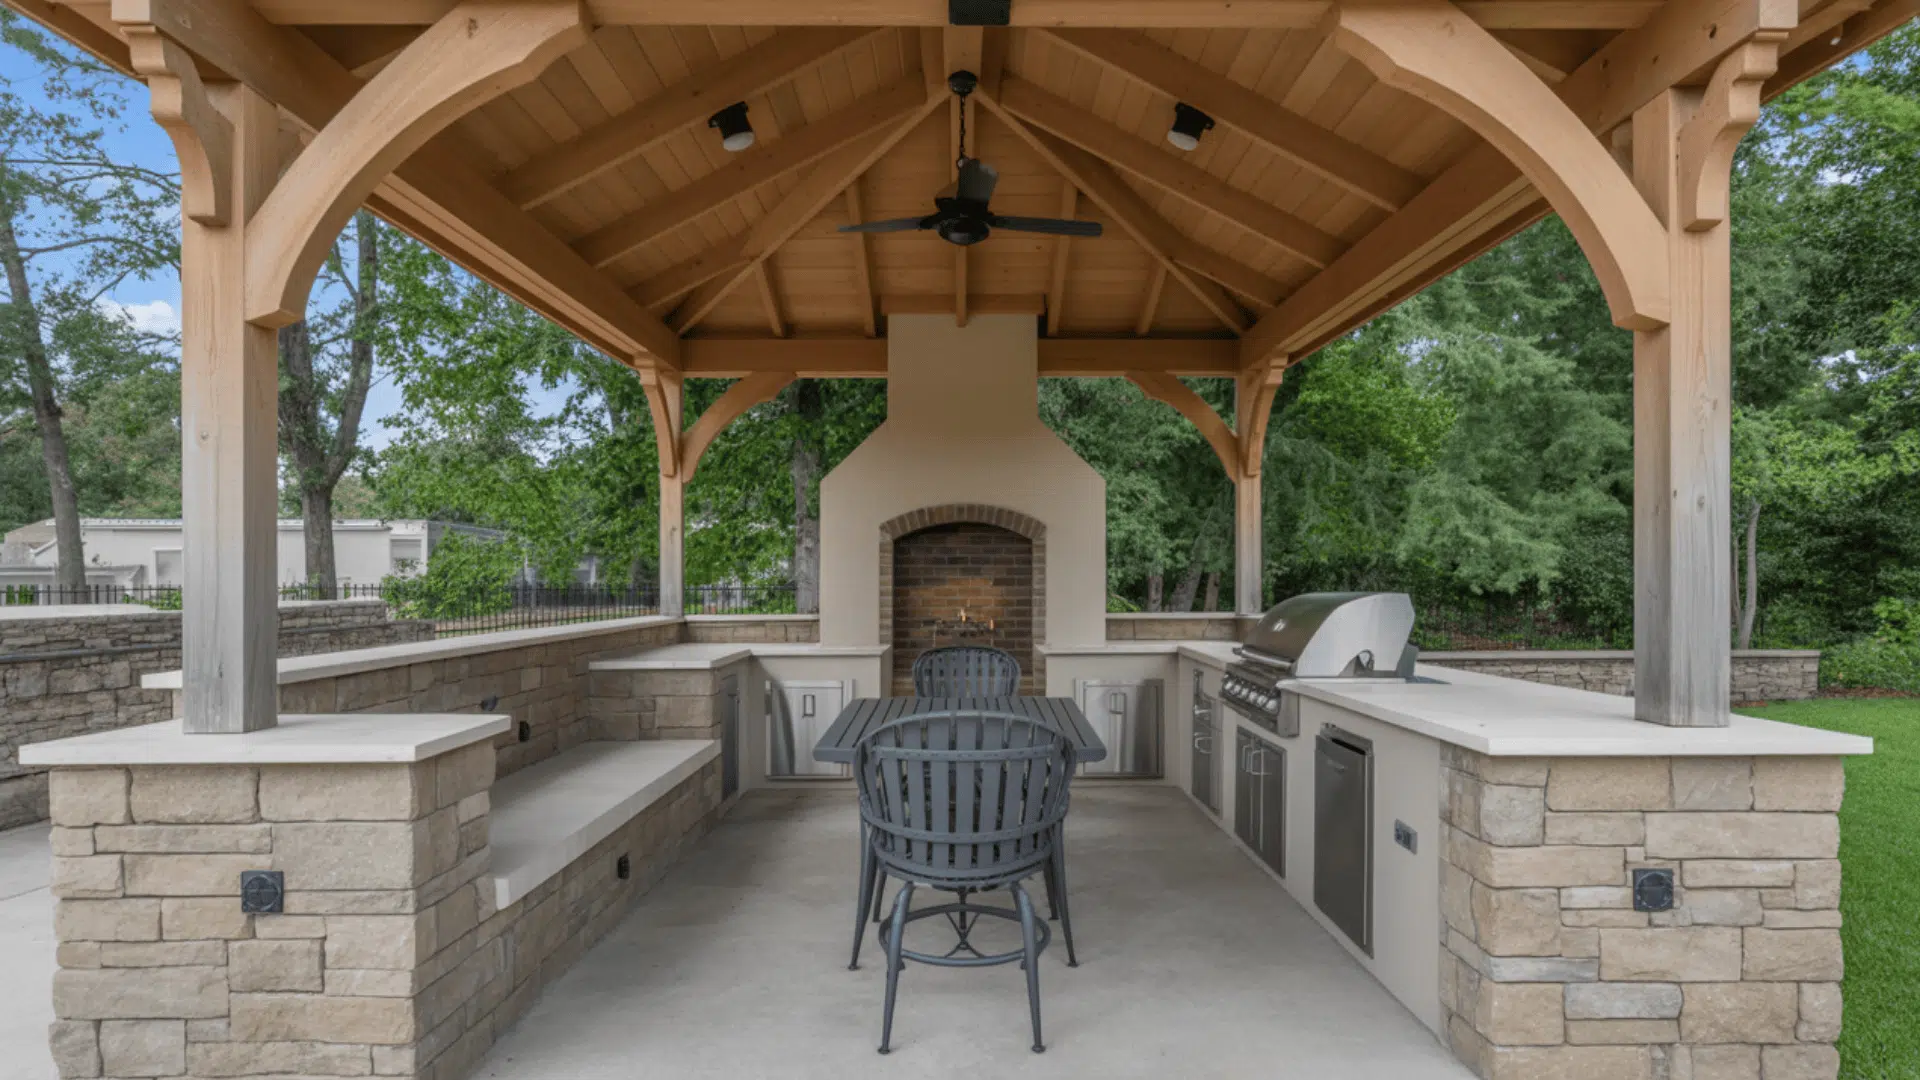
Protect your outdoor setup with a roof or pavilion that shields you from rain and sun. It’s perfect for all-weather cooking. Ensure your outdoor kitchen includes ventilation and lighting under the cover.
The structure extends your kitchen’s lifespan and comfort. Add ceiling fans or heaters to make it usable year-round. It’s the perfect blend of protection and practicality.
16. Outdoor Kitchen with Unique Flooring and Finishes

Choose surfaces that resist spills and weathering, such as sealed concrete or porcelain tile. Your outdoor kitchen plans should balance beauty with practicality.
Slip-resistant finishes and UV protection make maintenance effortless. A stylish rug can also add warmth and color.
Experiment with stone or patterned tiles for personality.
17. Outdoor Kitchen Hood System
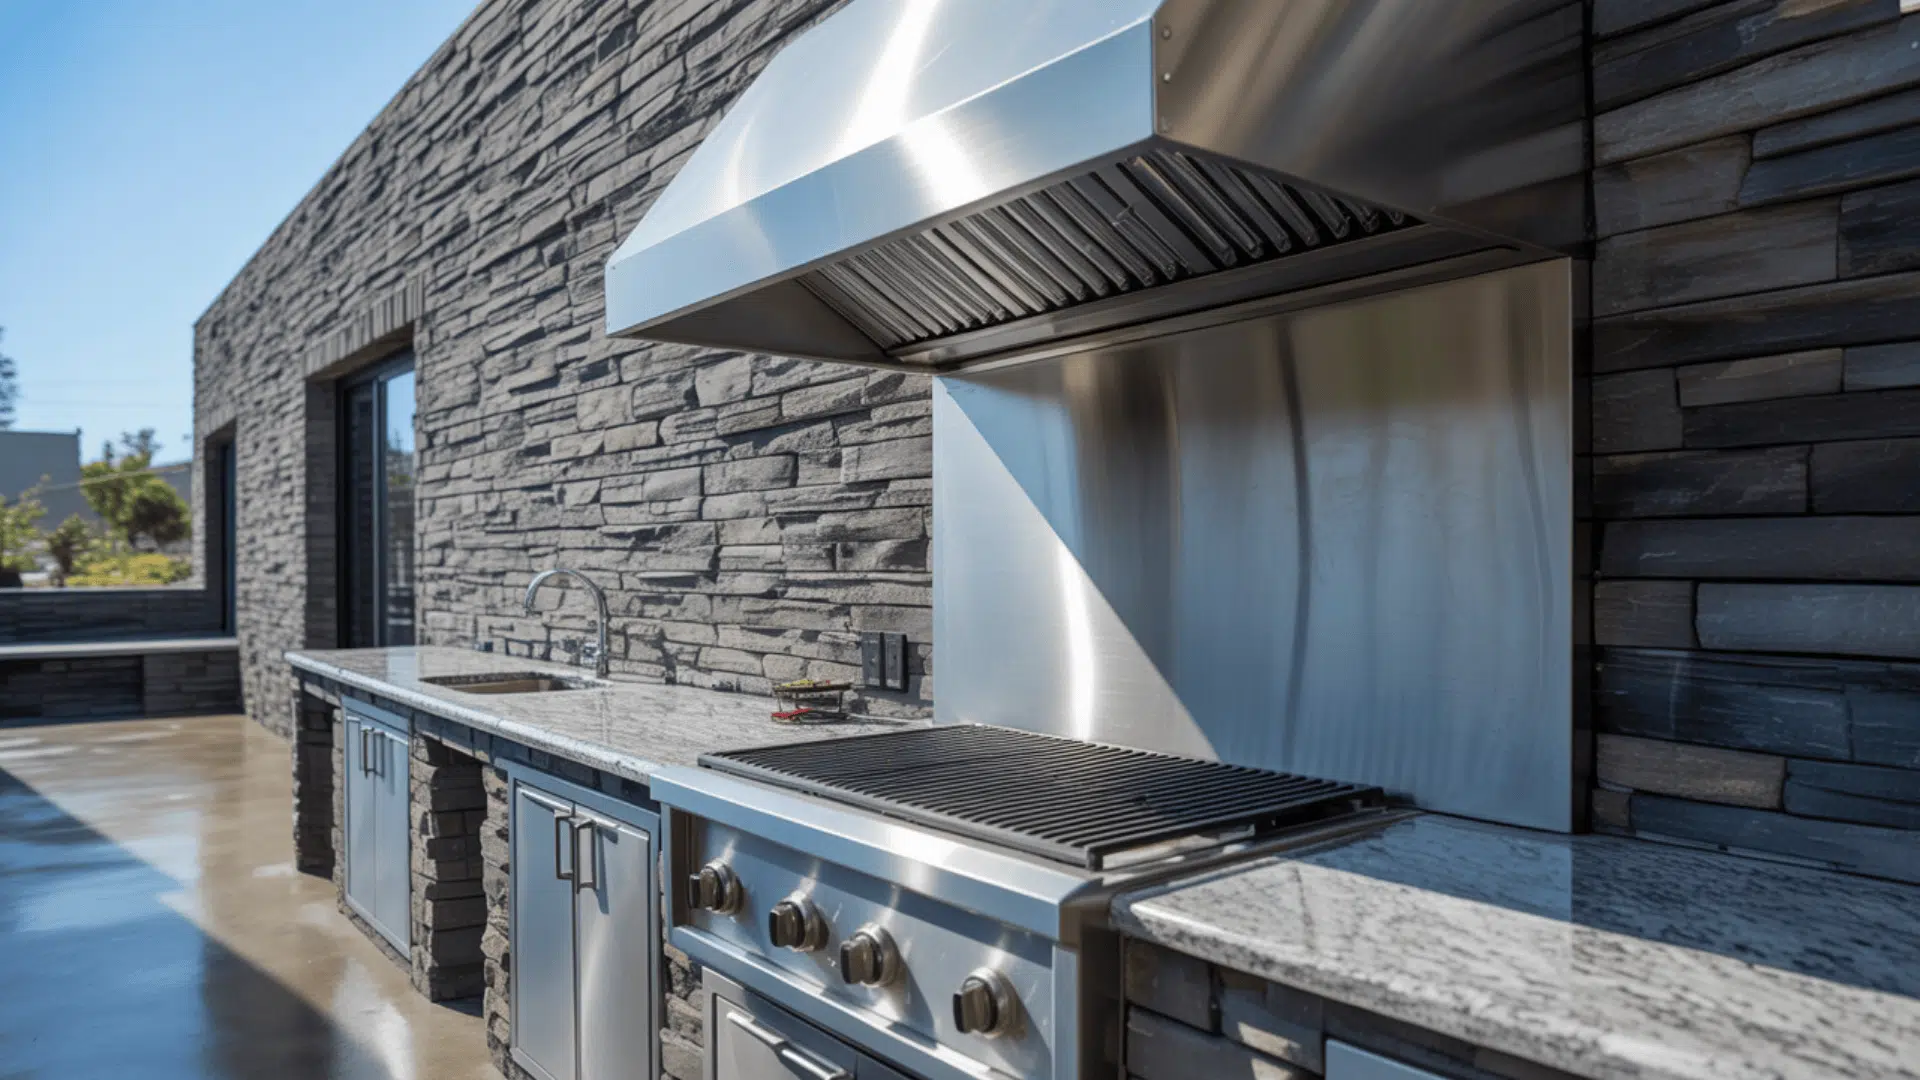
Proper airflow is essential for safe, comfortable cooking. Include vents, a range hood, or open siding in your outdoor kitchen plans.
Good ventilation prevents smoke buildup and protects materials from grease. It’s a small investment that makes every cookout more enjoyable. Use stainless steel or powder-coated hoods for longevity.
Practical Tips for Outdoor Kitchen Maintenance
Once your build is complete, keeping it in top shape is just as important as following your outdoor kitchen plans. Regular maintenance helps your setup stay beautiful, functional, and safe season after season.
- Clean Regularly: Wipe down countertops, appliances, and cabinets after each use to prevent grease buildup and staining
- Protect Your Surfaces: Reseal wood or stone countertops at least once a year to guard against moisture, sun, and temperature changes
- Check Gas and Electrical Lines: Inspect connections for leaks or wear before firing up your grill.
- Cover Appliances when Not in Use: Use weatherproof covers or install a pergola roof to reduce exposure to rain and UV rays
- Keep Pests Out: Store utensils and food securely, and clean crumbs or spills immediately
- Winterize Your Setup: If you live in a cold region, disconnect water lines, drain pipes, and cover all appliances before freezing temperatures hit
The Bottom Line
Building your own outdoor kitchen isn’t just possible; it’s one of the most rewarding DIY projects you’ll tackle. I’ve covered everything from initial planning and budgeting to choosing materials and timing your build.
The key is breaking it down into manageable steps rather than getting overwhelmed by the whole project. Start by sketching your outdoor kitchen plans based on your space, cooking style, and budget.
You don’t need perfection, just a solid roadmap. Remember, this is your backyard’s new birth, so make it work for how you actually live and entertain.
Ready to get started? Tell me in the comments which feature you’re most excited to include in your outdoor kitchen: a pizza oven, a built-in grill, or maybe a full bar setup?