During the winters, when cold air whispers through an invisible gap, I learned the importance of a perfectly hung door. That subtle draft taught me what most people miss: the precision and skill needed to get it right.
Hanging a door separates amateur work from professional results; the difference lies in small details: perfect measurements, aligned hinges, and proper spacing.
A door that scrapes the floor or won’t latch reveals mistakes most will never see, but everyone will feel. Ready to learn what changes a simple doorway into flawless function?
The Basics of Door Installation
Hanging a door requires precision alignment between three key components: the door slab, hinges, and door frame. Even minor miscalculations can result in doors that stick, swing improperly, or leave visible gaps.
The fundamental difference between interior and exterior doors lies in their weight and weatherproofing requirements. Exterior doors typically need additional sealing and sturdier hinges to withstand the elements.
Learning how to hang a door successfully starts with understanding that accuracy trumps speed every time. Small adjustments during installation prevent major headaches later.
Hanging a door becomes less alarming when you break the process into manageable steps and take time to measure twice before cutting or drilling.
Tools and Materials You’ll Need
Having the right equipment before you start makes learning how to hang a door significantly easier and ensures professional results from your first attempt.
| TOOLS | MATERIALS |
|---|---|
| Tape measure & pencil | Replacement door |
| Screwdrivers & drill | Hinges (2–3) and screws |
| Hammer & chisel | Mortise lockset (optional) |
| Level or straightedge | Rubber doorstops or wedges |
| Circular saw or planer & sandpaper | Wood filler & touch-up paint |
Step-by-Step Guide on How to Hang a Door
Follow this methodical approach to master hanging a door with precision and confidence, turning what seems complex into a manageable weekend project.
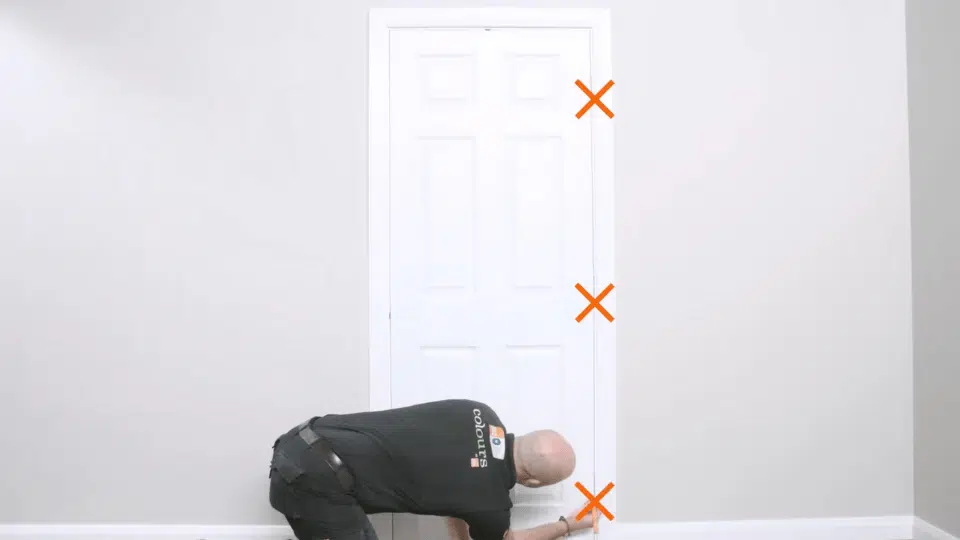
Step 1: Measure and Plan
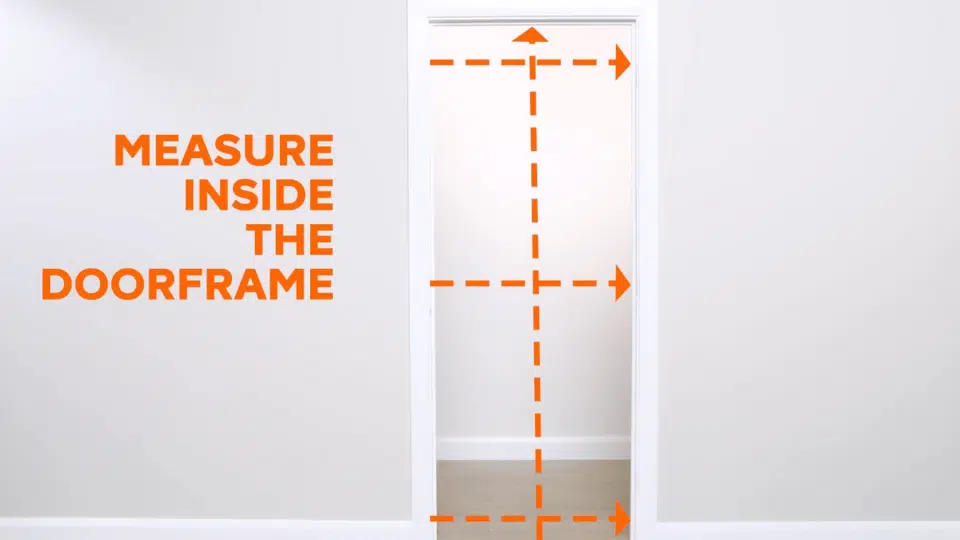
Measure the frame opening: width at top, middle, and bottom, plus height at both sides. Note the smallest numbers.
Plan for clearances: aim for about 3 mm at the top and latch side, 2 to 3 mm at the hinge side, and enough at the bottom for floor coverings and swing.
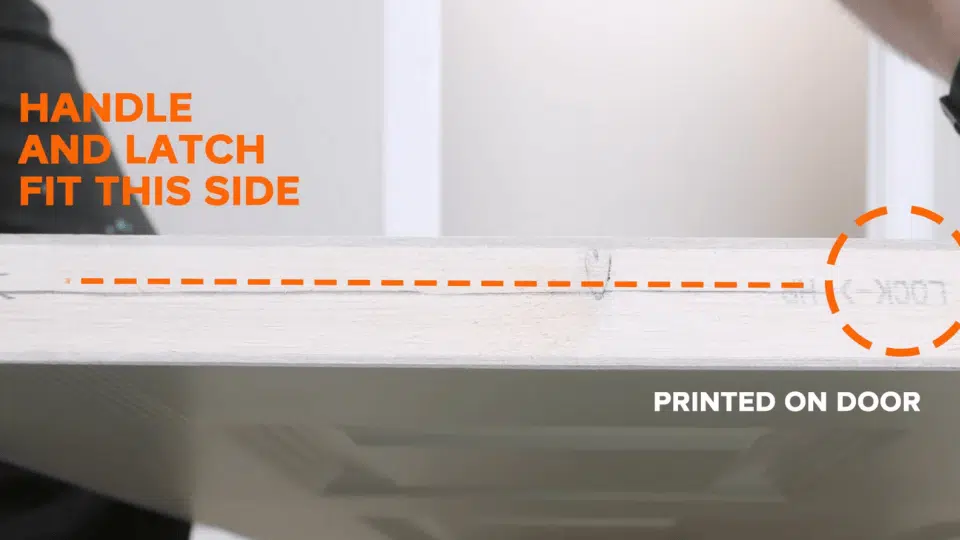
Many textured panel doors have “LBI” or similar on the lock side; lightly mark this in pencil to preserve orientation while trimming. Safely lift the door away and set the hardware aside if you plan to reuse it.
Step 2: Dry-Fit and Mark the New Door
Stand the new door in the frame with the lock side and top correctly oriented. A second set of hands helps. Shim under the door until the top gap is about 3 mm and the hinge side is plumb.
Scribe the frame lines onto the door edges using a sharp pencil and a long straightedge. Add your planned clearances to the scribe lines before cutting.
Example: if the door touches the head jamb, mark a second line 3 mm below for your cut.
Step 3: Trim the Door to Size
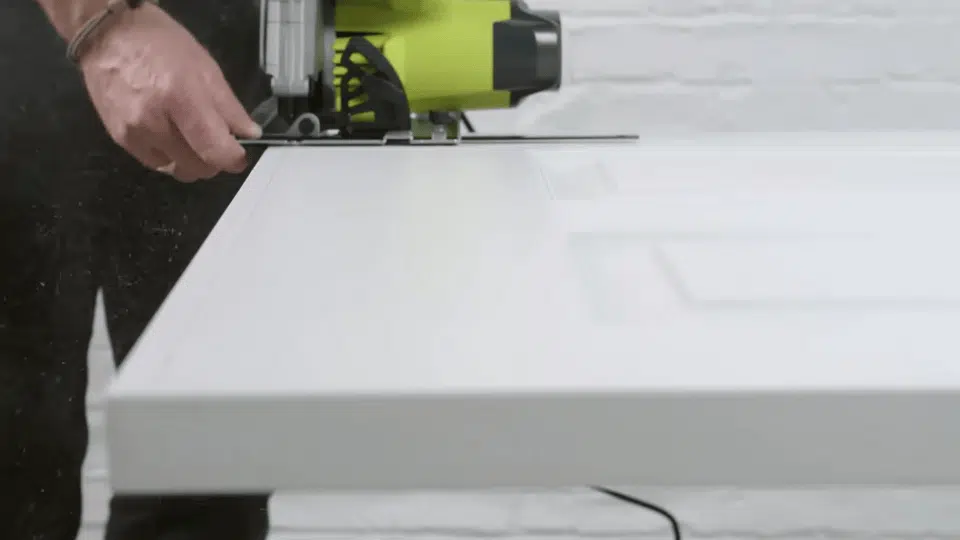
For larger reductions, cut with a circular saw guided by a straightedge. Keep the factory edge for the hinge side when possible.
For fine reductions of less than 5 mm, use an electric planer with light passes. Break sharp edges with sandpaper and check the fit again. Repeat in small increments until gaps are even.
Step 4: Lay out and Cut Hinge Mortises
Transfer hinge positions from the frame to the door edge. Mark top of top hinge, bottom of bottom hinge, and the middle hinge if used. Use a hinge as a template: trace around it on the door edge.
Set the mortise depth by holding the hinge leaf to the edge and scoring the depth line.
With a sharp chisel, score the outline, then make light parallel relief cuts across the mortise. Press the flat face of the hinge toward the mortise bottom until the hinge sits flush.
Step 5: Pre-Finish and Prep Hardware
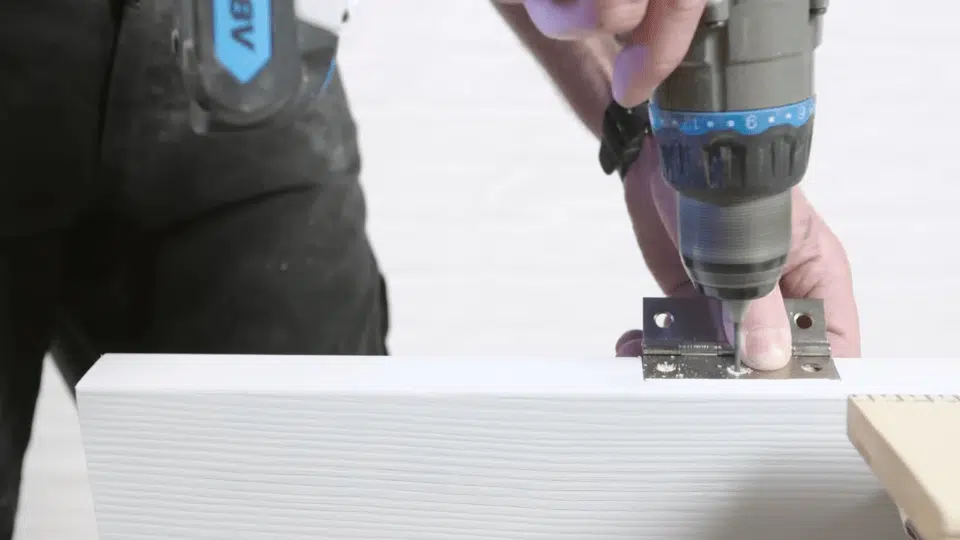
Drill pilot holes for hinge screws in the door and lightly wax or soap the threads for smoother driving. If you plan to paint or seal the edges, do it now so fresh cuts are protected.
Water-based enamel or primer dries quickly and helps prevent swelling. Install hinges on the door leaf first. Keep screws snug but not overtight.
Step 6: Hang, Align, and Final Checks
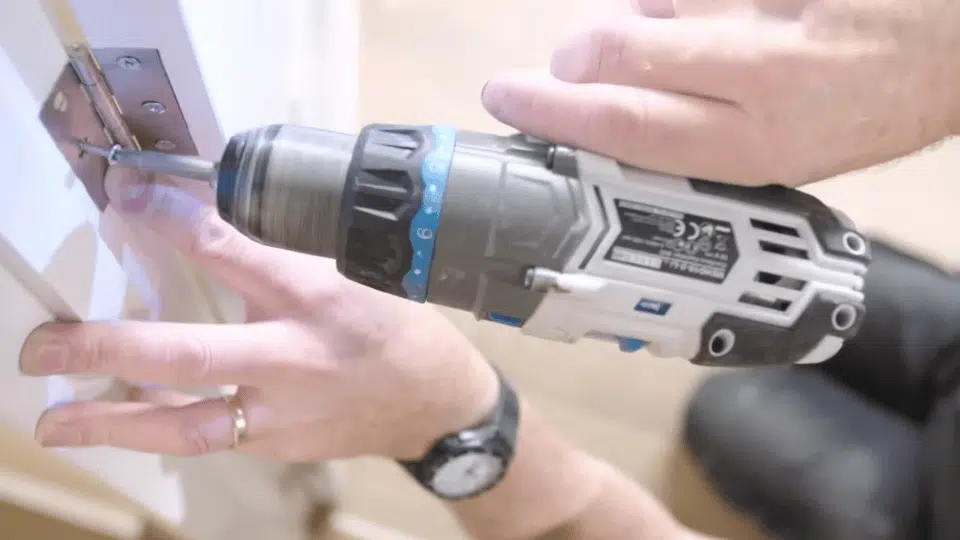
Reinstall the door using wedges to set the top gap, swing the hinges into the mortises with one screw to check alignment, adjust for even margins, then secure the remaining screws. The door should move freely with uniform margins.
Install the mortise latch and strike plate per template, drilling pilot holes and chiseling the faceplate to ensure smooth clicking. Fill any dings, touch up paint, and admire the clean, modern finish.
For a more detailed YouTube tutorial
Expert Tips for Hanging an Interior Door
Mastering how to hang an interior door goes beyond basic installation. These professional insights ensure your door operates flawlessly for years to come.
- Solid core doors and doors taller than 80 inches benefit from a middle hinge positioned equidistant between the top and bottom hinges. This extra support prevents sagging and reduces stress on the frame.
- When hanging a door, place shims behind each hinge location to prevent the frame from bowing inward when you tighten screws. This maintains consistent reveal spacing and ensures smooth operation.
- Apply primer or sealer to the top and bottom edges of the door slab to prevent moisture absorption and warping. This is especially critical in bathrooms or high-humidity areas.
- Replace at least one screw in each hinge with a 3-inch screw that penetrates into the wall framing. This anchors the door solidly and prevents hinges from pulling away.
- Temporarily hang the door on just the top hinge to verify it clears carpeting, thresholds, or flooring transitions. Making adjustments now saves worry later.
Common Mistakes to Avoid
Even experienced DIYers can stumble when learning how to hang a door. Recognizing these frequent errors helps you achieve flawless results on your first attempt.
- Skipping precise measurements before cutting: Doors require exact clearances on all sides (typically 1/8 inch on top and sides, 1/2 inch on the bottom). Measure the rough opening three times at different points and always account for the flooring height before trimming to prevent irreversible mistakes.
- Placing hinges at incorrect heights: Standard hinge placement is 7 inches from the top and 11 inches from the bottom, measured to the hinge center. Deviating from these measurements creates uneven weight distribution that causes doors to bind or sag prematurely.
- Forcing screws without pre-drilling pilot holes: Driving hinge screws directly into hardwood jambs often splits the wood and weakens the installation. Always drill pilot holes slightly smaller than your screw diameter to ensure clean threading and maximum holding power.
- Ignoring the door’s natural swing direction: Hanging a door to swing into tight spaces, against light switches, or into the hallway creates functional problems. Plan the swing direction based on the room layout and traffic flow before mortising hinges into the jamb.
Final Thoughts
Hanging a door upgrades your space through precise measurements, mortising, shimming, and alignment for smooth, secure operation.
I know that rushing through any phase compromises the final result, while attention to detail ensures years of flawless operation.
Simple tools and straightforward techniques create a perfectly hung door that showcases true craftsmanship. Ready to start? Gather your tools, take precise measurements, and change your space one hinge at a time.