Building a DIY deck from scratch might feel like a big job, but I promise you can handle it. I’ve built decks before, and I know the first step can be the hardest.
Once you start, it all begins to make sense. With a few tools, a solid plan, and a bit of patience, you’ll be surprised at what you can do.
In this guide, you will find each step to build your own deck with confidence and enjoy the space you’ve created.
You’ll learn the tricks that make the job smoother and the small details that give your deck a pro finish, even on your first try.
Key Components of a Deck’s Structure

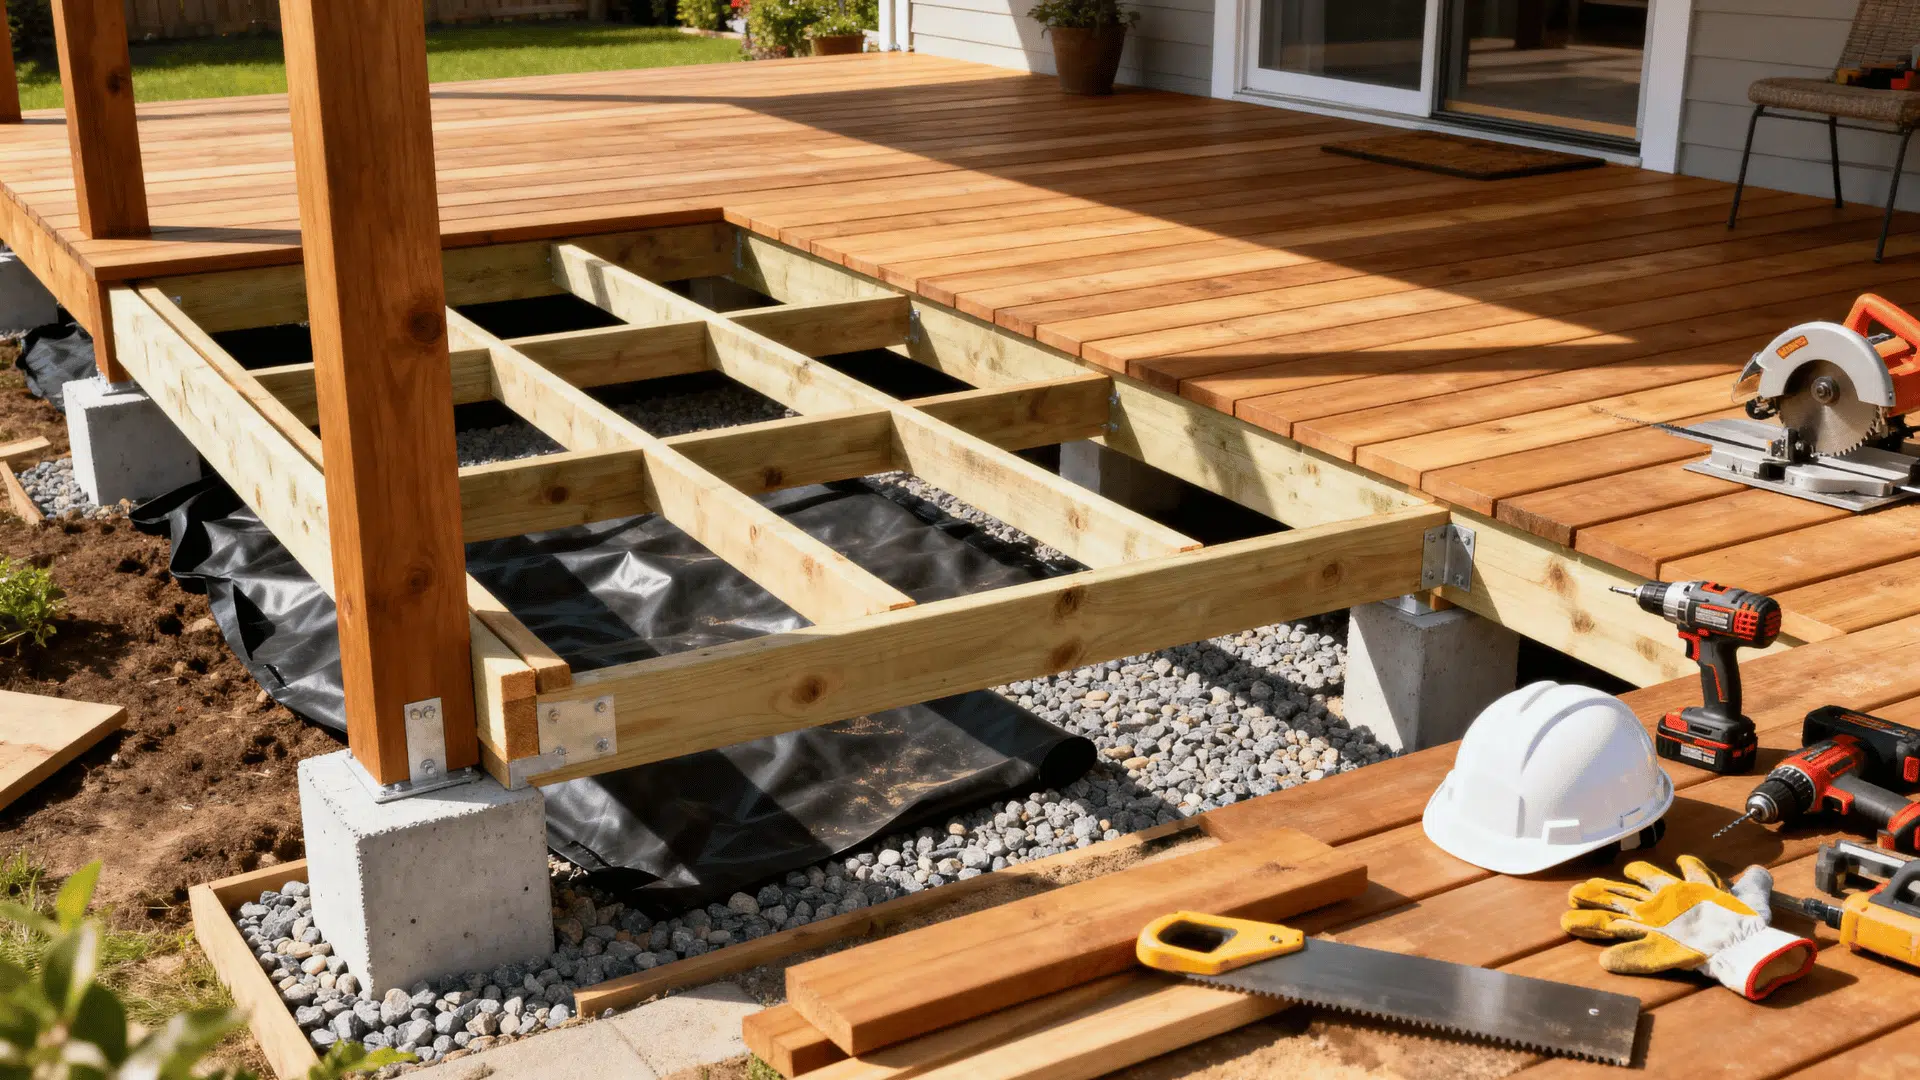
A deck’s anatomy is made up of essential structural components that ensure safety, stability, and longevity.
The foundation begins with concrete footings, which spread the load and prevent sinking. These footings support the vertical posts, transferring weight upwards to horizontal beams.
Beams distribute the deck’s weight to joists, which are spaced evenly to support the walking surface of the decking boards.
Each part works together to protect against shifting, sagging, or twisting over time. Properly installed hardware, such as joist hangers and fasteners, holds everything securely in place.
Additional elements, such as railing posts, ledger boards, and blocking or bridging, add safety and rigidity.
Understanding how these elements interact helps you plan, build, and maintain a deck that stays solid and safe for years to come.
When Is the Best Time to Build a Deck?

Timing is crucial for a successful deck project. The best seasons are late spring to early fall, when mild temperatures and low rainfall help materials settle properly and create comfortable working conditions.
Avoid winter because frozen ground makes digging post holes difficult, and concrete won’t cure correctly below 50°F.
Always check the weather forecast to ensure a dry spell of at least three days when pouring footings, as moisture during curing weakens the foundation.
Although summer heat is manageable, expect long days and stay hydrated; avoid working in extreme heat above 90°F when using adhesives.
Plan ahead and submit permit applications early in spring to avoid construction delays. Choosing the right season and weather window can save you time, money, and rework, so select your timing wisely.
Tools and Materials You Will Need
Before starting your deck, having the right tools and materials on hand will make the process smoother and more enjoyable. Here’s a list of all the supplies you’ll need.
| Materials | Tools |
|---|---|
| Pressure-treated wood or composite decking boards | Power drill, Post-hole digger |
| 6×6 posts, 2×8 beams, and joists | Circular saw, Miter saw |
| Joist hangers, galvanized nails, screws, and brackets | Level, Chalk line |
| Concrete mix, post anchors, footing forms | Tape measure |
| Landscape fabric and gravel for drainage | Safety gear (gloves, glasses, etc.) |
Step-by-Step Guide for DIY Deck Project
Building a DIY deck might seem intimidating, but knowing how to build a deck step by step makes the process surprisingly manageable. Here’s how I approached my build from design to finishing touches.
Step 1: Design and Planning

Start by designing your deck using an online tool like Lowe’s Deck Designer. You can choose pre-made templates or create your own from scratch.
Adjust size, shape, and material until it fits your space and budget. Don’t forget to check local codes and get permits before ordering materials.
Step 2: Layout and Footings

Using stakes and strings, mark out your deck area and make sure it’s perfectly square by checking diagonals. Then mark where each post will go based on your plan.
Dig post holes (usually 42 inches deep), pour concrete into footing forms, and insert post anchors while it’s still wet for solid support.
Step 3: Setting Posts and Beams

Cut your posts to height based on the deck level, factoring in beam and joist thickness. Secure the posts to anchors, then attach beams made from two 2x8s nailed together.
Use metal brackets to fasten everything and double-check that your structure is level and square before tightening bolts.
Step 4: Installing Joists and Deck Boards

Lay joists every 16 inches and secure them using joist hangers. Add blocking for stability, then trim all joists evenly. Begin fastening deck boards, keeping them snug if wet or slightly spaced if dry.
Pre-drill holes to avoid splitting and check squareness as you go for a flawless finish.
Step 5: Railings and Stairs

Cut notches for railing posts, ensuring they meet code requirements for height and spacing. Add top and bottom rails, then evenly space the balusters.
For stairs, create a level gravel base or concrete pad before securing stringers and treads. Finish with beveled edges and a smooth railing cap for a polished look.
Once your DIY deck is complete, allow it to season before staining or sealing. Add lattice or landscaping to enhance its appearance.
For a More Real-Time Walkthrough, Refer to This Video Tutorial.
How Much Does It Cost to Build a DIY Deck?
Understanding how much it costs to build a deck helps you set a realistic budget and avoid surprises. Here’s a table to help you plan your budget.
| Category | Typical Cost (DIY) | Key Notes |
|---|---|---|
| Materials | ~$15 – $35 per sq ft | Lower for pressure-treated wood; higher for premium composites. |
| Tools | Varies significantly | Initial investment in saws, drills, fasteners; some tools you may already own. |
| Labor (if you hire) | ~$15 – $40 per sq ft | If you decide not to DIY, labor often accounts for ~40% of the total cost. |
| Size and Materials | Larger size + premium materials = higher cost | For example, a 12×12 deck might cost $3,600–$9,400 depending on material. |
| Free Design Tools | $0 upfront | Many online deck-design tools give you material lists and cost estimates. |
Total DIY Cost Range (materials + tools and no labor): Around $2,300 to $5,500
Total Cost with Professional Labor: Around $4,500 to $11,300
Troubleshooting Common Deck Problems
- Rotting Wood: Look for soft spots, discoloration, or crumbling wood, especially near ground contact or where water pools. Replace affected boards promptly to prevent structural issues.
- Loose or Popped Nails/Screws: These can pose safety hazards. Drive the nails back in, or better yet, replace them with corrosion-resistant deck screws to ensure a longer-lasting hold.
- Cracked or Splintered Boards: Inspect for cracks or splinters caused by sun exposure or wear. Replace damaged boards and consider sanding rough edges to avoid injury.
- Wobbly Railings: Tighten loose connections and check for rot in posts or supports. Reinforce with brackets or replace rotted sections to maintain safety.
- Foundation Shifts or Uneven Decking: Check for sinking posts or uneven surfaces, often due to soil movement. Consult professionals for foundation repairs or add additional supports if needed.
- Discoloration and Fading: Re-stain or seal your deck regularly (every 2-3 years) to protect against UV damage and moisture, maintaining appearance and durability.
- Bouncy Deck Boards: Add blocking between joists or extra support beams if you feel excessive bounce or movement on the decking surface.
- Accumulated Dirt and Algae: Clean regularly with mild soap or deck cleaner. For stubborn grime, consider pressure washing, but avoid damaging the wood surface.
Practical Maintenance Tips for the Deck
Keeping your deck in top shape ensures it lasts longer and looks great year-round. Here’s how I handle simple deck upkeep year-round.
- Regular cleaning: Sweep debris weekly and wash with mild soap to prevent buildup
- Staining and sealing: Reapply every 2–3 years to protect wood and maintain color
- Inspect fasteners: Check screws, nails, and brackets twice a year for loosening
- Seasonal care: Clear snow gently in winter and check for moisture damage in spring
- UV protection: Apply a UV-resistant finish to reduce fading and cracking
A little routine care goes a long way in preserving your deck’s strength, appearance, and safety for years to come.
Wrapping It Up
Building a DIY deck isn’t just about adding square footage to your home; it’s about creating memories, gaining confidence, and proving to yourself that you’re more capable than you thought.
I encourage you to start your deck project today. Grab those plans, head to your local supplier, and take that first step.
And once you’re done, or even mid-build, I’d love to hear about your experience. Drop a comment below and share your deck-building path with me!