Have you ever seen brick walls that seem to have been touched by centuries of history? There’s a secret European technique that creates that haunting, weathered appearance: German schmear.
This ancient technique alters ordinary brick with mysterious, unpredictable patterns.
Regular paint can’t replicate this aged, castle-like texture. I’m going to help you understand how German schmear brings old-world charm to modern homes.
What Is a German Schmear Brick?
German Smear brick is a decorative masonry technique originating in Germany centuries ago, in which builders applied thin layers of mortar over brick to weatherproof structures.
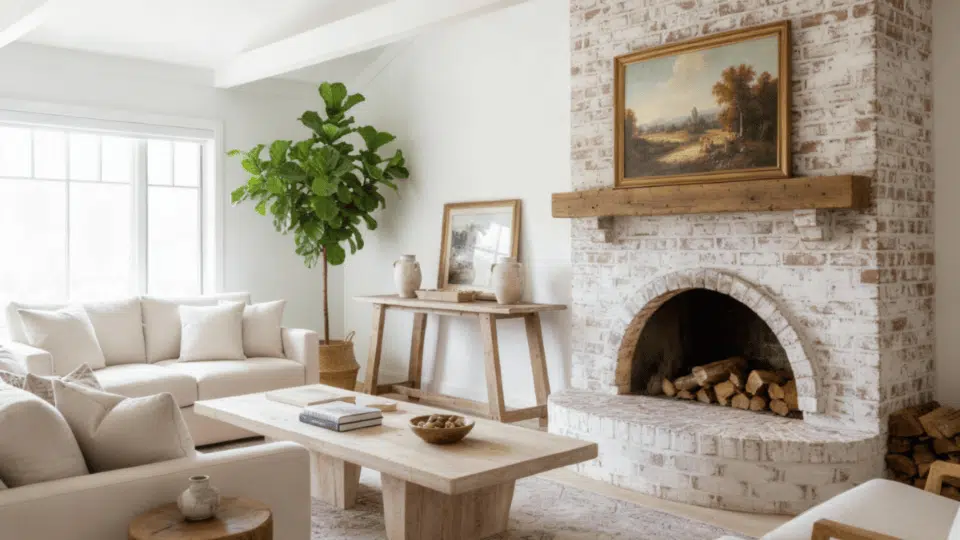
People love this rustic style because it softens the harshness of red brick while preserving its dimensional character, offering an evergreen look that blends traditional and modern design sensibilities.
This diverse finish works beautifully as a stunning focal point on a German Schmear fireplace, as an interior brick accent wall for added warmth, and on exterior brick facades for increased curb appeal.
The mortar application hides imperfections while creating depth that paint alone cannot achieve.
How German Schmear Differs From Whitewashing and Limewashing?
While German Schmear brick, whitewashing, and limewashing all lighten brick surfaces, they use different materials and produce distinct results. Each method offers unique benefits for changing a German Schmear fireplace or brick walls.
| FEATURE | GERMAN SCHMEAR | WHITEWASHING | LIMEWASHING |
|---|---|---|---|
| Material | Mortar mixture | Diluted paint | Hydrated lime and water |
| Texture | Heavy, dimensional | Flat, smooth | Slight, matte |
| Coverage | Partial to heavy | Translucent | Semi-transparent |
| Durability | Permanent | Moderate | Long-lasting |
| Appearance | Rustic, aged European | Clean, uniform | Soft, chalky |
| Removal | Very difficult | Easy to paint over | Moderate |
How to Know If Your Brick Is Suitable?
Not all brick surfaces work equally well for German Smear brick applications. The success of this technique depends heavily on brick condition, porosity, and existing treatments.
Before starting a German Schmear fireplace or wall project, people must evaluate their brick to ensure proper mortar adhesion and long-lasting results.
Brick Types That Accept Schmear Best
German Smear brick adheres best to porous, unsealed brick, which allows the mortar mixture to bond properly.
Older brick often works better than newer varieties since aging creates microscopic surface irregularities that help mortar grip. The technique may not adhere well in several situations:
- Previously painted or sealed brick that creates a non-porous barrier
- Glazed or smooth-faced brick lacking surface texture
- Brick treated with water repellents or sealers
- Extremely weathered brick that crumbles or sheds material
- The brick is contaminated with heavy creosote buildup on the fireplace
Tools and Materials Required
Before you begin, gather everything you’ll need; having the right tools and materials on hand makes the process smoother and helps you avoid mid-project trips to the store.
| ITEM | PURPOSE |
|---|---|
| Plastic sheeting | Protects walls and nearby surfaces from splatter |
| Ram board or heavy floor board | Shields the flooring during mortar application |
| Thinset mortar | Main material used to create the German Schmear |
| Mixing bucket | Holds and mixes mortar |
| Drill with mixing paddle | Ensures smooth and consistent mortar mixing |
| Grout bag | Applies mortar into joints neatly and evenly |
| Margin trowel or six-inch knife | Strikes joints and spreads mortar on bricks |
| Masonry sponge | Creates the distressed German Schmear finish |
| Non-highlighted masonry sealer | Protects the finished surface without yellowing |
| Sprayer or spray bottle | Applies sealer evenly across the brick |
Step-by-Step German Schmear Application
Ready to revamp your brick? Follow these detailed steps to achieve that perfect German schmear finish, even if you’ve never tackled a masonry project before.
Step 1: Protect and Prepare the Workspace

Cover the surrounding walls with plastic sheeting and lay down a floor protection board, such as ram board. If you have a hearth or a top ledge, place a thicker board or a sheet of plywood over it.
This is important because all the mortar you apply to the vertical brick will fall downward, and you want to keep that finished surface clean and safe.
Secure everything with tape so nothing shifts while you work. A well-protected work area makes the entire process smoother and far less stressful.
Step 2: Mix Your Thinset Mortar Properly
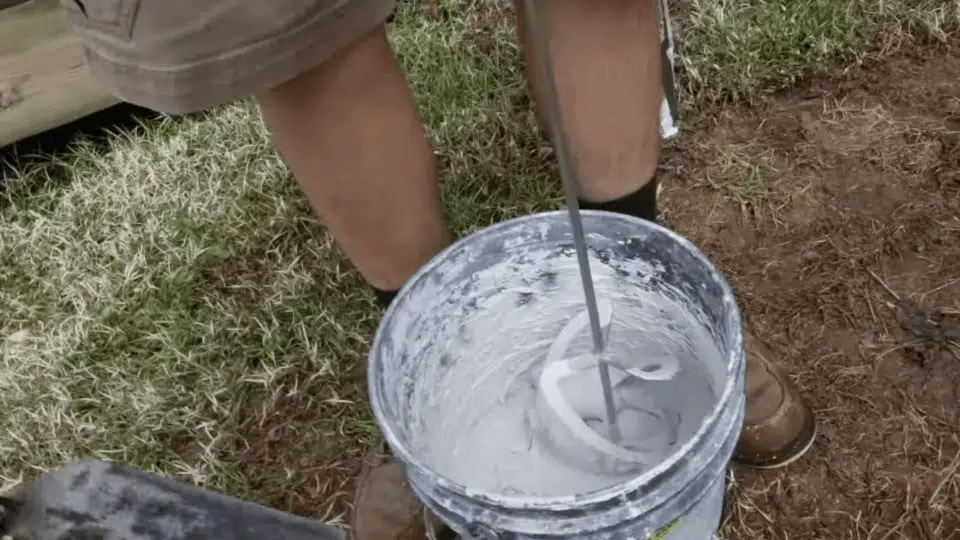
Add the mortar to a bucket and mix it with water using a drill and mixing paddle. Mix until smooth, then let it sit for a few minutes (this is called slaking). After it rests, mix it again.
This helps activate the mortar and gives it a consistent texture. The goal is to reach a texture thick enough to cling to the brick but soft enough to squeeze through a grout bag without clogging.
Step 3: Fill All Mortar Joints With a Grout Bag
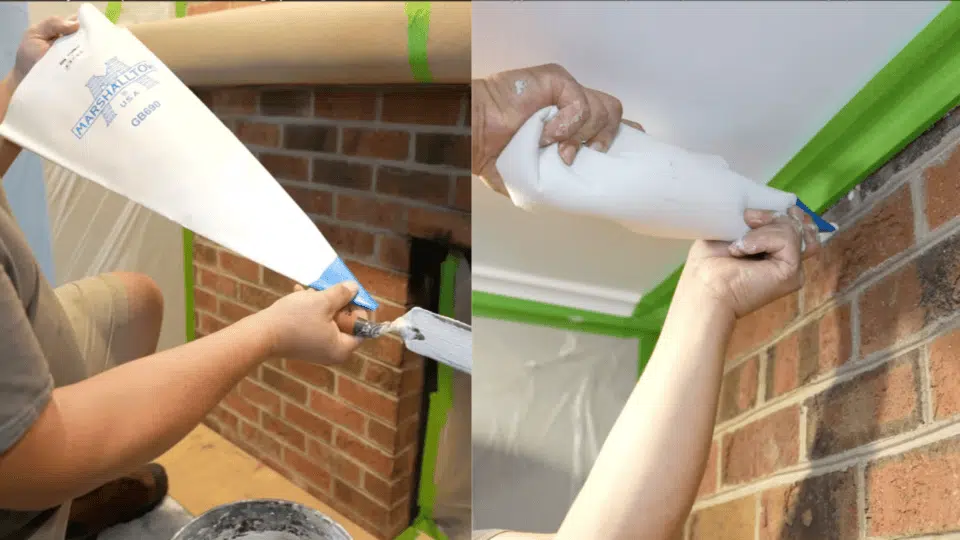
Scoop your mixed mortar into a grout bag, keeping the tip slightly angled downward. This helps prevent air bubbles and gives you a smoother flow.
Follow each joint between the bricks and fill them completely. Don’t worry if the joints aren’t pretty yet; they’ll look better later.
This step helps smooth out older or uneven joints and provides a clean foundation for the German Schmear finish. Take your time and move methodically from top to bottom.
Step 4: Strike Off and Shape the Fresh Joints
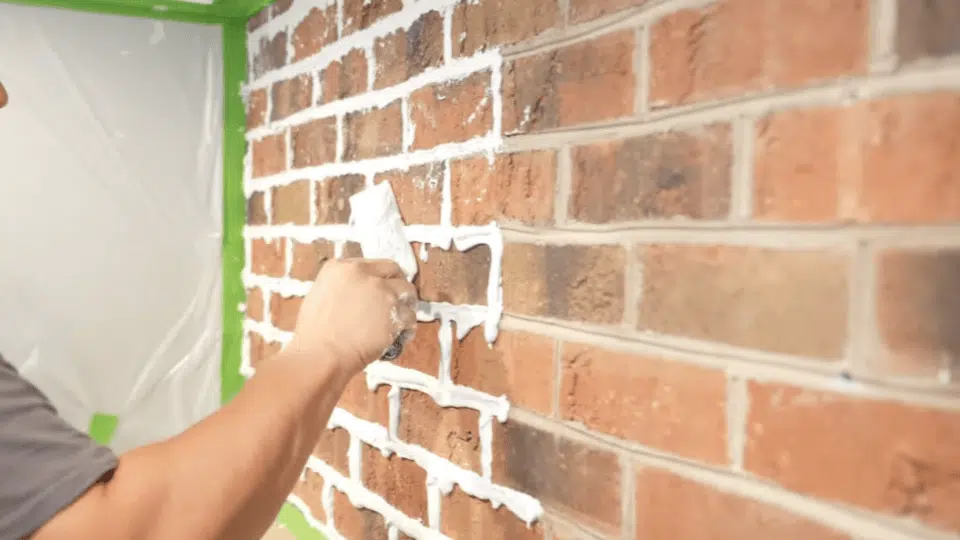
Grab a margin trowel or a six-inch knife and start smoothing out the joints.
Hold the tool at a 30 to 45 degree angle and scrape along the joints to remove extra mortar. You can move diagonally or horizontally, depending on how much mortar you want pulled onto the brick face.
Around the mantel or bottom edge, be extra careful to keep your lines clean. You will remove the tape later, and a crisp line here will help your finished fireplace look professional and tidy.
Step 5: Sponge to Create the Distressed German Schmear Look
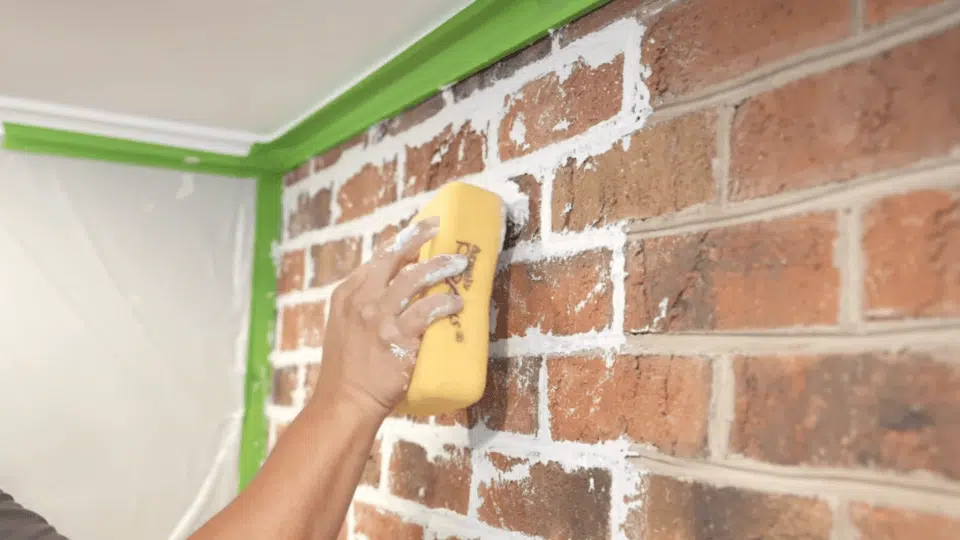
Once your joints are shaped, move on to the fun part. Dip a masonry sponge into water, wring it out slightly, and start wiping the brick faces.
Use long, gentle strokes to drag the mortar across the surface. As you wipe, you’ll begin to see the classic distressed German Schmear look appear.
You can allow more brick to show through in some areas and apply heavier coverage in others.
Step 6: Touch Up and Perfect the Design
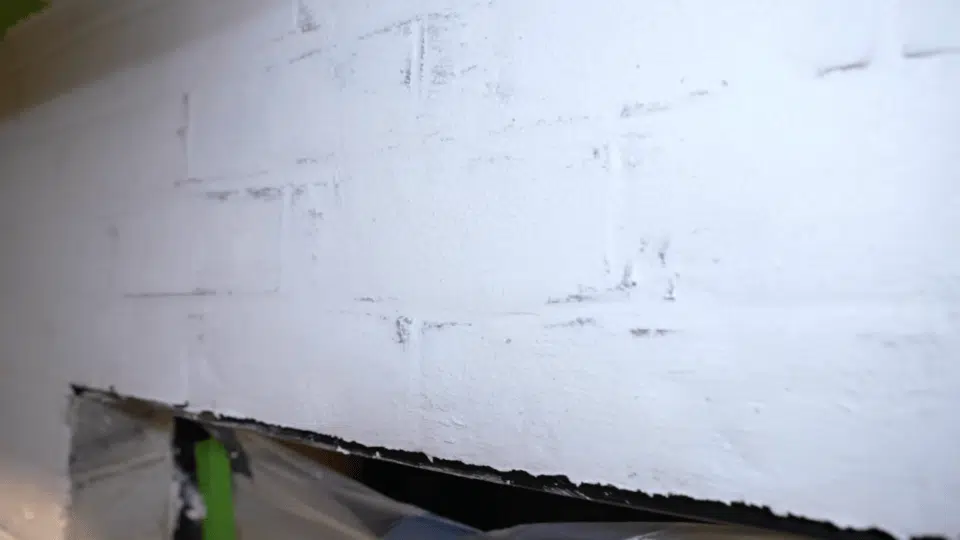
Add small amounts of mortar where needed and use the sponge again to blend everything together. It’s completely normal to make a few rounds of touch-ups.
Many people also like to leave small accents or spots with slightly more brick peeking through. These variations create a charming, natural finish.
Step 7: Seal the Finished German Schmear for Protection
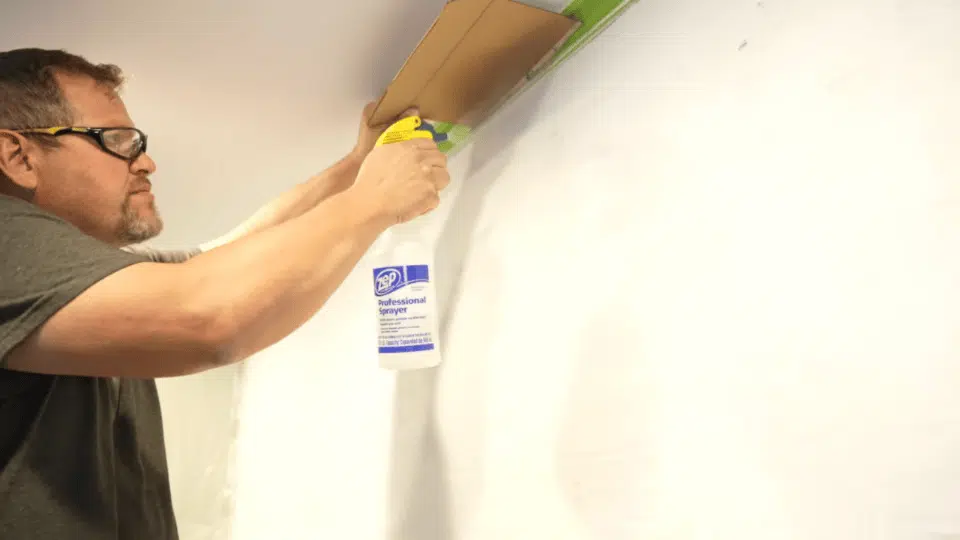
Use a non-highlighted grout or masonry sealer. This is important because highlighted sealers can tint the surface yellow, especially over white mortar.
Spray or brush the sealer evenly across the entire fireplace. It may darken the surface temporarily, but it will return close to the original color once dry.
Make sure the room is well ventilated, since sealers can have a strong smell. Once sealed, your German Schmear will resist stains and be much easier to keep clean, especially around a working fireplace.
For a more detailed YouTube tutorial
German Schmear Brick Checklist
Make your project smoother and stress-free with this quick, simple checklist that covers everything you need before, during, and after applying a German Schmear finish.
Pre Evaluation
⬜ Check for loose mortar or damaged joints
⬜ Clean soot, dust, and grime
⬜ Remove old paint or coatings
⬜ Choose how much brick you want visible
Setup
⬜ Gather tools and materials
⬜ Protect walls with plastic
⬜ Cover floor and hearth
⬜ Tape off edges and mantel
Mixing
⬜ Mix thinset mortar in a bucket
⬜ Let it rest (slake), then remix
⬜ Check for smooth, workable consistency
Application
⬜ Fill mortar joints with grout bag
⬜ Strike joints with a trowel or knife
⬜ Sponge to create the distressed look
Touch Up
⬜ Fix thin or uneven spots
⬜ Blend with sponge
⬜ Adjust brick visibility as desired
Finish
⬜ Allow mortar to dry fully
⬜ Apply non-highlighted sealer
⬜ Ventilate the room well while sealing
Tips and Common Mistakes to Avoid
Achieving a flawless German Smear brick finish requires attention to detail and avoiding common pitfalls that plague first-time applicators.
These expert insights help people achieve professional-looking results on their German Schmear fireplace or brick walls while understanding how to address issues that may arise during the process.
- Expert Tips for a Professional Outcome: Testing the technique in a hidden area allows practice with mortar consistency and coverage before tackling visible surfaces, ensuring confidence and achieving desired results.
- Work in Small Sections: Applying German Schmear brick in manageable 3-4-square-foot sections prevents premature drying and maintains control over the wiping process, resulting in a consistent texture throughout.
- Mortar Consistency Matters: Mixing mortar to a peanut butter thickness ensures proper adhesion and workability. Too thin creates runny messes, while too thick prevents smooth application and texture control.
- Timing Is Critical: Wiping excess mortar within 5-10 minutes of application prevents overly difficult removal and allows shaping the texture, while waiting too long causes permanent adhesion issues.
- Proper Surface Preparation: Thoroughly cleaning brick and removing all sealers, paint, soot, and grime before starting guarantees strong mortar adhesion and prevents peeling or failure on German Schmear fireplace projects.
Conclusion
German schmear brick projects are easier than you might think. You’ve learned the materials, techniques, and maintenance needed for beautiful results.
The best part is customizing coverage to match your style preferences. I’ve covered everything from mortar mixing to final sealing for lasting durability.
Ready to start your project? Gather your supplies this weekend and practice on a small test section first. Your brick will gain an evergreen European character that impresses guests and adds value to your home for years ahead.