Lego pieces all over the floor are annoying, and buying a ready-made Lego table can cost way too much for what you actually get.
You can build a Lego table yourself, and it’s easier than you might think. I’m talking about simple projects that won’t take forever or require fancy tools.
This guide shows you different DIY Lego table ideas you can actually make at home.
You’ll find designs for different spaces and skill levels, plus tips to set everything up so your kids have a proper spot to build without the mess taking over your living room.
Things to Consider Before Building Your Lego Table
Planning makes all the difference when creating a LEGO table DIY project. A few smart decisions can save time, money, and frustration later. Here’s what matters most:
- Available Space: Measure the room where the table will live and ensure there’s walking space around it
- User Height: Match the table height to the builder’s size, so creating stays comfortable for hours
- Storage Needs: Count how many Lego sets need organizing to plan drawer or bin capacity
- Budget Range: Set a realistic spending limit before shopping for materials and supplies
- Baseplate Preferences: Decide between removable plates for flexibility or permanent ones for stability
These considerations shape every decision ahead. Getting them right means building a DIY LEGO table that actually gets used daily.
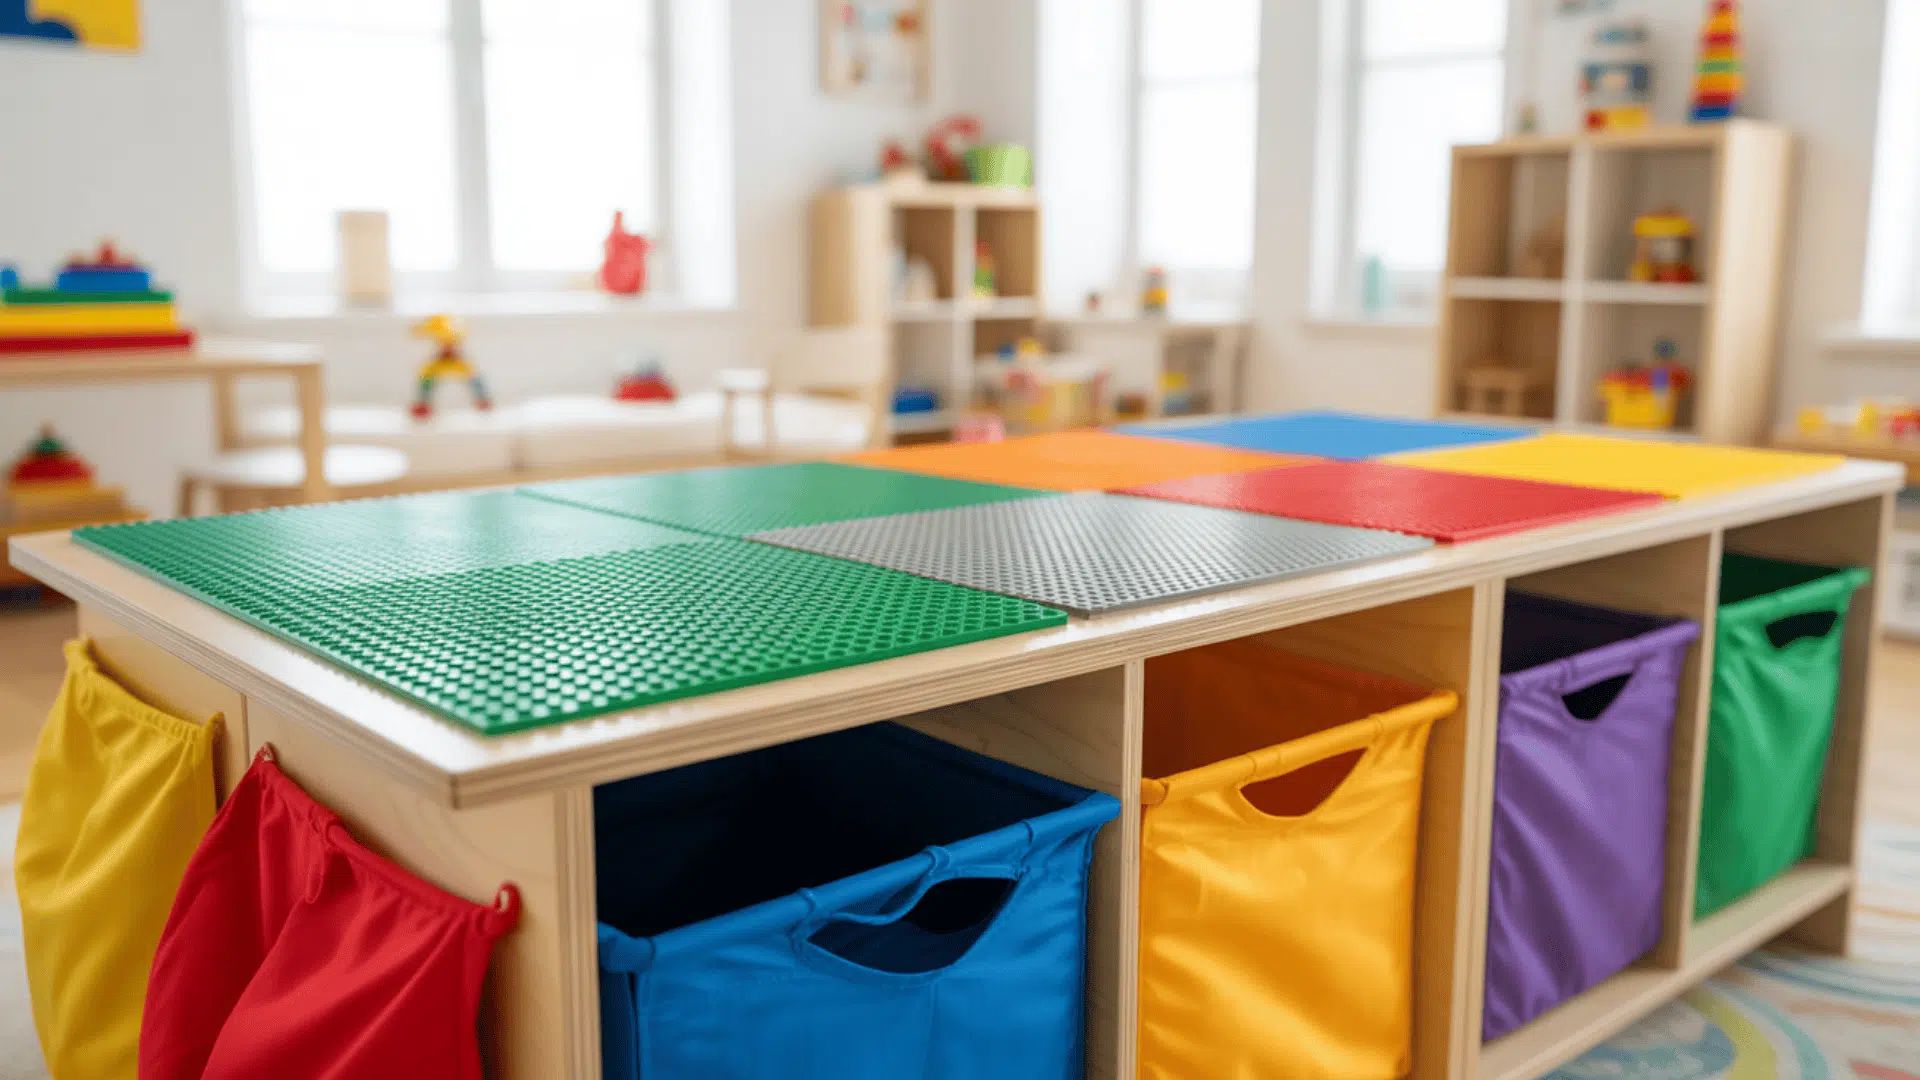
Everything You Need to Know About Lego Baseplates
Baseplates are the building surface where all the magic happens. Standard 10×10-inch plates work perfectly for most LEGO table DIY projects and cost around $8-12 each.
They come in various colors, such as green, gray, blue, and tan. Most builders need four to six plates to cover a standard table surface.
The flat studs let bricks click securely into place while making cleanup simple. Choose colors that match the building theme or mix them for variety.
Attach plates using strong double-sided tape or liquid adhesive, depending on whether permanence or flexibility matters more.
Tools and Materials Needed to Build a Lego Table
Before you begin building your DIY Lego Table, make sure you have all your supplies ready. Having the right tools and materials on hand will make the project faster, easier, and more enjoyable.
| Item | Purpose |
|---|---|
| IKEA Lack side table | Main structure for the Lego table |
| IKEA TROfast storage bin | Storage for Lego bricks |
| TROfast sliding tracks | To hold and guide the storage bin |
| Heavy-duty adhesive tape | For securing the slides under the table |
| Double-sided carpet tape | To attach the Lego baseplates on top |
| Lego baseplates (10×10 inch) | Building surface for Lego creations |
| Scissors or utility knife | To trim adhesive tape as needed |
| Clean cloth | To wipe surfaces before sticking tape |
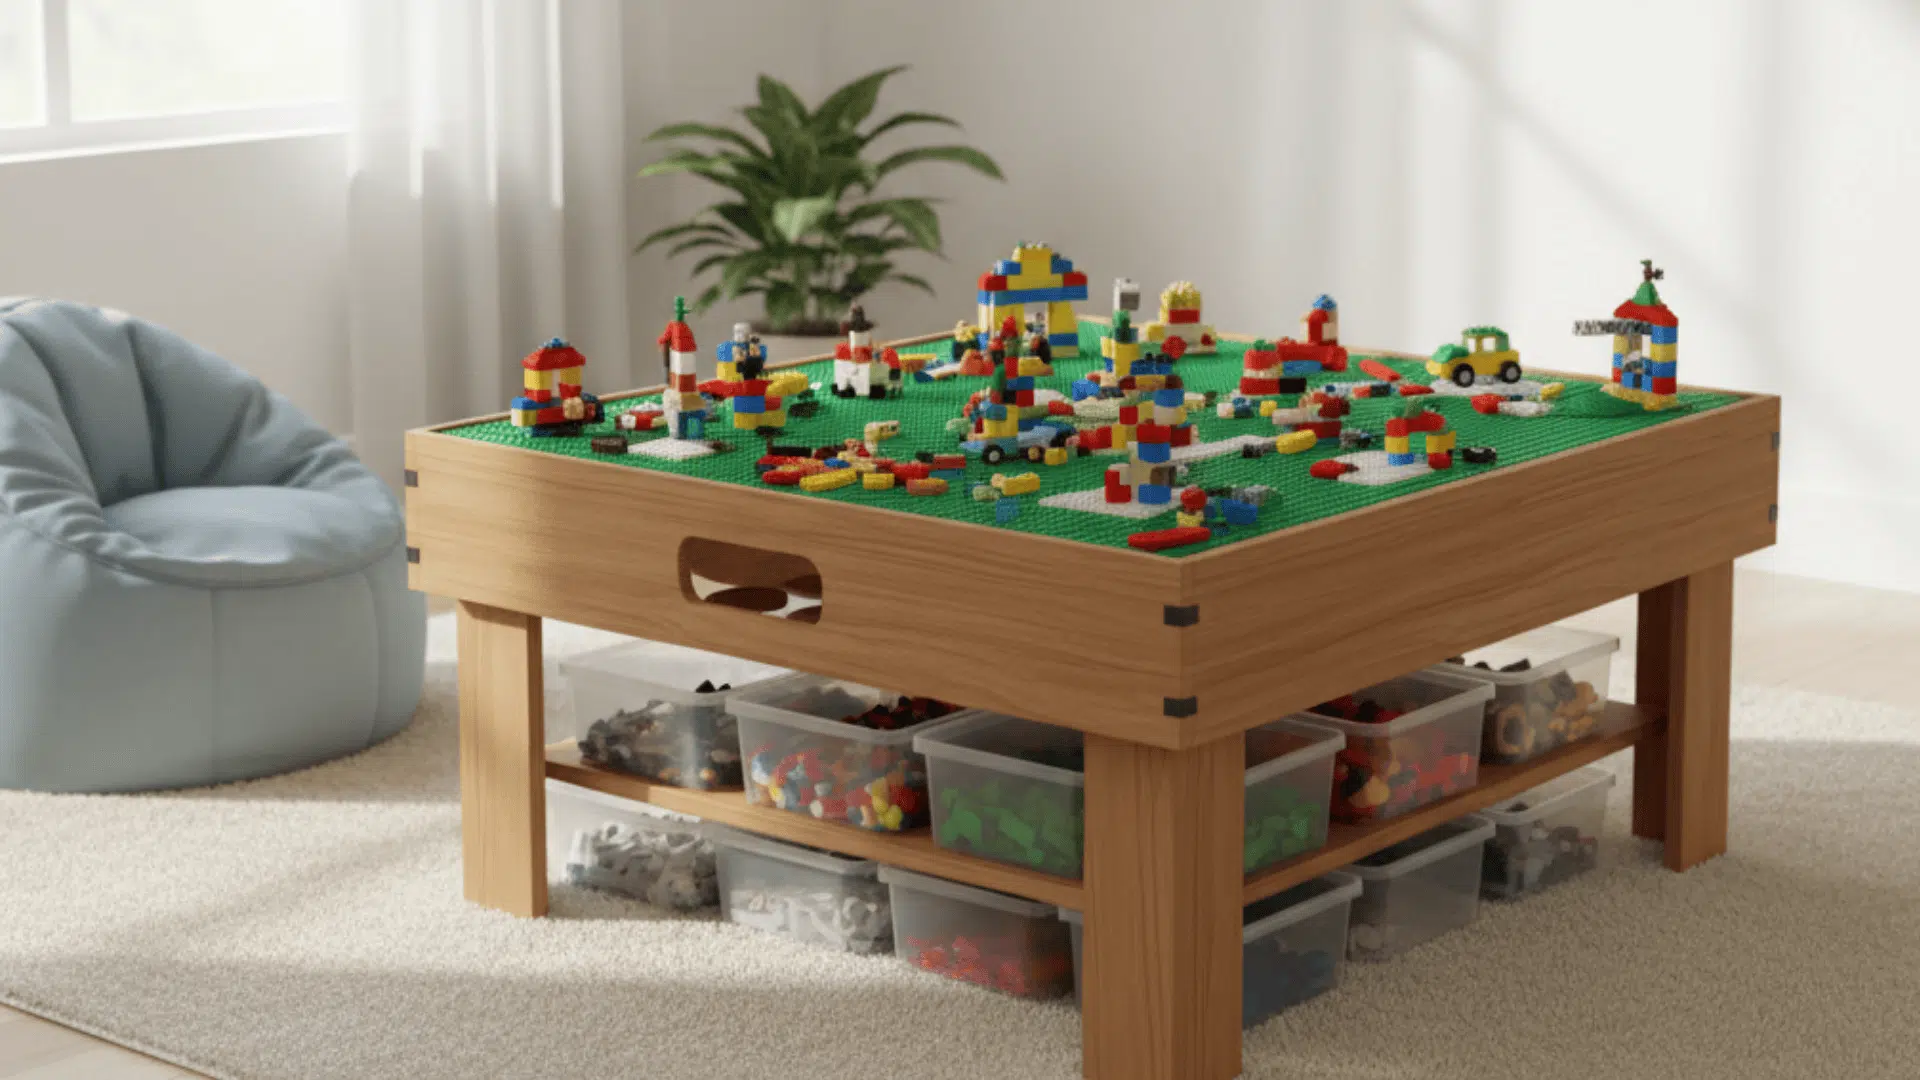
How to Make a Simple DIY Lego Table Using an IKEA Side Table
Creating a DIY Lego Table doesn’t have to be expensive or complicated. With just a few IKEA pieces and simple tools, you can build a fun, functional play space that keeps Lego bricks organized and ready for creativity.
Step 1: Prepare the Table
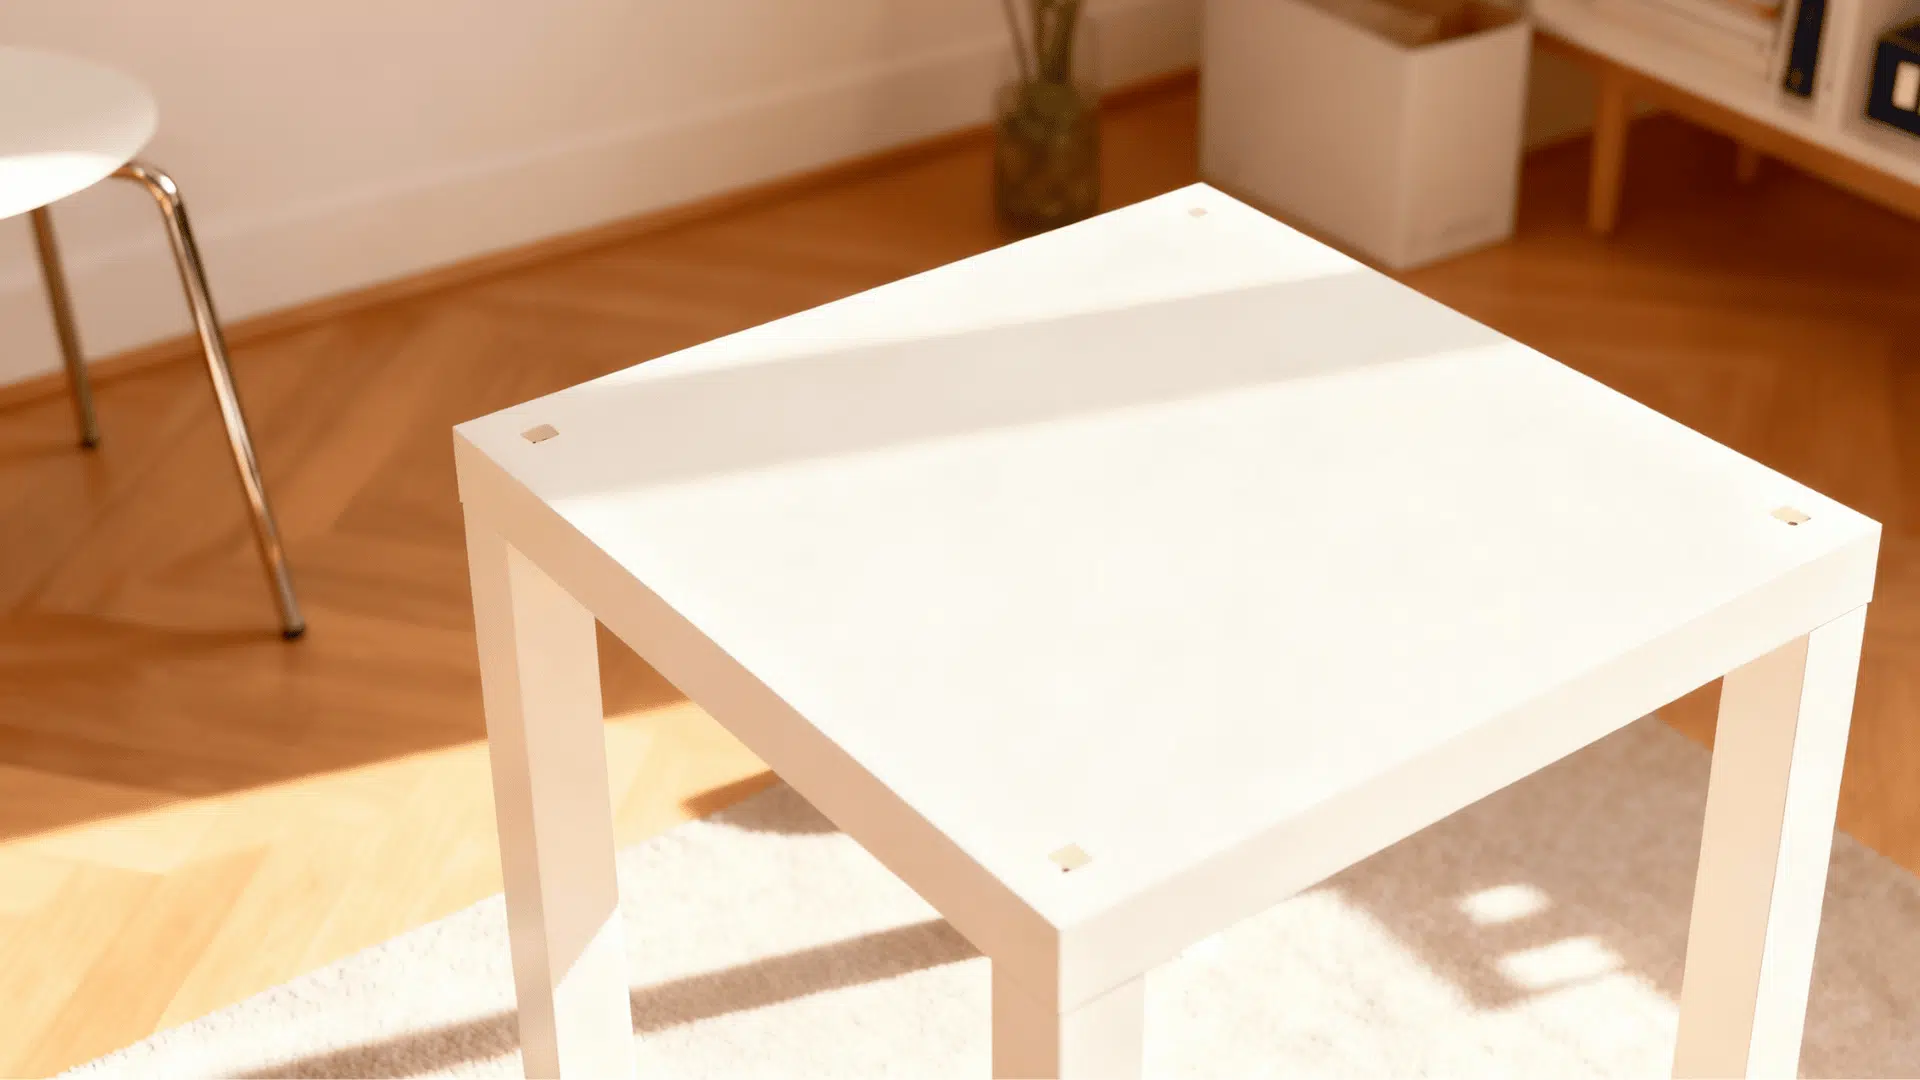
Start with an IKEA Lack side table. Unbox it, assemble the legs, and check that the surface is clean and flat. This will be your Lego table base, so make sure it’s sturdy and level before you continue.
Wipe the tabletop and underside with a clean, dry cloth to remove dust. Adhesives stick best to smooth, clean surfaces.
Step 2: Add the Storage Bin Tracks
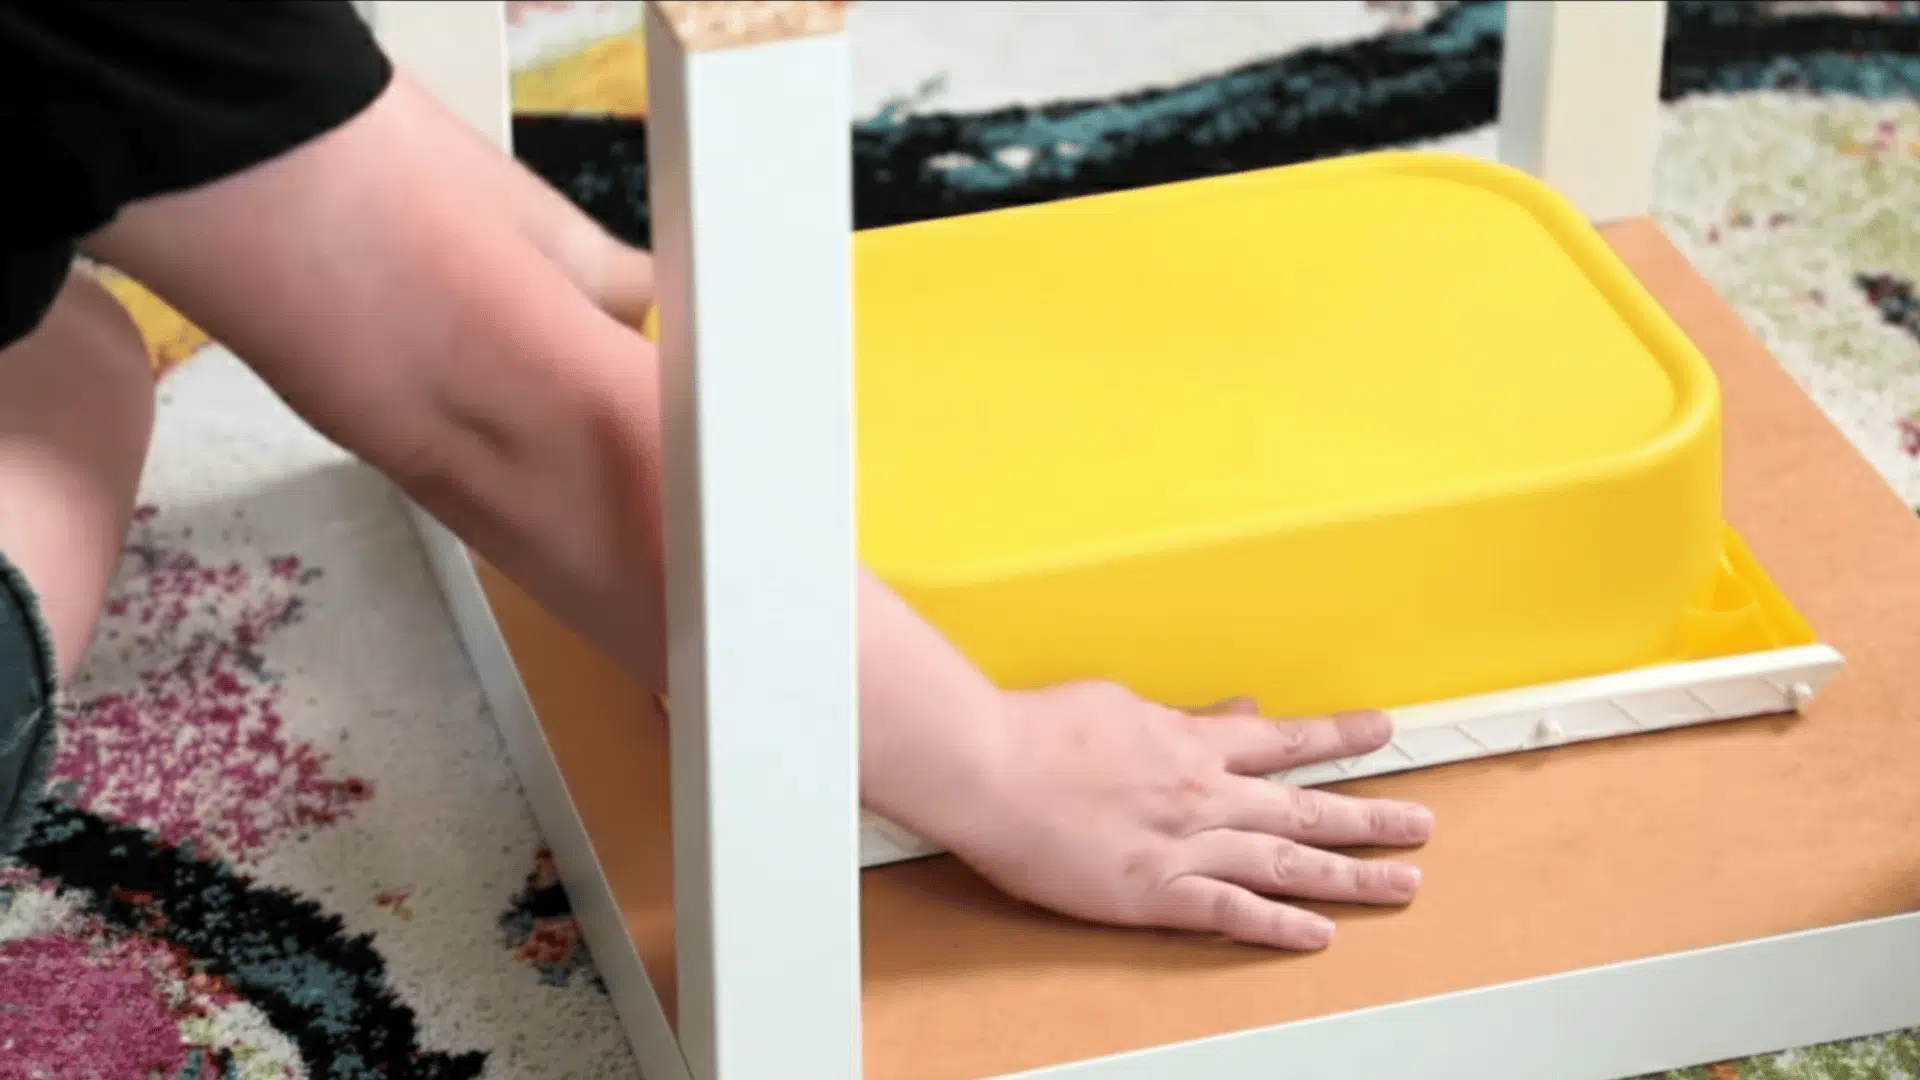
Flip the table upside down. Take a TROfast storage bin and its sliding tracks (you can ask for the slides when buying the bin).
Use heavy-duty adhesive tape to attach the slides to the underside of the table. Press down firmly so they stick securely. Let the adhesive set for a few minutes.
Step 3: Install the Storage Bin
Once the tracks are firmly attached, slide the TROfast bin into place. It should glide smoothly in and out. This bin will serve as hidden storage for all those colorful Lego pieces, keeping the area neat and tidy.
If the slides feel tight, then adjust them slightly until the bin moves smoothly without catching on the table edges.
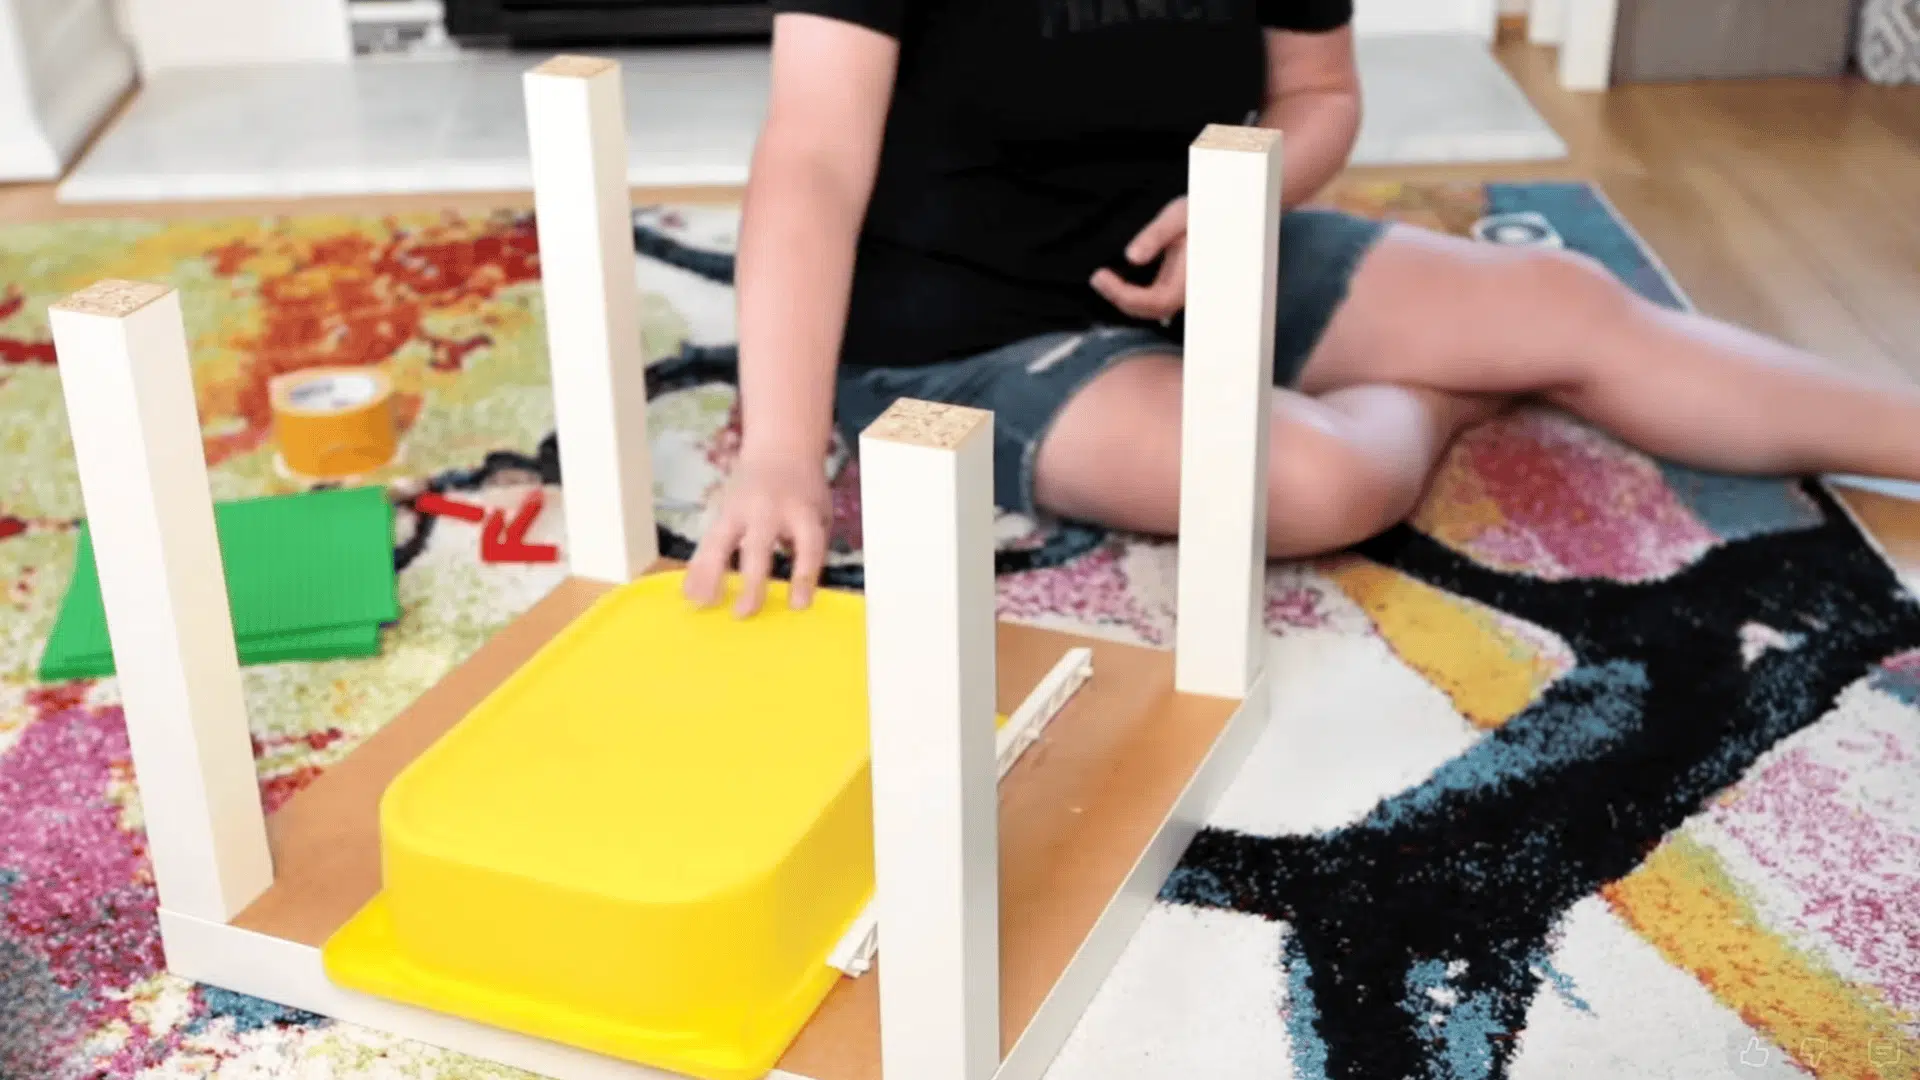
Step 4: Attach the Baseplates
Turn the table right-side up. Line up Lego baseplates on the surface to check the fit. Then, apply double-sided carpet tape to the back of each plate and press them onto the tabletop, edge to edge.
Hold each one in place for about 30 seconds to ensure a solid bond. Gently press along the seams between baseplates to make sure they align perfectly and look even across the surface.
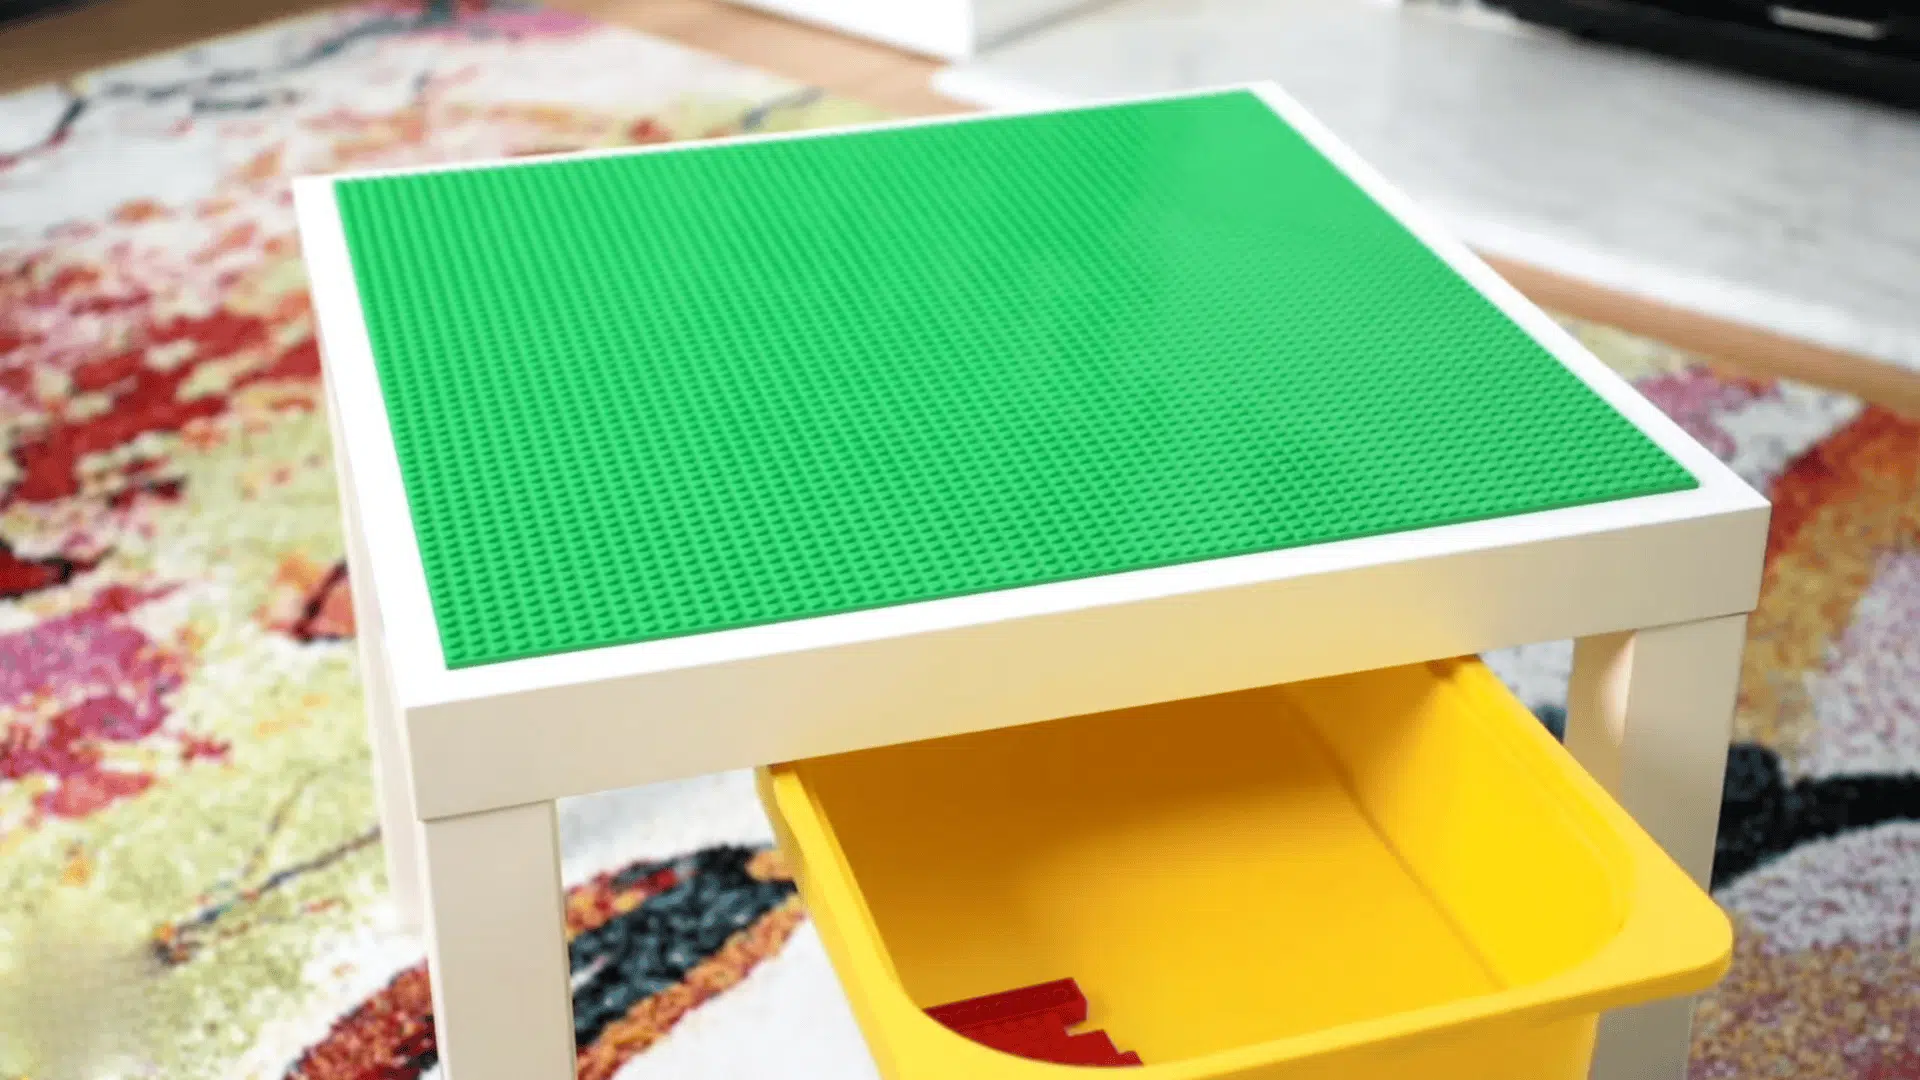
Step 5: Finish and Enjoy
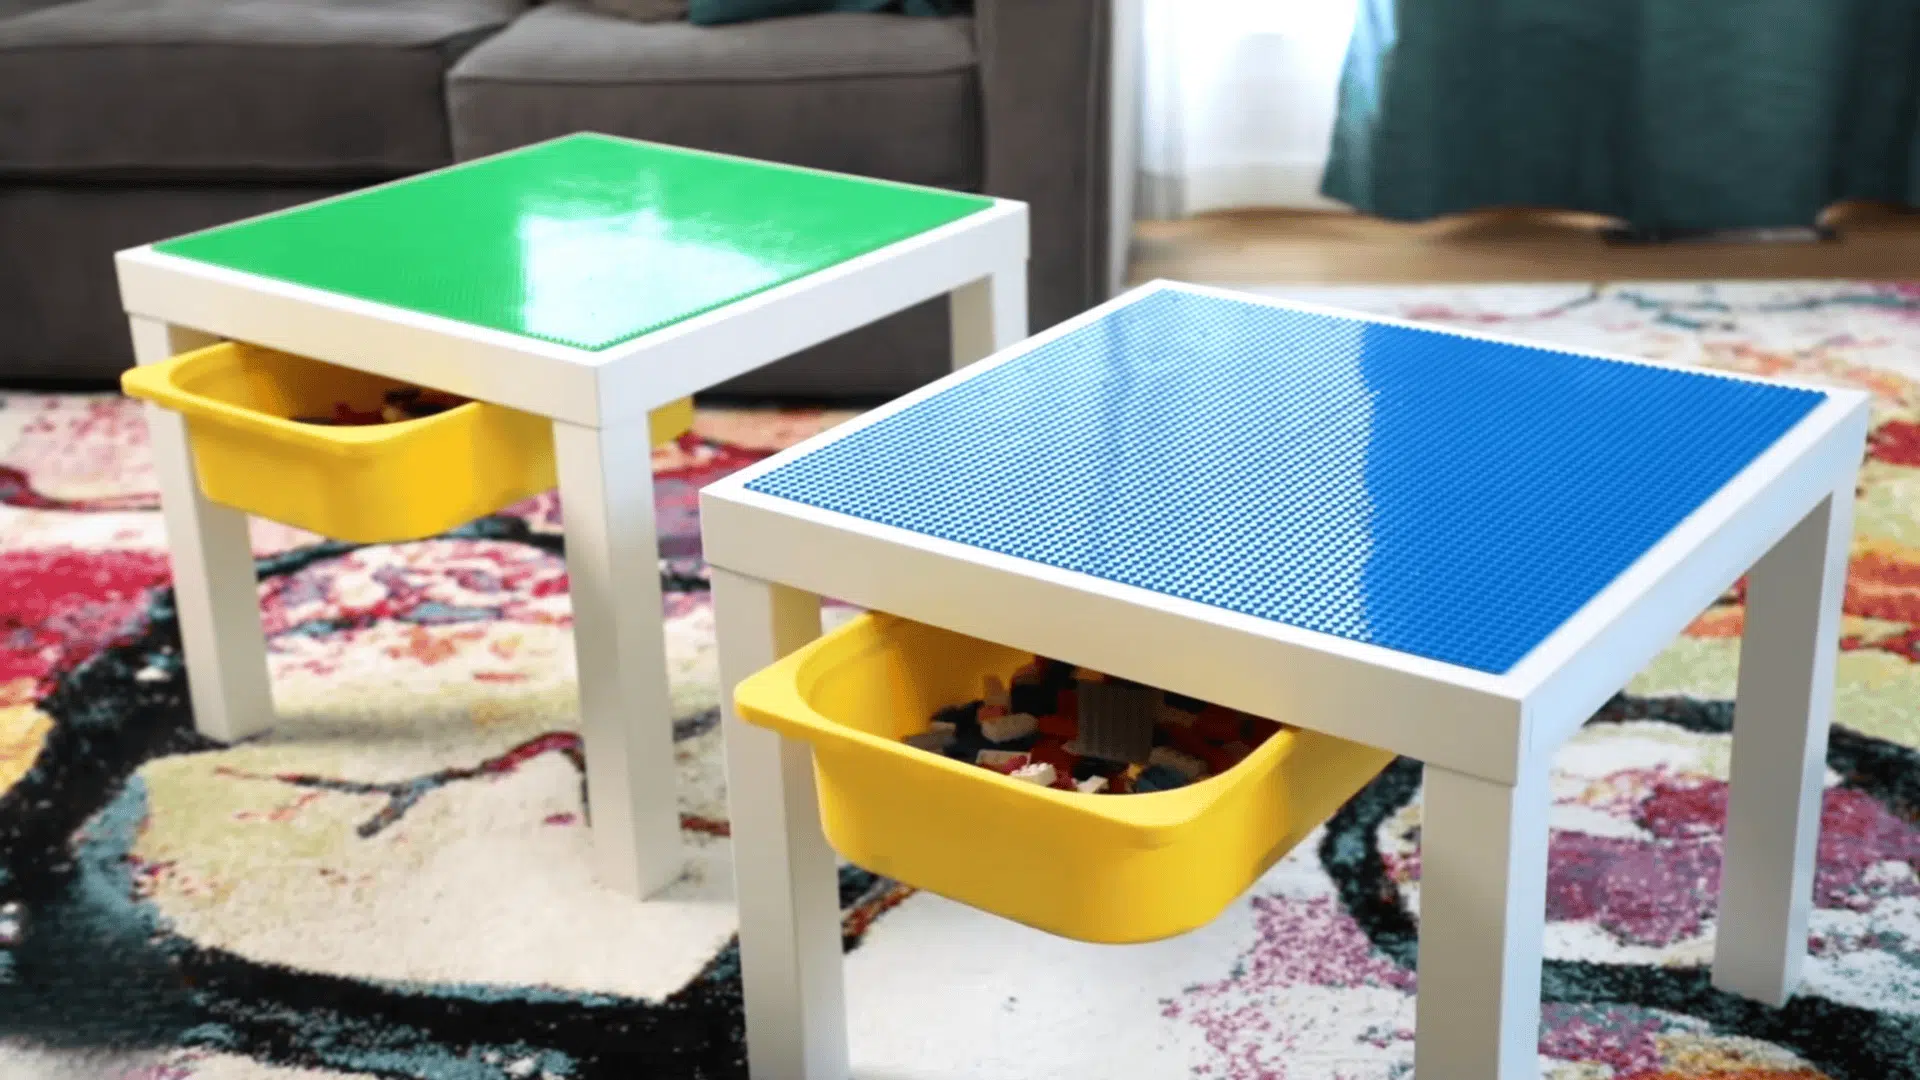
Check that everything feels secure, the bin slides easily, and the baseplates are firmly attached. Your Lego table is ready! It’s a quick, low-cost project that turns a simple IKEA table into a fun, creative building space.
Take a moment to test it out by building a small Lego set to make sure everything stays steady and in place. You can also personalize the table with your child’s name, a pop of color, or fun stickers to make it uniquely theirs.
For a Step-By-Step Demonstration, Watch the Video Tutorial Below
Fun DIY Lego Table Ideas You Can Make at Home
Getting creative with a Lego table DIY design adds personality and function to any space. Different styles suit different needs, budgets, and skill levels. Here are some options that work in real homes.
1. Coffee Table Conversion
Repurpose an old coffee table by sanding it down, gluing Lego baseplates to the surface, and adding baskets or drawers underneath. Add a coat of bright paint to give an old table new life.
- Tools and Materials Needed: Coffee table, sandpaper, wood paint, Lego baseplates, glue, and small baskets
- Creative Addition: Paint the tabletop border in contrasting colors or add name labels for each builder
- Maintenance Tip: Use furniture polish monthly to keep the wood finish smooth and long-lasting
2. Rolling Lego Cart Table
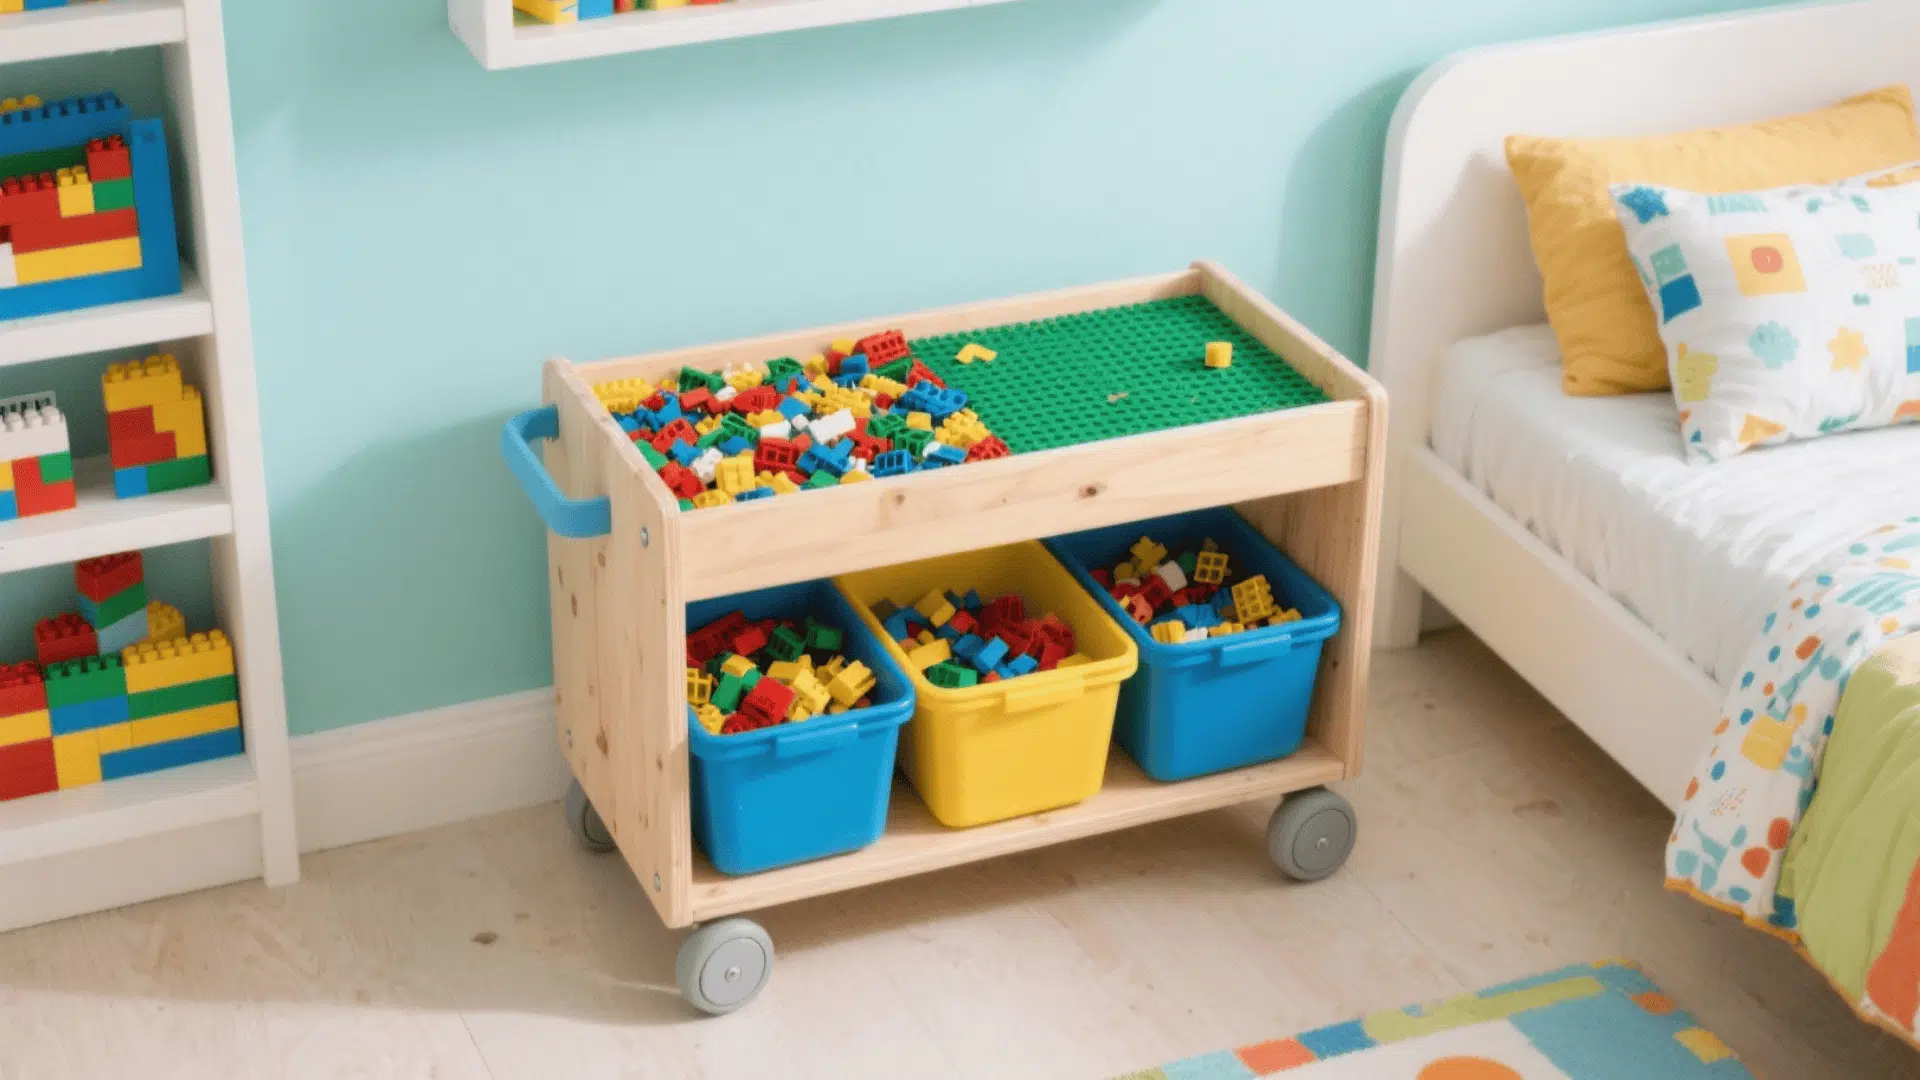
Attach caster wheels to a low wooden cart or box, glue Lego baseplates on top, and store Lego bins inside. Make sure the height is comfortable for kids to reach all corners easily.
- Tools and Materials Needed: Wooden box, caster wheels, Lego baseplates, chalkboard paint, labels, and screws
- Creative Addition: Add chalkboard labels to each side so kids can name their creations or write building themes
- Maintenance Tip: Check the wheel locks regularly to prevent the table from rolling away during play
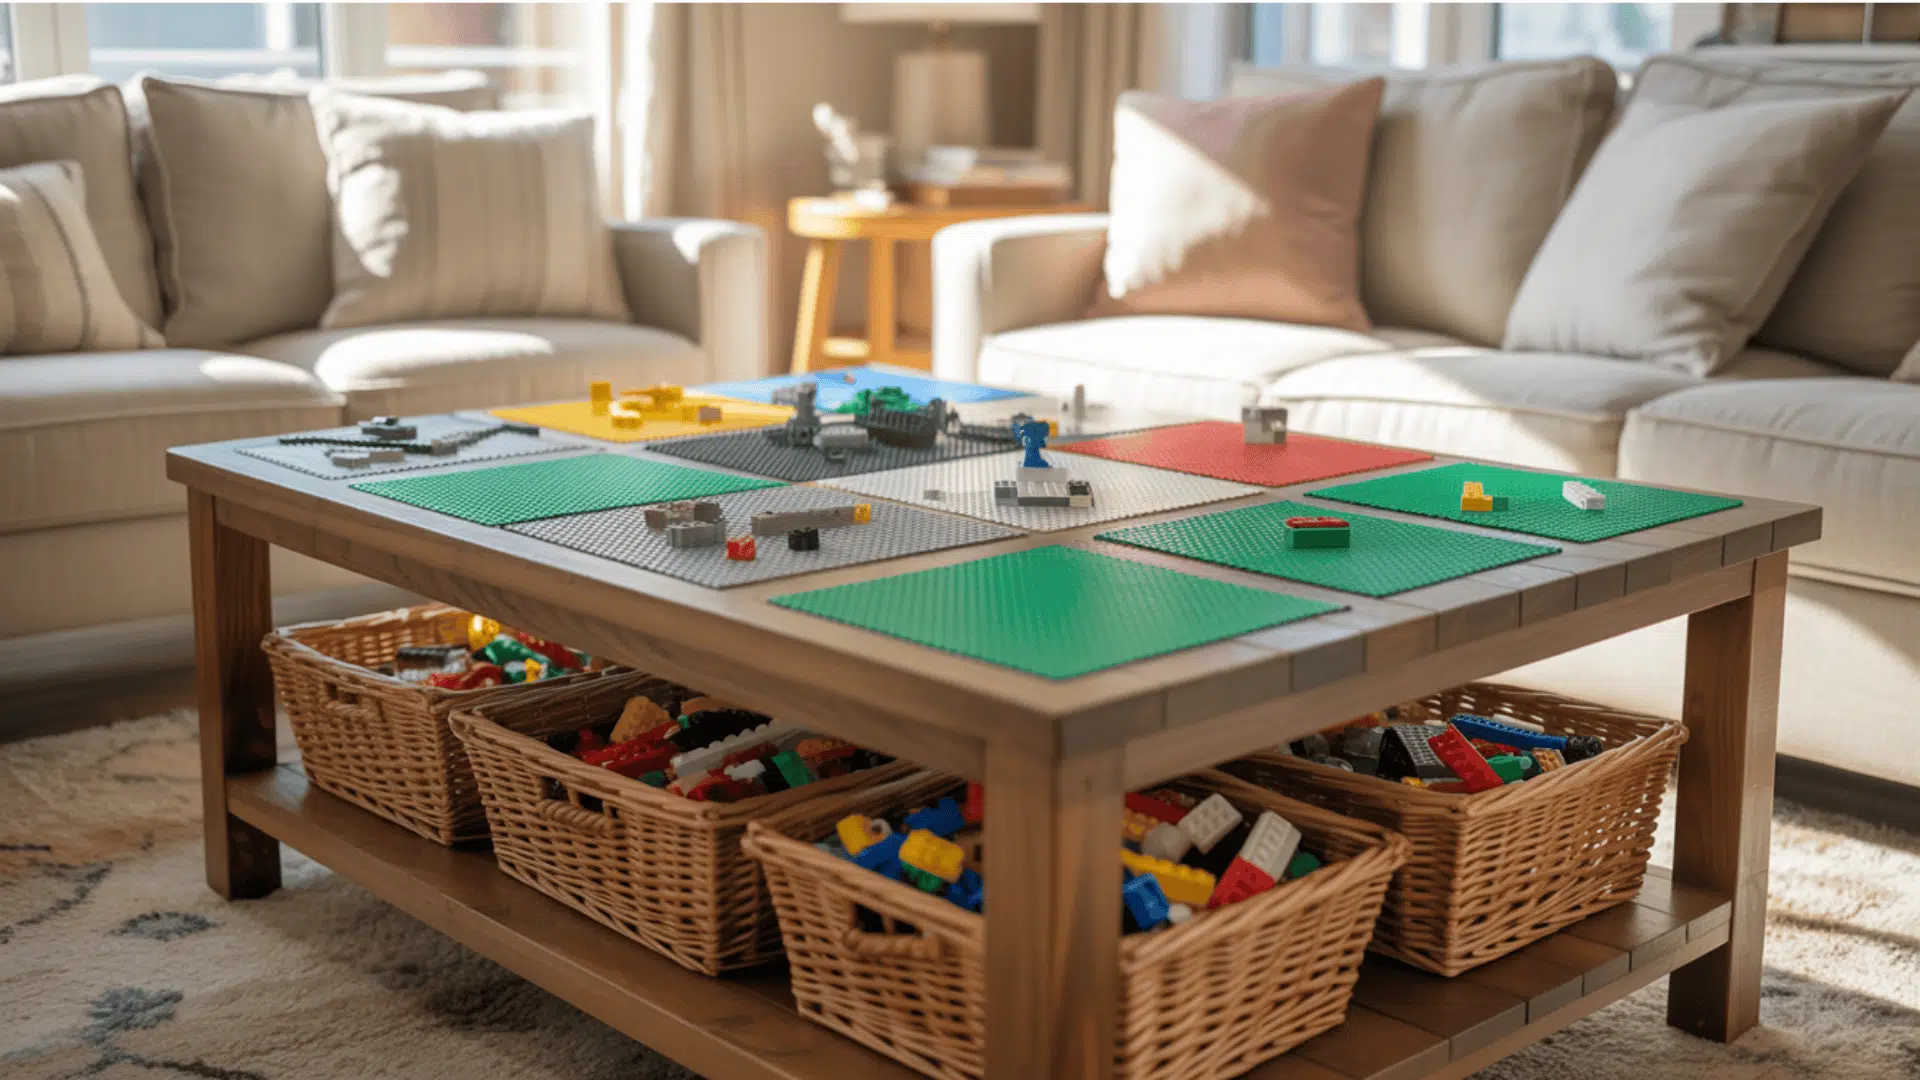
3. Dual-Purpose Craft and Lego Table

Split the tabletop in half, one side for Lego baseplates, the other smooth for drawing or crafts. Add a small divider or storage cup in between for markers and Lego pieces.
- Tools and Materials Needed: Table, Lego baseplates, craft supplies, divider panel, glue, and paint
- Creative Addition: Add a flip-up divider that doubles as a pencil or brick holder
- Maintenance Tip: Clean both sides regularly to prevent glue or crayon residue from sticking to Lego bricks
4. Foldable Wall-Mounted Lego Table
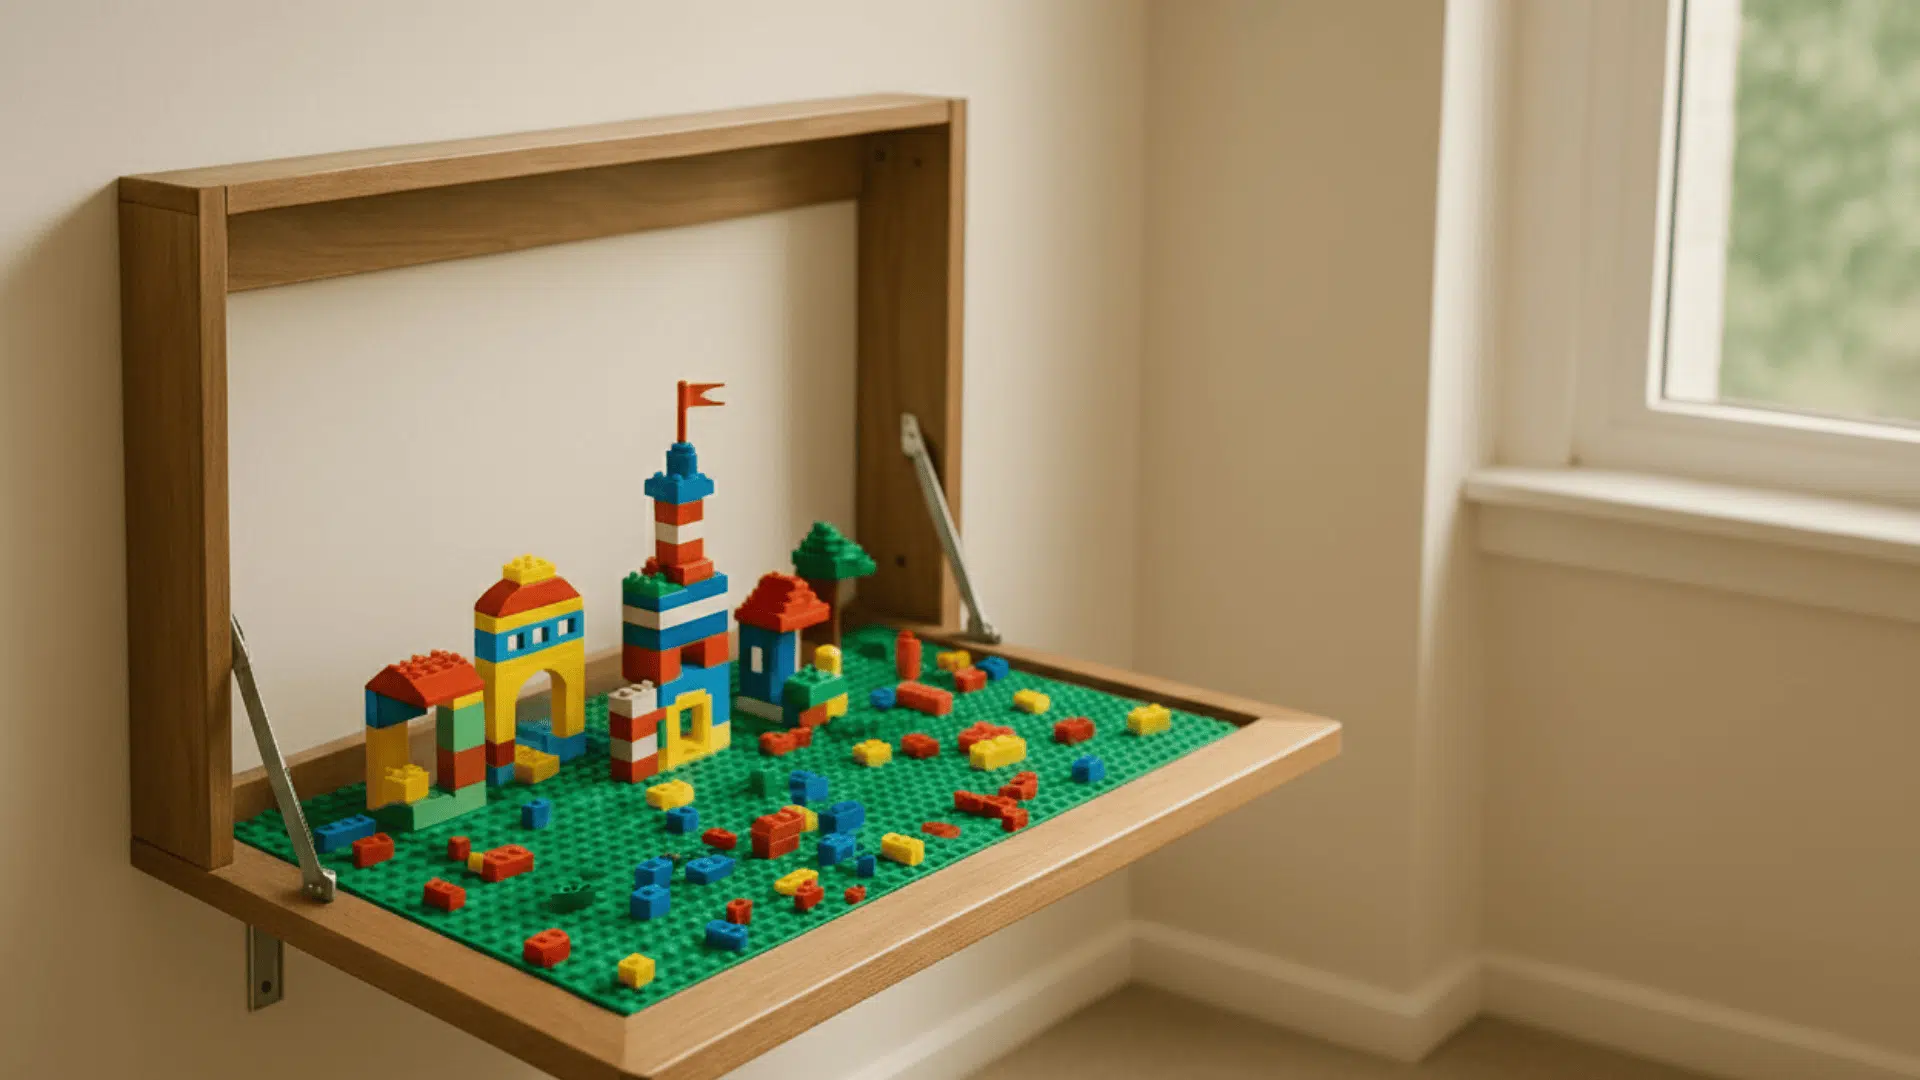
Mount a fold-down wooden panel on the wall using sturdy hinges, then cover it with Lego baseplates. Add a small latch to keep it closed and safe when folded up.
- Tools and Materials Needed: Wood panel, hinges, wall anchors, Lego baseplates, screws, paint, and latch
- Creative Addition: Decorate the underside of the folded table with a mural or your child’s name
- Maintenance Tip: Tighten hinge screws monthly and ensure the wall anchors stay secure
5. Lego Train and City Combo Table
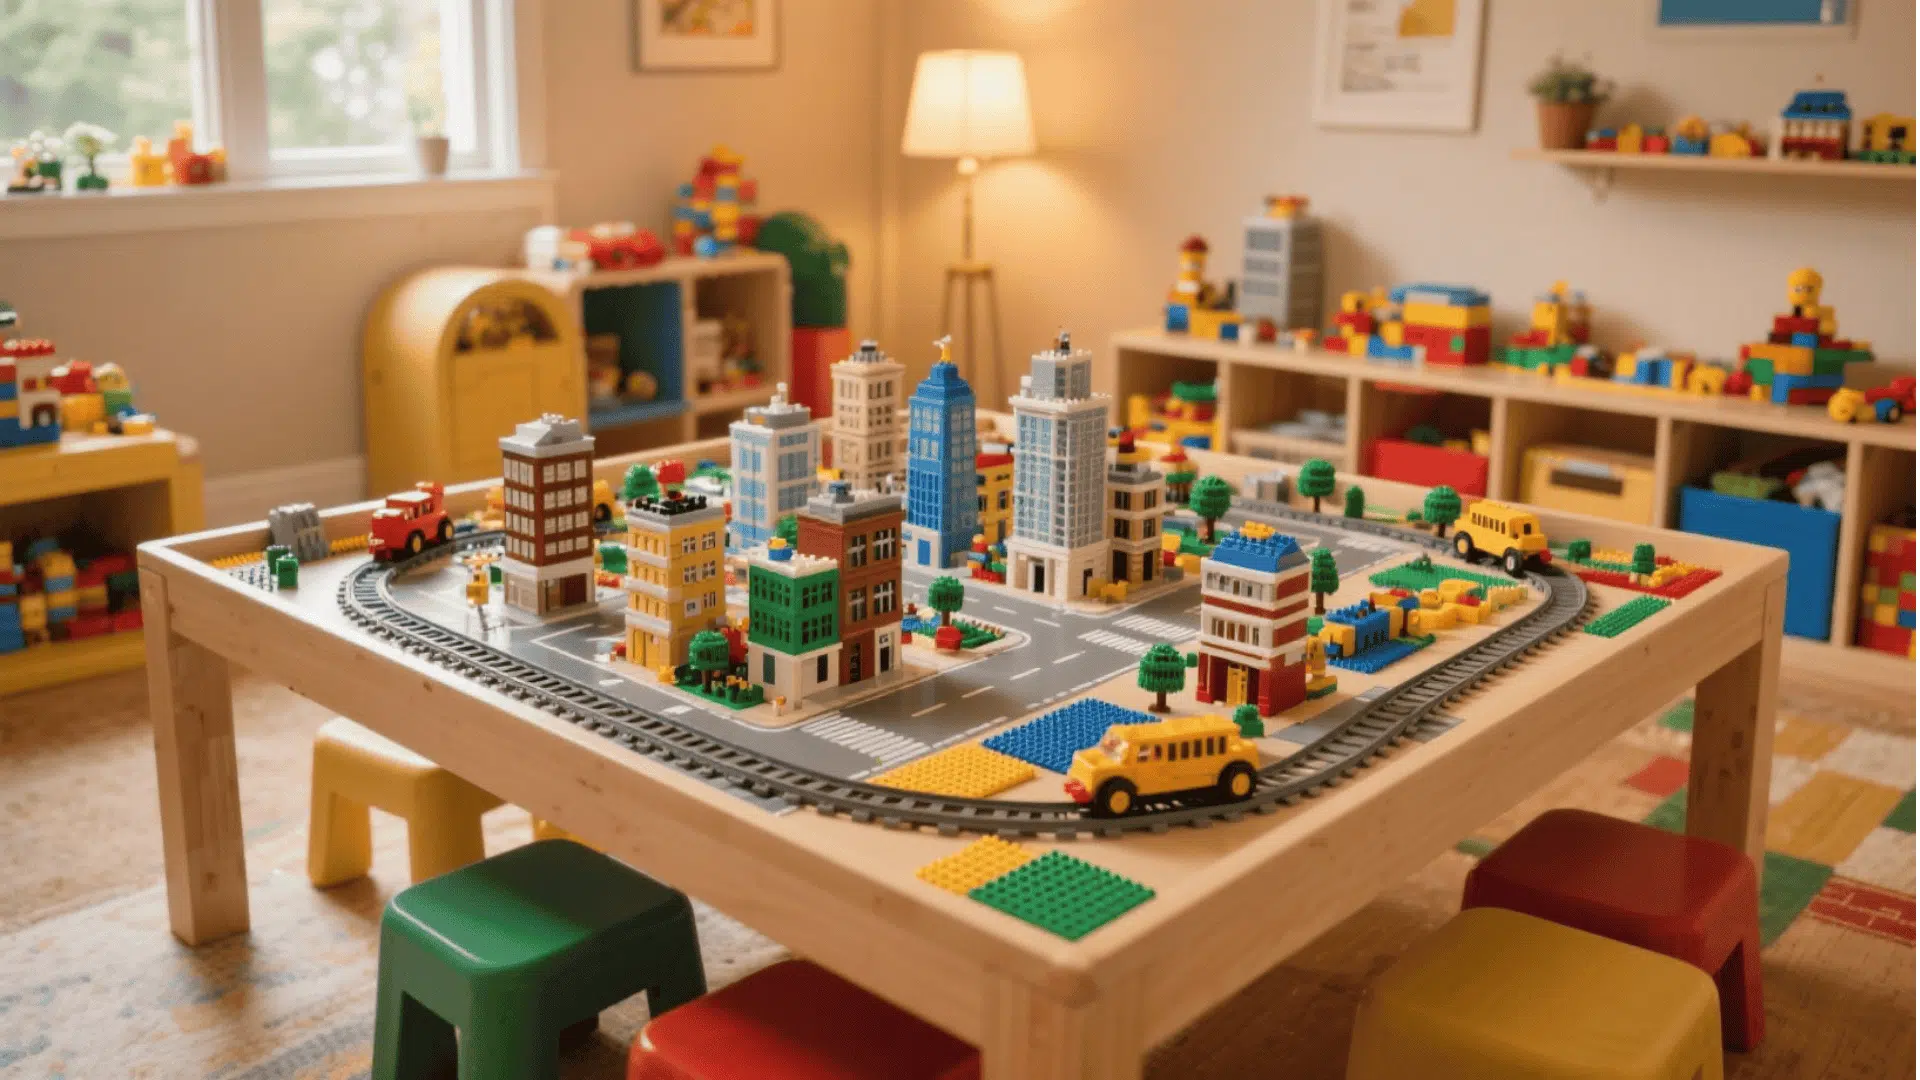
Create a table with half Lego baseplates and half train track area. Add small borders around the edge to keep tracks and bricks in place.
- Tools and Materials Needed: Wood board, Lego baseplates, toy train set, border trim, glue, and small props
- Creative Addition: Add small street signs, mini trees, or LED streetlights for a city look
- Maintenance Tip: Store trains and Lego separately to avoid scratches or lost pieces
6. Plywood and Storage Bin Design
Build a plywood tabletop supported by cube storage bins. Secure baseplates on top, leaving a border for easy lifting and movement.
- Tools and Materials Needed: Plywood board, cube bins, Lego baseplates, adhesive, paint, and labels
- Creative Addition: Paint the bins in rainbow colors or label them by brick type
- Maintenance Tip: Re-glue any loose baseplates as soon as they start lifting
7. Outdoor Lego Table
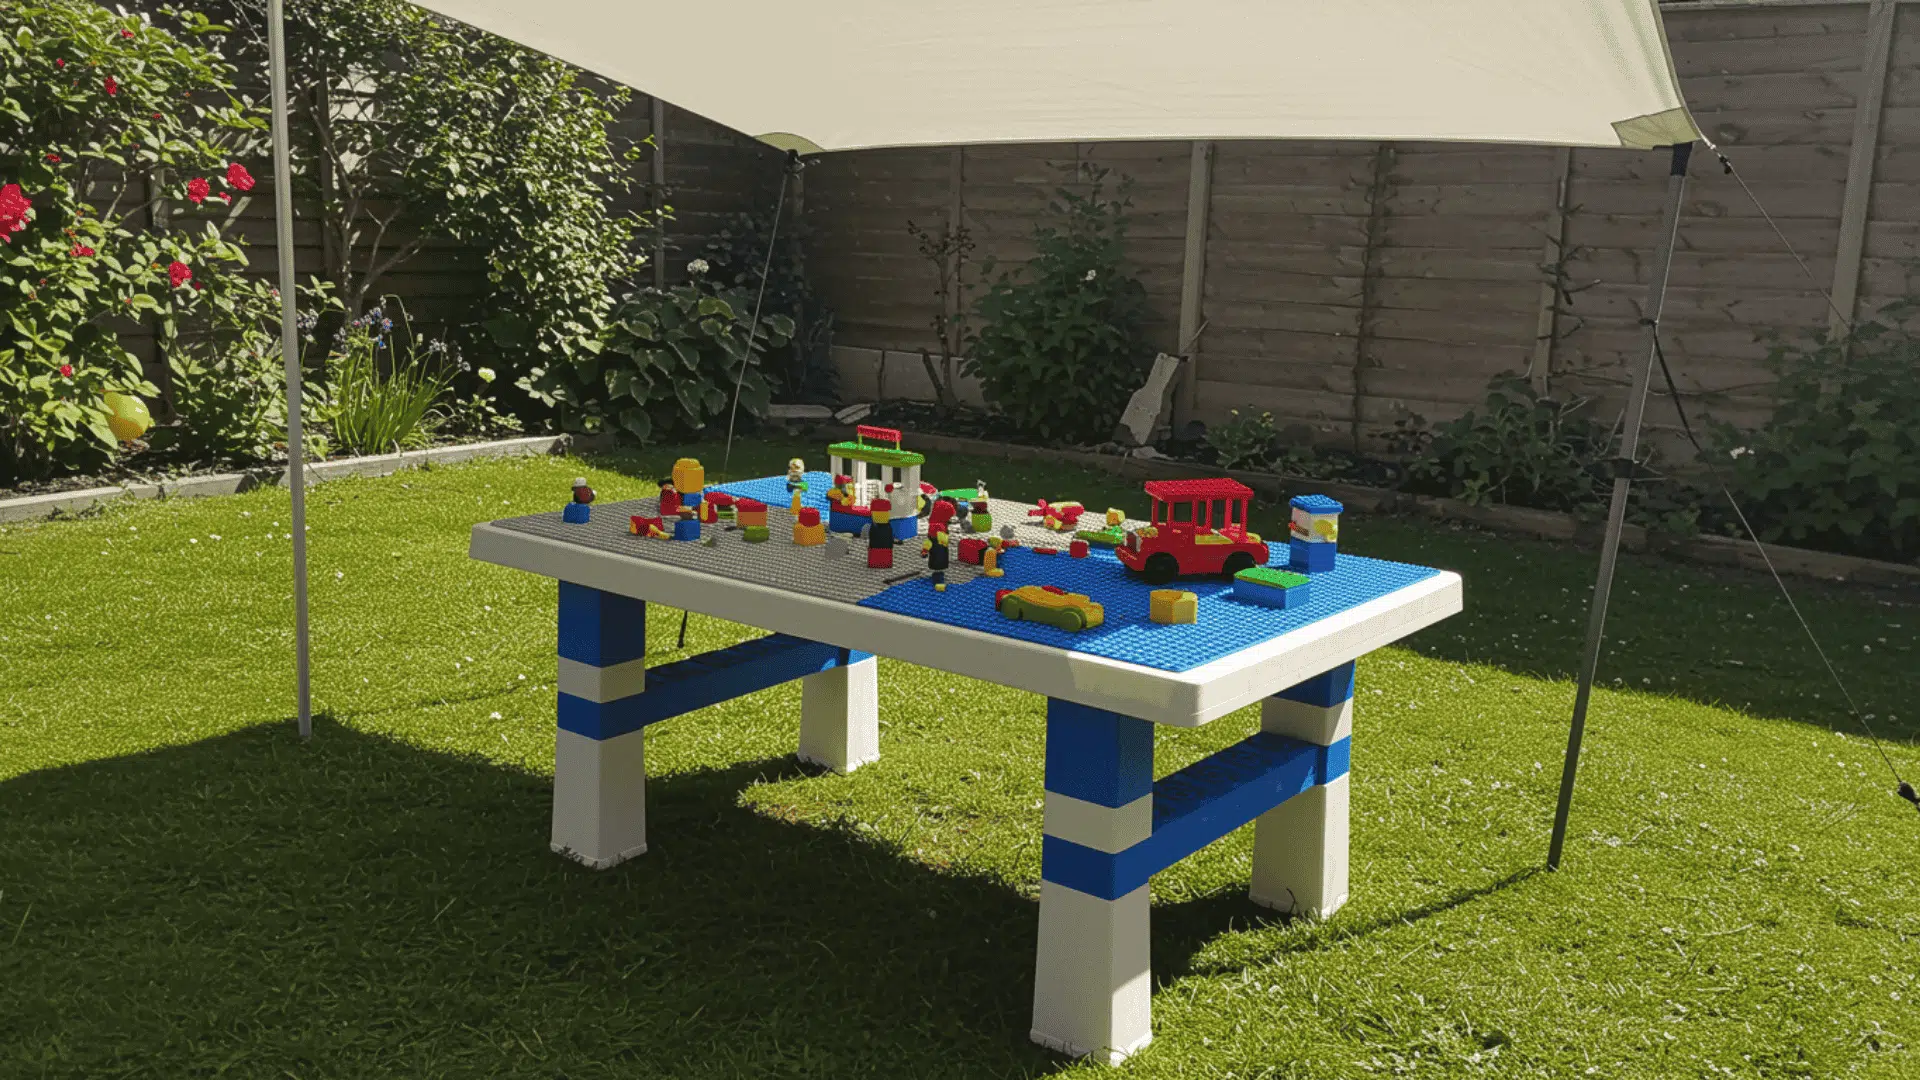
Use treated or composite wood for durability and attach plastic Lego baseplates. Apply a weatherproof sealant to protect the surface from rain and sun.
- Tools and Materials Needed: Outdoor-safe wood, Lego baseplates, waterproof sealant, screws, drill, and umbrella
- Creative Addition: Add a small umbrella or canopy for shade and style
- Maintenance Tip: Bring Lego pieces indoors after play to prevent fading or damage
8. Hidden Storage Lift-Top Table
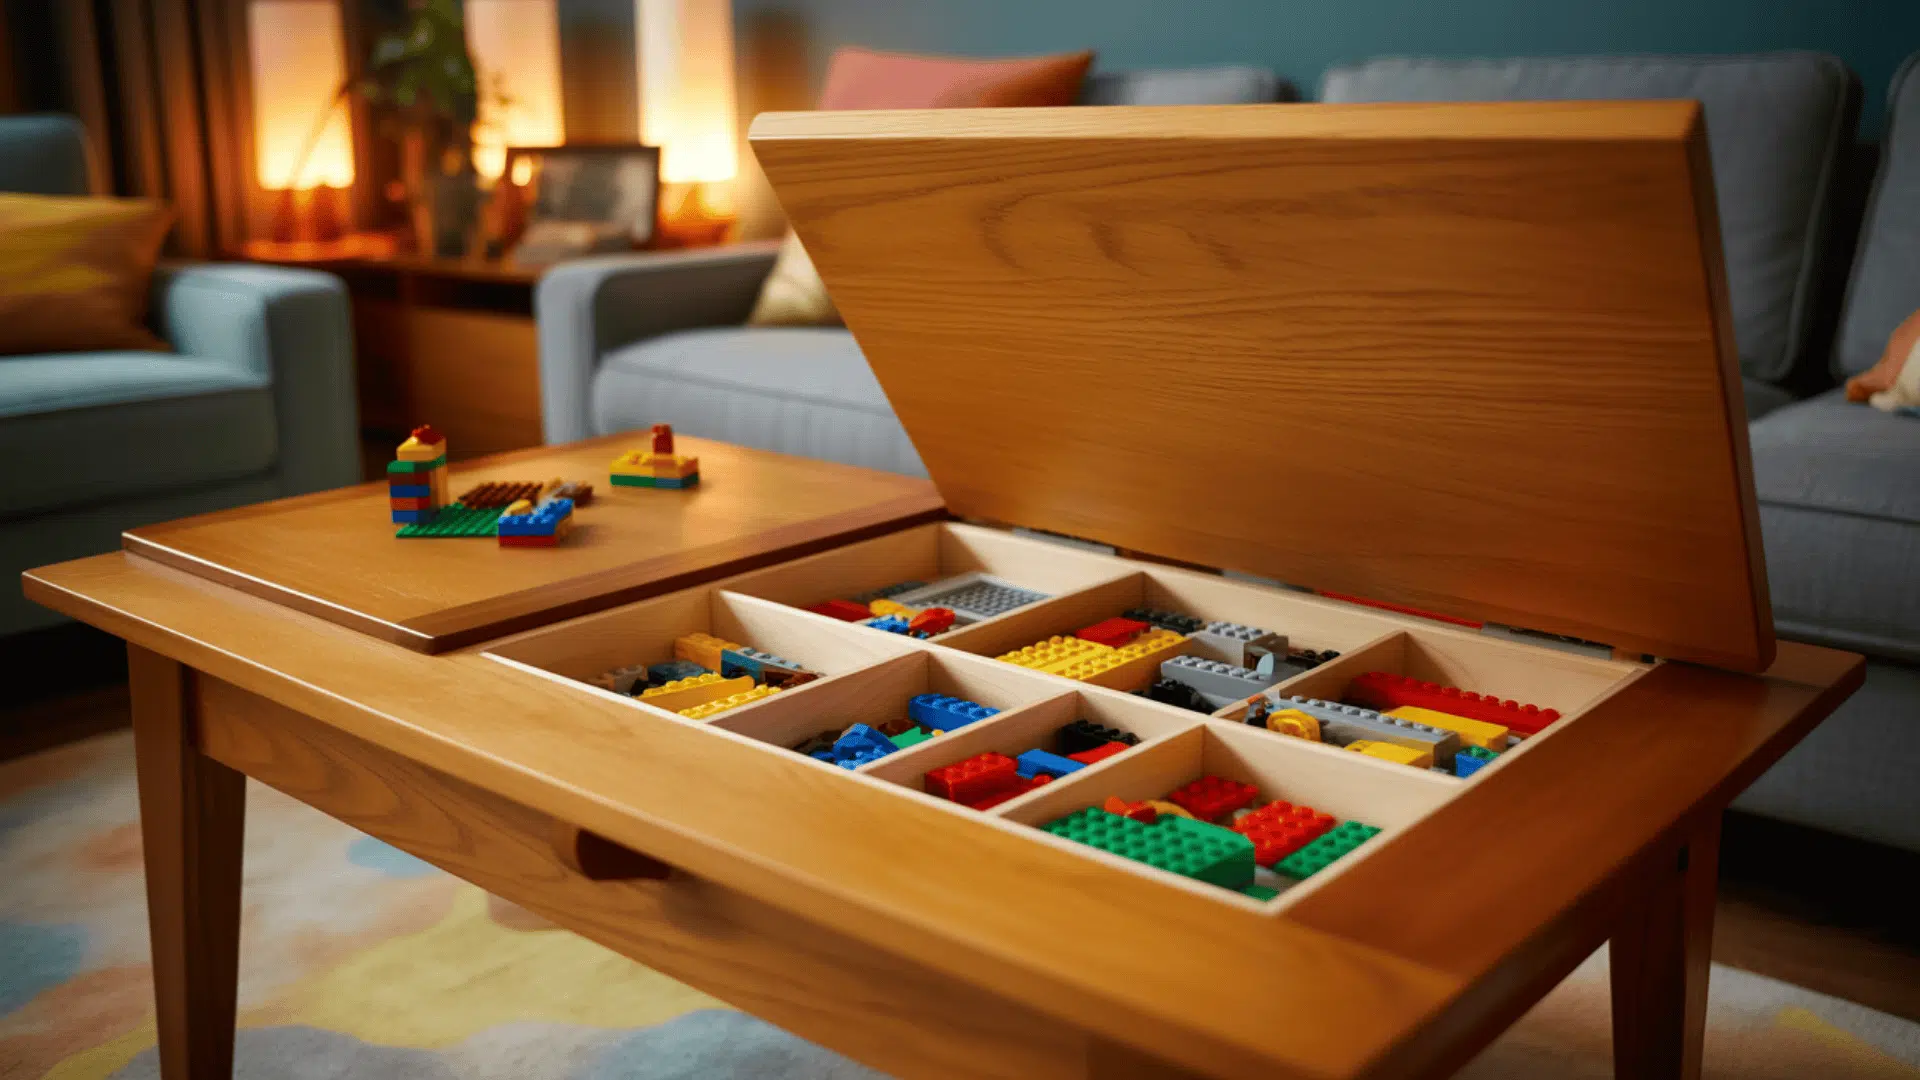
Install a hinged lid on the tabletop that lifts to reveal hidden storage for Lego bricks. Line the inside with colorful contact paper for a neat look.
- Tools and Materials Needed: Table with storage, hinges, Lego baseplates, contact paper, adhesive, and screwdriver
- Creative Addition: Add fabric lining or colored paper inside the compartment for a finished design
- Maintenance Tip: Oil the hinges occasionally to keep them opening smoothly
9. Lego Table from an Old Dresser
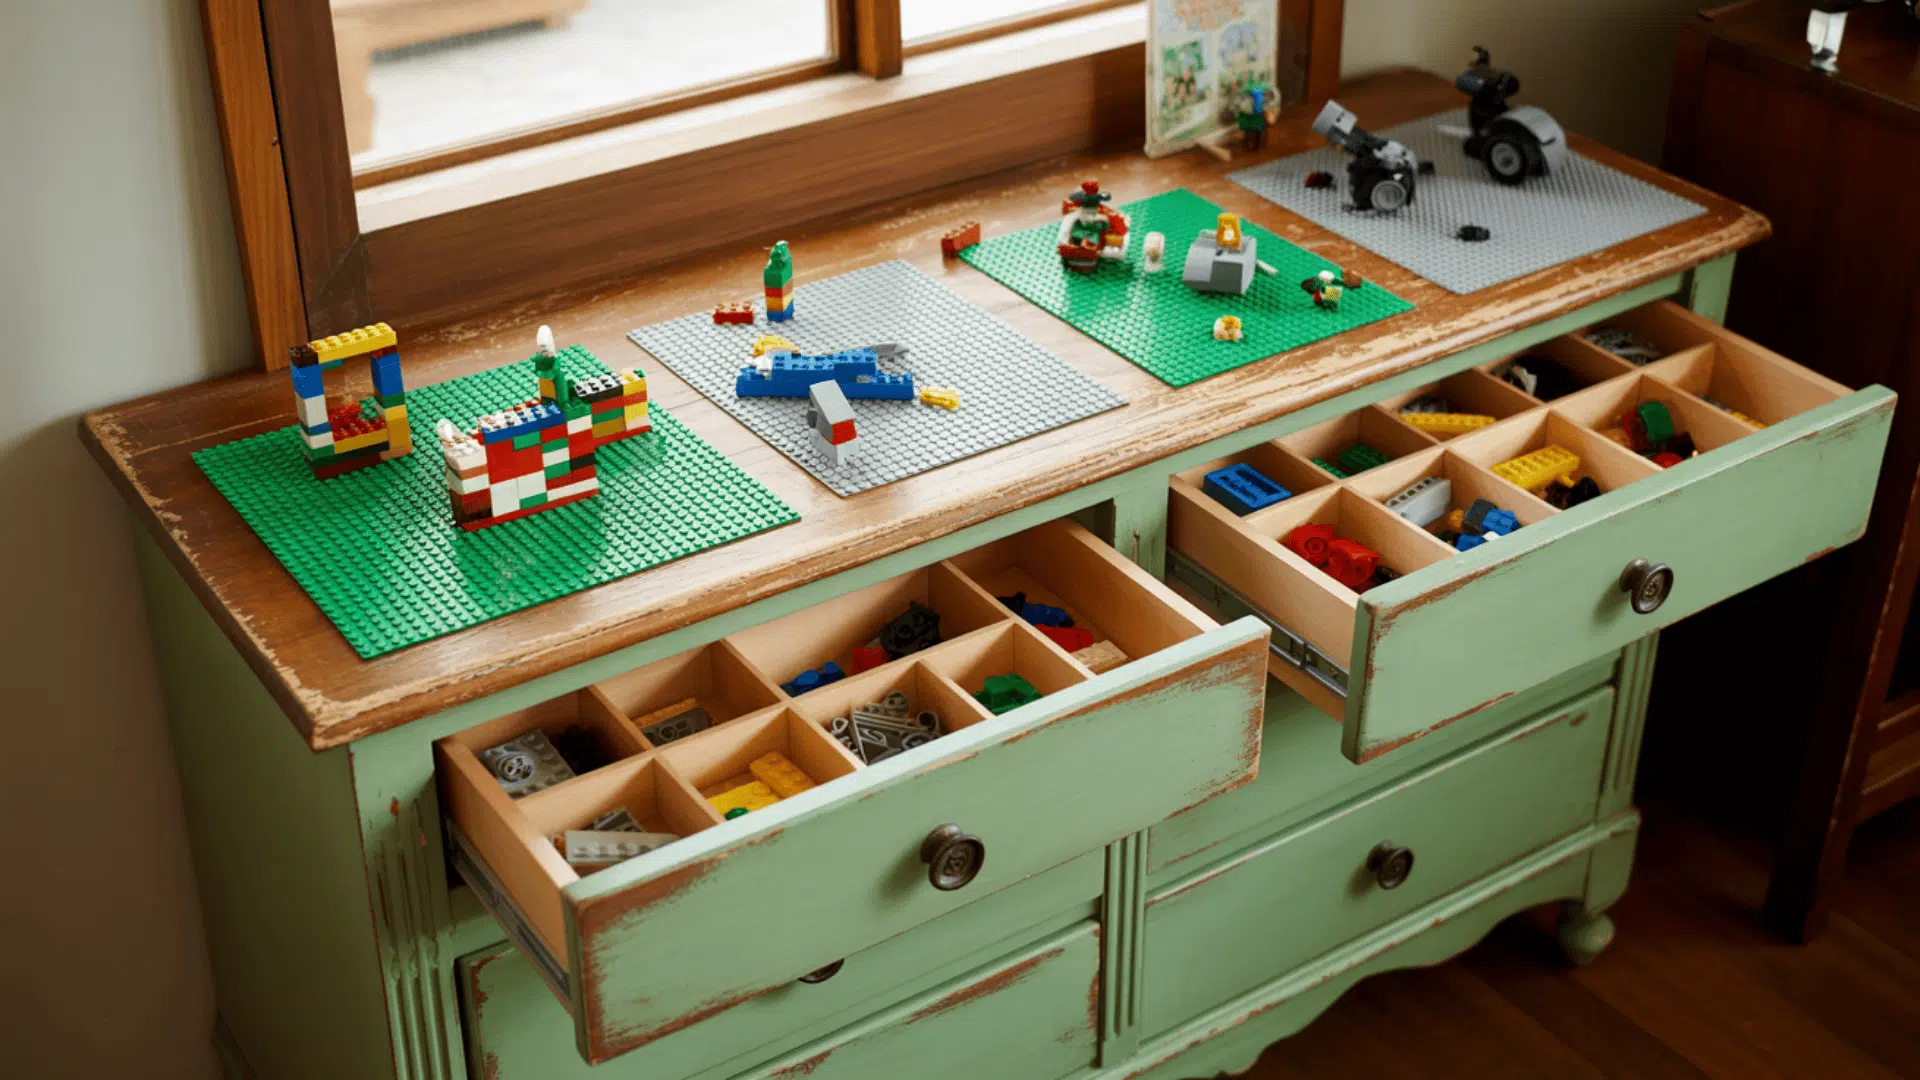
Remove the top drawers of an old dresser, reinforce the surface, and attach Lego baseplates. Use the lower drawers for storing sorted bricks.
- Tools and Materials Needed: Old dresser, Lego baseplates, paint, screws, brush, and storage bins
- Creative Addition: Paint the drawers in classic Lego brick colors for a themed appearance
- Maintenance Tip: Keep the drawers organized by color to make cleanup easy
10. Custom Corner Lego Station
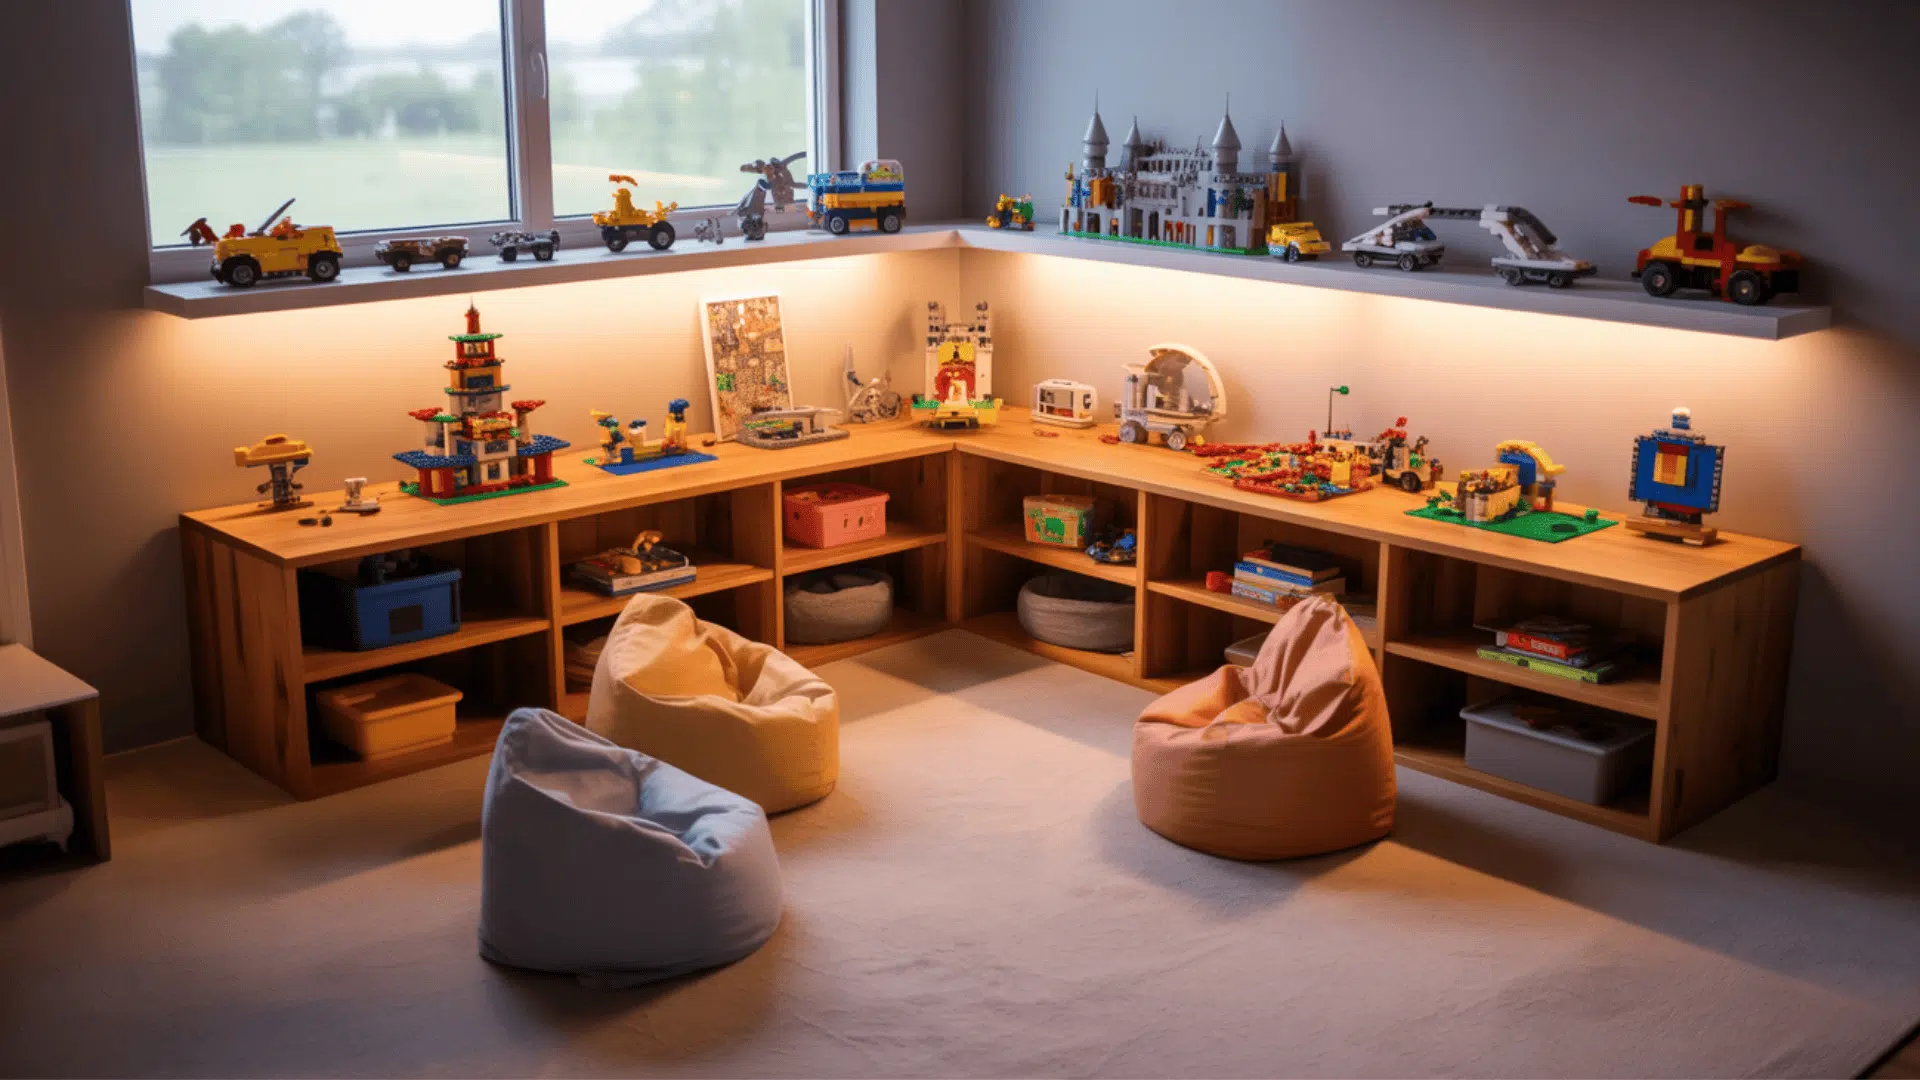
Build an L-shaped table to fit into a room corner, giving more space for group builds. Add a lip to the border to prevent pieces from sliding off.
- Tools and Materials Needed: Wood panels, corner brackets, Lego baseplates, screws, drill, and shelf boards
- Creative Addition: Add floating shelves above to display finished Lego creations
- Maintenance Tip: Vacuum the corners regularly to keep small bricks from getting lost
Each design offers different benefits. Pick one that matches available space, budget, and the builder’s age for maximum enjoyment and use.
Choose the Right Adhesive for Your Lego Table Project
Securing baseplates properly keeps them from shifting during intense building sessions. The right attachment method depends on whether the lego table DIY needs permanent or removable plates.
| Method | Best For | Durability | Application Technique |
|---|---|---|---|
| Hot Glue | Permanent setup | Very strong | Apply dots in corners and center, press firmly for 30 seconds |
| E6000 Adhesive | Long-term use | Extremely strong | Spread the thin layer evenly, clamp for 24 hours |
| Gorilla Glue | Moisture-prone areas | Very strong | Dampen surface lightly, apply sparingly, clamp for 1-2 hours |
| Elmer’s Glue | Kid-safe projects | Moderate | Cover back completely, let dry overnight with a weight on top |
| Double-Sided Tape | Temporary/rental homes | Moderate | Stick strips around edges, smooth out air bubbles |
| Velcro Strips | Changing layouts | Good | Attach one side to the table, the other to the baseplate back |
Common Mistakes to Avoid When Building a Lego Table
Even simple DIY lego table projects can go wrong without proper planning. Learning from others’ errors saves time, materials, and disappointment.
- Skipping measurements leads to tables that are too tall or short, causing back pain and discouraging use
- Weak adhesive choices result in baseplates peeling off mid-build, frustrating everyone involved
- Ignoring storage means no place for loose bricks, so the mess returns quickly
- Using particle board or thin materials causes warping and won’t hold baseplates securely
- Forgetting edge protection leaves sharp corners that pose safety risks for younger builders
- Inadequate spacing makes the surface cramped, limiting creativity and making the building uncomfortable
The Bottom Line
Creating a DIY lego table changes how families organize and enjoy building time together. The right materials, proper baseplate attachment, and smart storage solutions turn any ordinary table into a dedicated creative space.
Most projects are completed in a single weekend with basic tools and supplies from local hardware stores.
The finished table keeps bricks contained, saves money compared to store-bought versions, and provides years of organized building fun.
Ready to reclaim those living room floors? Grab supplies this weekend and start building that perfect table today!