Building your own firewood rack doesn’t require fancy tools or complicated plans. I’ve found that with some basic materials and a free afternoon, you can create a sturdy holder that keeps your wood dry and organized.
Most DIY firewood racks use simple materials like scrap lumber, cinder blocks, or pallets and require only basic skills.
This blog provides easy, step-by-step instructions for building a practical firewood storage solution that fits your space and needs.
Why Build a DIY Firewood Rack?
Storing firewood properly makes all the difference between dry, ready-to-burn logs and damp, moldy wood that smokes up the house.
A DIY firewood rack keeps wood elevated off the ground, allowing air to circulate freely so logs dry faster and stay rot-free. This simple structure also keeps pests away from the wood pile.
Building one at home saves significant money compared to purchasing pre-made options. Plus, homemade racks offer flexibility, are easy to move, adjust, or expand as storage needs change.
Picture this: wood dumped on wet ground, slowly absorbing moisture, versus neatly stacked logs on a sturdy rack, protected and accessible. That’s the transformation a proper firewood rack DIY project delivers.
Estimated Time and Cost
A DIY firewood rack project typically takes about an hour, making it a quick weekend task. The total cost hovers around $80- $100, though prices may fluctuate depending on local lumber prices and material choices.
Some builders spend less by using reclaimed wood or repurposed materials. The goal remains affordable, creating a functional DIY firewood holder without breaking the bank.
Compared to store-bought racks that often cost $150 or more, this homemade approach delivers excellent value while providing the same durability and protection for stored logs.
What Tools and Materials You’ll Need
You’ll only need a few basic materials and tools for this DIY firewood rack project:
- Cinder blocks (10): form the sturdy base and elevate the rack off the ground
- 2×4 lumber: eight 8-foot pieces for the frame, eight 4-foot pieces for the vertical supports, and eight 14-inch pieces for the end connectors
- Fasteners: screws or nails long enough to secure the 2x4s together
- Tools: a handsaw or chop saw, a drill or hammer, a tape measure, and a level
- Extras: a strip of roofing tar paper, tarp, or plastic sheet to protect the top from rain, and a few staples or small nails to hold it in place
Step-by-Step Instructions to DIY Firewood Rack
Building this DIY firewood rack involves six straightforward steps that take roughly an hour, transforming basic materials into a functional, durable wood storage solution.
Step 1: Prepare the Base
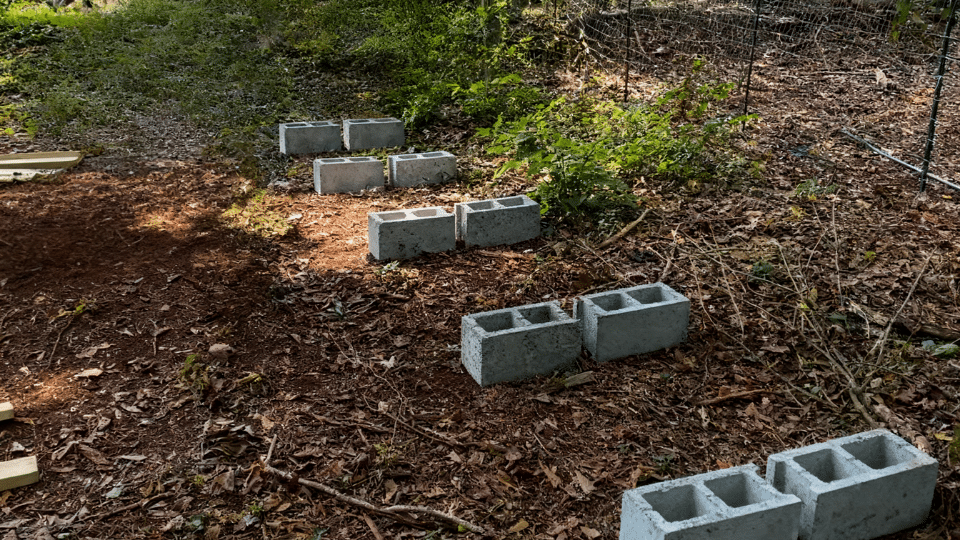
Place your cinder blocks on flat, level ground with the holes facing up and down rather than sideways, as this orientation provides better vertical strength and allows you to insert 2×4 supports later if needed.
Place two cinder blocks every 4 feet to provide solid support at each end of the rack, and add one block in the middle of each section for extra stability.
Step 2: Build the Main Frame
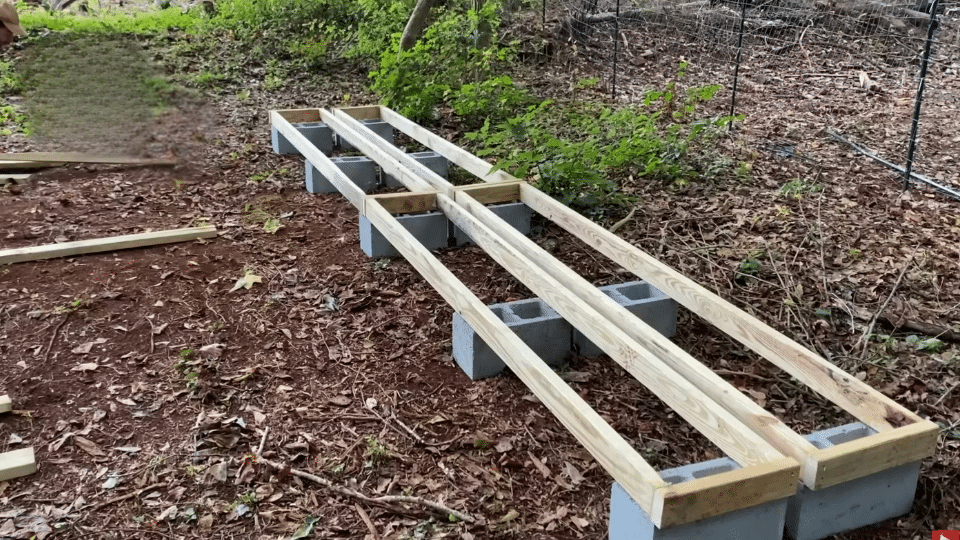
Take two 8-foot 2x4s and two 14-inch 2x4s for your base frame. Position them upright on their 2-inch edge rather than laying them flat to form a long rectangle.
This vertical orientation provides more load strength and prevents warping under heavy firewood. Secure all four corners firmly with screws or nails.
Step 3: Add Vertical Supports
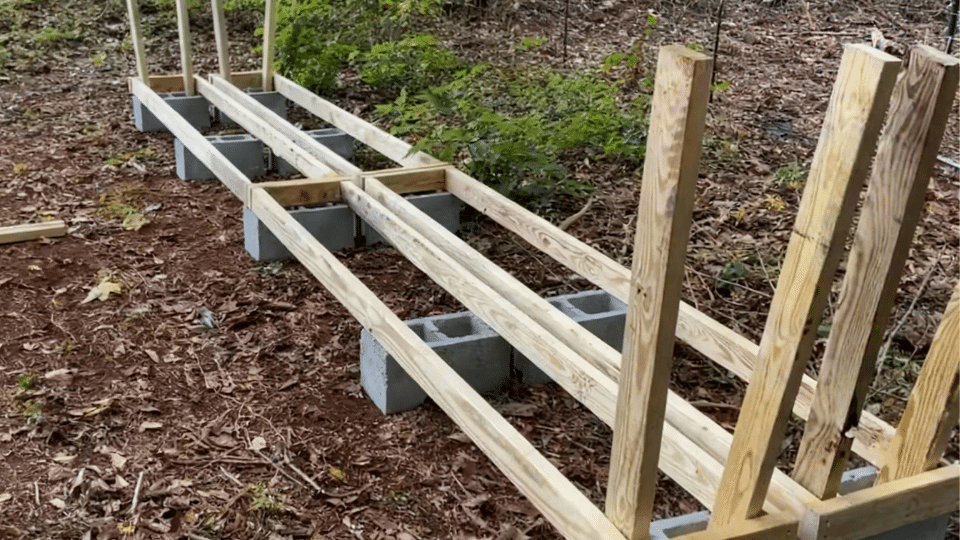
Insert one 4-foot 2×4 into each cinder block hole at both ends of the rack, creating a total of four vertical supports on each side.
These upright 2x4s act as sturdy posts that hold the stacked firewood securely in place and prevent logs from rolling or spilling out as you add more wood to the pile.
Step 4: Load Your Firewood
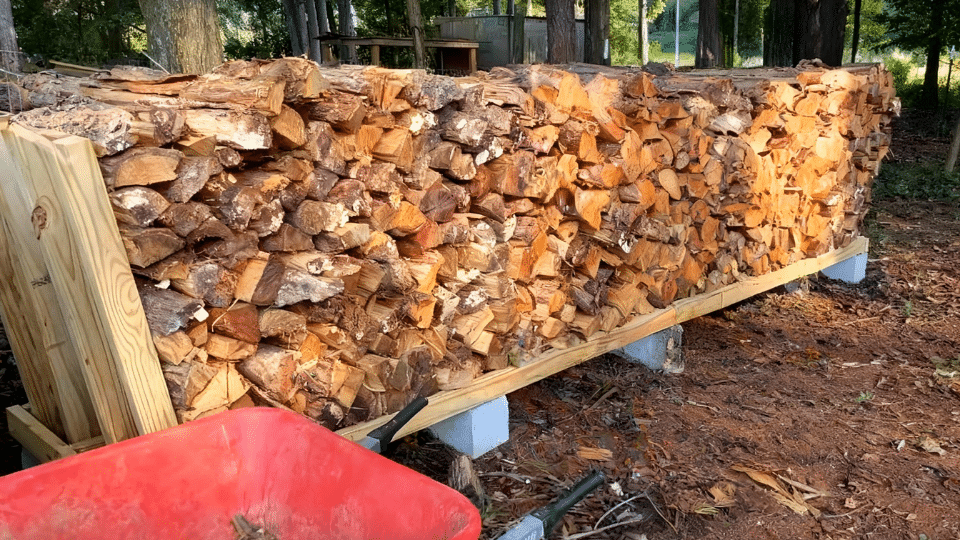
Now comes the easy and satisfying part: start filling your newly built rack with firewood, stacking the logs neatly between the vertical supports.
Each rack can hold up to a cord and a half of wood when properly stacked, and you’ll likely find that it takes longer to fill it with all your firewood than it actually did to build the entire structure!
Step 5: Protect Your Firewood
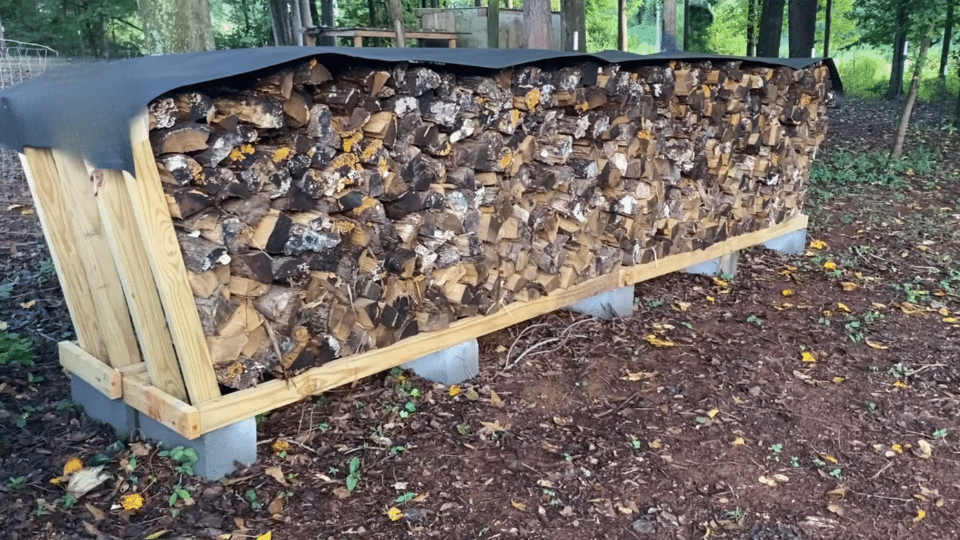
Avoid wrapping the entire rack in plastic as this traps moisture, and instead, drape a strip of roofing tar paper, thin tarp, or plastic sheet over just the top portion.
Secure it using a few staples or small nails along the sides and top edges, but leave the sides completely open for airflow to help the wood dry faster and prevent mold or rot.
For a more detailed guide and explanation, refer to the YouTube video below.
Easy Upgrades for a More Permanent Firewood Rack
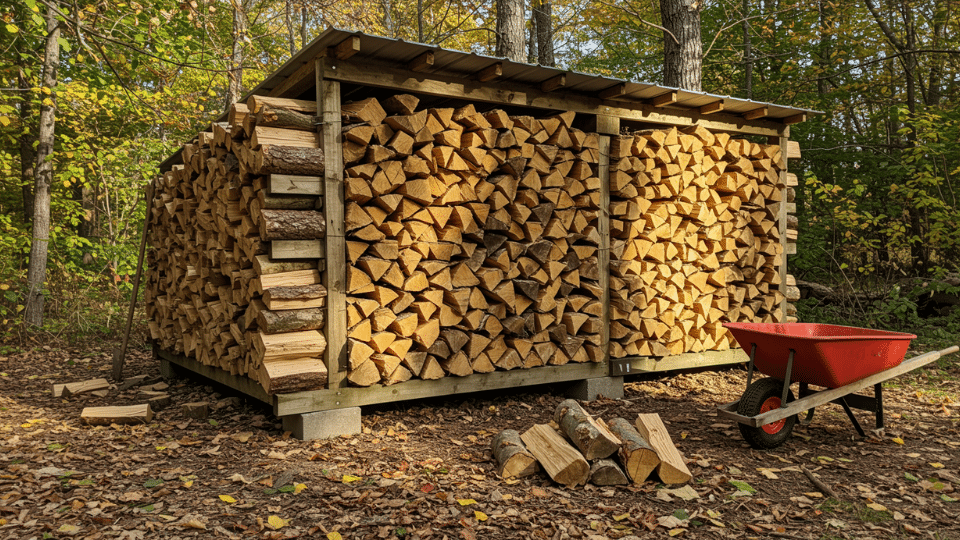
Once the basic DIY firewood rack stands are complete, consider a few simple upgrades to boost longevity and functionality. Adding a slanted roof protects logs from rain and snow, keeping wood drier year-round.
Treating lumber with weather-resistant stain or sealant prevents warping and extends the rack’s lifespan. For added stability, anchor the structure to the ground using concrete footings or metal stakes, especially helpful in windy areas. Installing a back panel creates extra support and stops logs from rolling off.
These modest tweaks and touches change a basic diy firewood holder into a sturdy, permanent storage solution that serves reliably for years, all while maintaining the budget-friendly spirit of the original build.
Helpful Tips and Best Practices
Following a few smart guidelines ensures the firewood rack DIY performs well season after season, keeping wood dry and accessible.
- Pick the right spot: Choose a sunny, breezy location for faster drying and better air circulation.
- Check stability: Ensure the base stays level over time; shifting ground affects overall balance.
- Consider treated lumber: For long-term outdoor use, treated wood resists rot, though it’s an optional upgrade.
- Keep dimensions practical: Avoid building too tall or deep, balanced racks remain accessible and stable under heavy loads.
- Maintain a safe distance: Position the diy firewood holder several feet from buildings to prevent pests from migrating indoors.
- Stack strategically: Alternate log directions to create an interlocking, stable pile.
- Scale up easily: Building two racks doubles storage without added complexity.
Wrapping It Up
I recommend building a firewood rack using materials you already have and placing it in a well-drained spot near your fireplace.
Even if your first rack isn’t perfect, it’ll still do its main job of keeping your firewood dry, organized, and ready to burn whenever you need it.
Once you see how simple it is, you might want to build a second one for different wood sizes. Ready to get started? Grab your tools and pick your favorite design.