Orchids whisper secrets in the language of blooms, but here’s the mystery: fertilizing orchids isn’t like feeding regular houseplants.
These exotic beauties play by different rules. Feed them wrong, and they’ll stubbornly refuse to flower, or slowly fade away.
But master how to fertilize orchids, and you’ll unlock spectacular blooms that seem almost magical. The real question isn’t if you should feed them, but how and when. Ready to crack the code?
What Nutrients Do Orchids Need?
Orchids require a balanced blend of macronutrients and micronutrients to support their complex growth cycles.
Understanding these essential elements helps growers choose the right fertilizers and maintain healthy plants that produce stunning blooms season after season.
- Nitrogen: Promotes lush foliage growth and strengthens leaf development, giving orchids the vibrant green color that indicates healthy plants.
- Phosphorus: Encourages robust root systems and triggers flower production, making it crucial during blooming phases.
- Potassium: Supports overall plant health, disease resistance, and helps orchids efficiently use water and nutrients.
- Calcium: Strengthens cell walls and supports root tip development, preventing common growth disorders.
- Magnesium: Essential for chlorophyll production and photosynthesis, keeping leaves green and productive.
- Iron: Prevents leaf yellowing and maintains the plant’s ability to produce energy through photosynthesis.
Factors to Consider Before Fertilizing Orchids
Successful fertilizing of orchids depends on multiple variables beyond basic schedules. Understanding these factors ensures proper nutrition tailored to specific needs and conditions.
- Orchid Species Requirements: Different varieties have distinct needs; Phalaenopsis tolerate frequent feeding, while Cattleyas prefer lighter applications, and Dendrobiums need varying levels based on growth stage.
- Water Quality Impact: Hard water builds up salts requiring less fertilizer, while soft water needs more complete feeding; flush pots monthly to prevent accumulation.
- Growing Medium Considerations: Bark drains quickly and requires frequent feeding; moss retains nutrients longer; and inorganic media requires consistent fertilization.
- Environmental Conditions: Bright, warm conditions need regular feeding, while low light or cool temperatures require reduced fertilizer; match feeding to your environment.
Adjusting these factors creates customized care that promotes healthy growth and blooms. Monitor your orchid’s response and modify your approach as conditions change.
How to Fertilize Orchids the Right Way?
Proper fertilization technique matters just as much as choosing the right product or schedule.
Following proven methods protects fine orchid roots from chemical burns while ensuring plants absorb maximum nutrients for vigorous growth and stunning blooms.
1. Best Fertilizer Types and Ratios

Selecting appropriate fertilizer formulas at different growth stages optimizes orchid health and flowering performance. Fertilizing orchids with balanced nutrition provides the foundation for year-round success.
- Balanced formulas like 20-20-20: Ideal for general maintenance throughout the growing season, providing equal parts nitrogen, phosphorus, and potassium that support roots, leaves, and flowers simultaneously.
- Switching to bloom boosters during spikes: When flower spikes appear, transition to higher phosphorus ratios, such as 10-30-20 or 15-30-15, to strengthen buds and produce larger, longer-lasting blooms with more vibrant colors.
2. The Weakly Weekly Method

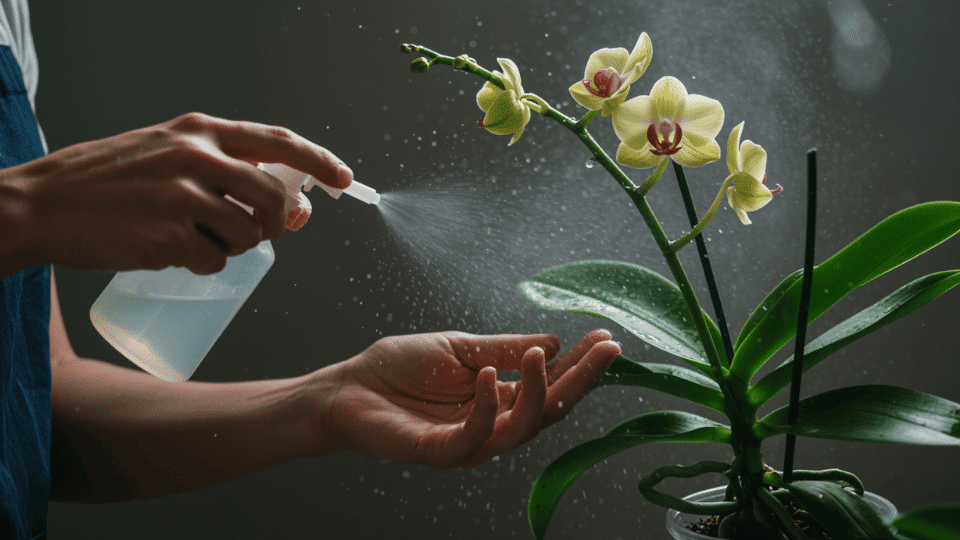
The “weakly weekly” approach represents the gold standard for fertilizing orchids safely and effectively, mimicking the gentle, consistent nutrition orchids receive in nature through light rainfall and organic debris.
- Explain dilution and frequency: Mix fertilizer at one-quarter to one-half the manufacturer’s recommended strength, and apply every week during active growth to provide steady nutrition without overwhelming roots.
- Why gentle feeding prevents root burn: Diluted solutions deliver nutrients gradually, preventing salt accumulation that damages tender root tips and causes brown, shriveled roots that can’t absorb water or minerals properly.
3. Step-by-Step Instructions
Following a methodical process ensures thorough, safe fertilizer application that nourishes orchids without risking root or crown damage.
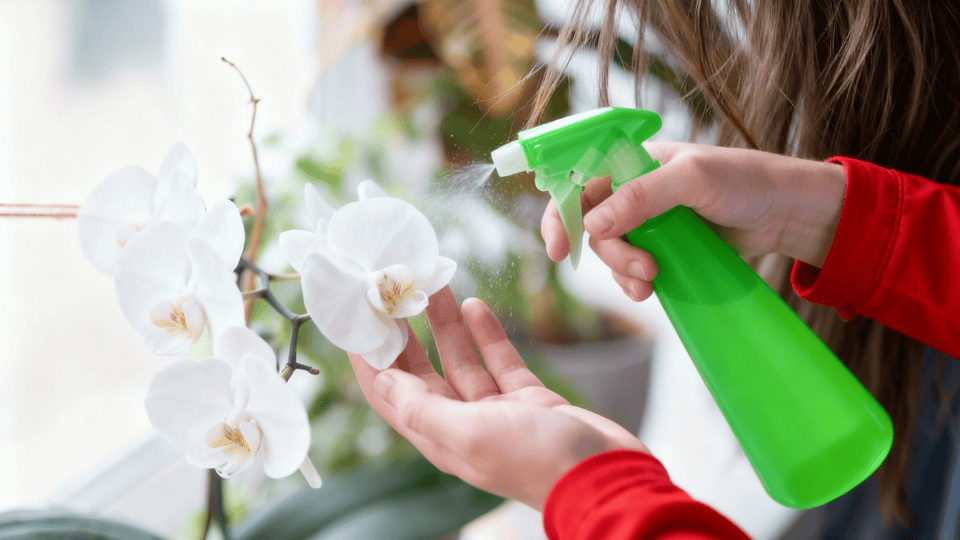
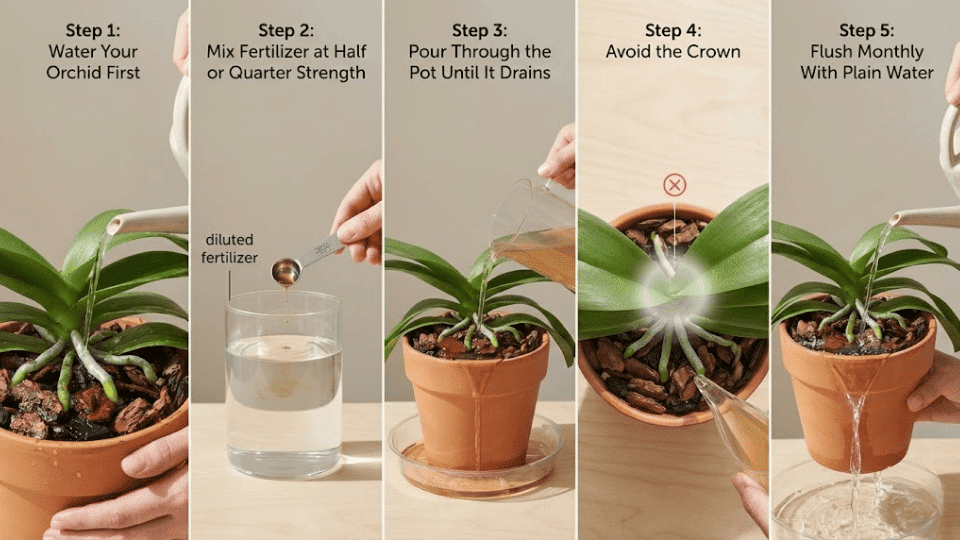
- Water your orchid first: Pre-moistening the potting medium prevents concentrated fertilizer from shocking dry roots and ensures even distribution throughout the pot.
- Mix fertilizer at half or quarter strength: Dilute your chosen formula in room-temperature water according to the weakly weekly method for safe, consistent feeding.
- Pour through the pot until it drains: Apply fertilizer solution slowly over the entire surface, allowing it to flow through drainage holes and flush out accumulated salts.
- Avoid getting fertilizer solution in the crown: Keep fertilizer away from the center where leaves meet the stem, as pooled solution can cause crown rot in Phalaenopsis and similar orchids.
- Flush once a month with plain water: Run clear water through pots monthly to remove salt deposits that build up even with diluted fertilizers, preventing root damage and nutrient lockout.
Signs Your Orchid Needs Fertilizer
Orchids communicate their nutritional needs through visible changes in appearance and growth patterns. Recognizing these warning signs early allows growers to adjust their feeding routine before deficiencies seriously impact plant health.
- Pale or yellowing leaves indicate nitrogen deficiency and insufficient chlorophyll production
- Weak new growth appears stunted, thin, or smaller than previous leaves and shoots
- No blooms despite mature plant age suggest a lack of phosphorus needed for flower formation
- Slow root development with few white or green root tips signals inadequate nutrients for root growth
Orchid Fertilizing Schedules
Timing fertilizer applications to match orchid growth patterns maximizes nutrient uptake and prevents waste or root damage.
A strategic feeding schedule aligned with seasonal changes and blooming cycles ensures orchids receive proper nutrition when they need it most while avoiding overfeeding during slower growth periods.
| SEASON | FREQUENCY | NOTES |
|---|---|---|
| Spring | Weekly | Start increasing strength as new growth emerges |
| Summer | Weekly | The highest feeding period with active root and leaf development |
| Fall | Every two weeks | Slow down as growth slows and temperatures drop |
| Winter | Monthly or not at all | Depends on the species and whether the plant enters dormancy |
Blooming Cycle Adjustments
How to fertilize orchids changes dramatically during the flowering stages. When flower spikes emerge, continue regular feeding with balanced formulas to support spike development.
During active blooming, reduce fertilizer frequency to every two weeks, as blooms require less nutrition than growing foliage.
After flowers fade, cut back feeding significantly for 4-6 weeks, allowing the plant to rest and redirect energy toward root and leaf recovery.
Resting Period Rules
Orchids enter rest periods when new growth stops, leaves mature, and no flower spikes appear, typically after blooming or during cooler months.
During dormancy, fertilizing orchids should be reduced or stopped entirely, as roots absorb minimal nutrients when growth slows.
Excessive feeding during rest causes salt accumulation that burns roots and stresses plants, making reduced fertilization essential for long-term orchid health and encouraging the next blooming cycle.
Common Mistakes When Fertilizing Orchids
Even experienced growers can fall into fertilization traps that harm rather than help their orchids. Avoiding these frequent errors protects plants from nutrient burns, salt damage, and poor blooming performance while maximizing the benefits of proper feeding.
- Applying fertilizer to dry roots: Pouring fertilizer solution onto dry potting media shocks roots and causes chemical burns, as concentrated nutrients contact unprepared root tissues without adequate moisture buffering.
- Overfeeding: Using full-strength formulas or fertilizing too frequently leads to toxic salt buildup that damages root tips, causes leaf burn, and prevents nutrient absorption despite abundant feeding.
- Not flushing salts: Skipping monthly plain water rinses allows mineral deposits to accumulate in bark or moss, creating crusty white residue that blocks roots from accessing water and nutrients.
- Using random ratios not suited to orchids: Garden fertilizers designed for heavy-feeding plants contain concentrations too strong for orchids’ delicate root systems and lack the balanced micronutrients these epiphytes require for optimal health.
Wrapping It Up
Fertilizing orchids doesn’t have to feel complicated once you understand the basics. Remember: weak is better than strong, consistency beats randomness, and your orchid will tell you what it needs through its leaves and blooms.
Start with diluted fertilizer, then adjust as needed based on your orchid’s response.
Now that you know the secrets, it’s time to put them into action. Grab your fertilizer, mix it up, and give your orchid the nutrition it’s been craving. Your next stunning bloom is waiting!