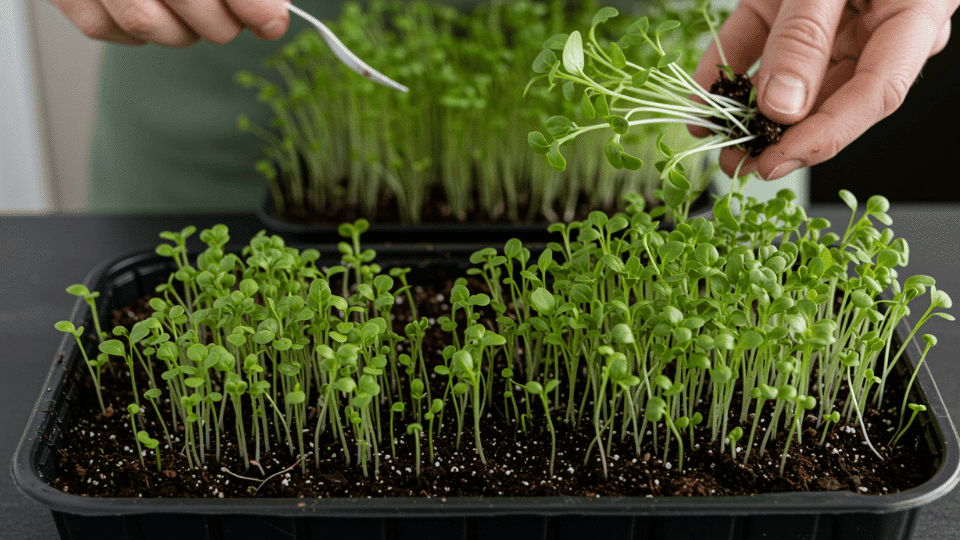
Fresh, crunchy greens in just days; right from your kitchen counter. Learning how to grow microgreens indoors is easier than you think, and you don’t need a garden or fancy equipment.
These tiny powerhouses pack serious nutrition and flavor into plants you can harvest in 1-2 weeks.
Whether you want fresh ingredients year-round or a fun indoor project, microgreens deliver fast results with minimal effort. Ready to turn your kitchen into a mini farm?
What Are Microgreens
Microgreens are young vegetable and herb seedlings harvested at their first true leaf stage, typically seven to twenty-one days after germination.
These nutrient-dense greens pack significantly more vitamins, minerals, and antioxidants than their mature counterparts, making them a powerhouse addition to any meal.
Learning how to grow microgreens indoors allows gardeners to enjoy these concentrated flavors and nutritional benefits year-round.
- Radish: Fast-growing with a spicy, peppery kick that adds bold flavor to salads and sandwiches within five to seven days.
- Sunflower: Nutty, crunchy texture perfect for beginners mastering how to grow microgreens indoors with reliable germination rates.
- Pea Shoots: Sweet, tender greens offering exceptional yields and simple cultivation requirements for container growing.
Microgreens vs Sprouts vs Baby Greens
Understanding the distinctions between microgreens, sprouts, and baby greens helps gardeners make informed decisions about what to grow indoors.
Knowing how to grow microgreens indoors becomes easier once these differences are clear, allowing growers to select the option that best fits their kitchen goals and available resources.
| Feature | Sprouts | Microgreens | Baby Greens |
|---|---|---|---|
| Growth Time | 2-7 days | 7-21 days | 3-6 weeks |
| Growing Medium | Water only | Soil or growing medium | Soil or hydroponic systems |
| Parts Consumed | Entire plant, including seeds and roots | Stems and leaves only | Mature leaves only |
| Flavor Profile | Mild, fresh | Intense, concentrated | Mild to moderate |
| Nutritional Density | Moderate | Very high | Moderate |
| Growing Difficulty | Easy | Easy to moderate | Moderate |
Benefits of Growing Microgreens Indoors
Growing microgreens indoors offers remarkable advantages that appeal to both new and experienced gardeners seeking fresh, homegrown produce.
Understanding how to grow microgreens indoors unlocks a sustainable food source that fits into modern lifestyles, providing consistent harvests regardless of season or climate conditions.
- Year-Round Growing: Indoor environments eliminate seasonal limitations, allowing continuous cultivation and harvests every few weeks regardless of outdoor temperatures or weather patterns.
- Fast Harvest Cycles: Most varieties reach harvestable size within seven to fourteen days, providing nearly instant gratification compared to traditional gardening timelines.
- Minimal Space Requirements: Kitchen counters, windowsills, or small shelving units provide sufficient room for productive microgreen operations without requiring yard space or elaborate setups.
- Exceptional Nutrient Density: These young greens contain up to forty times more vitamins and antioxidants than mature vegetables, delivering maximum nutrition in minimal portions.
Supplies You Need
While microgreen cultivation requires minimal investment compared to traditional gardening, selecting appropriate materials ensures healthy growth, proper drainage, and optimal harvests.
| Supply Category | Recommended Options | Key Features | Best For |
|---|---|---|---|
| Containers and Trays | 10×20 growing trays, shallow plastic containers, ceramic dishes | Drainage holes essential, 1-2 inches deep | Large batches or decorative displays |
| Growing Mediums | Coconut coir, potting soil mix, hemp mats, hydroponic pads | Excellent water retention, sterile, lightweight | Most microgreen varieties |
| Seeds | Radish, sunflower, broccoli, pea shoots, basil | Untreated, high germination rates, organic preferred | Quick harvests or specialty flavors |
| Lighting Options | LED grow lights, fluorescent T5 bulbs, natural sunlight | Full-spectrum, adjustable height, energy-efficient | Year-round indoor cultivation |
| Watering Tools | Spray bottle, bottom watering tray, small watering can | Gentle application, consistent moisture control | Delicate seedlings and established greens |
How to Grow Microgreens Indoors Step-by-Step
Mastering the art of growing microgreens indoors requires following a systematic process that ensures healthy germination, vigorous growth, and flavorful harvests.
Step 1: Prepare Your Container
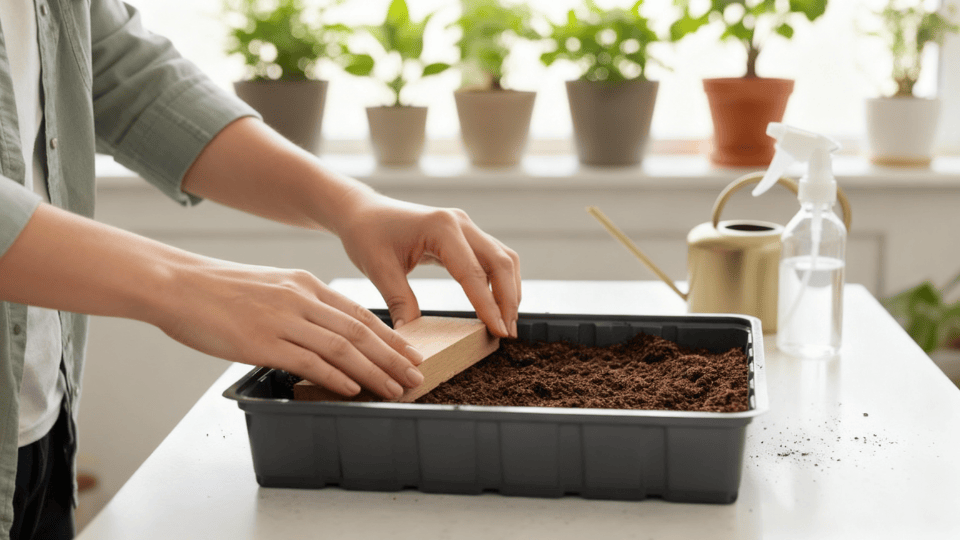
Select a clean container with drainage holes, measuring 1 to 2 inches deep, for optimal root development. Fill with growing medium, leaving half an inch below the rim.
Press the surface flat to ensure even seed contact and consistent moisture distribution throughout cultivation.
Step 2: Spread the Seeds
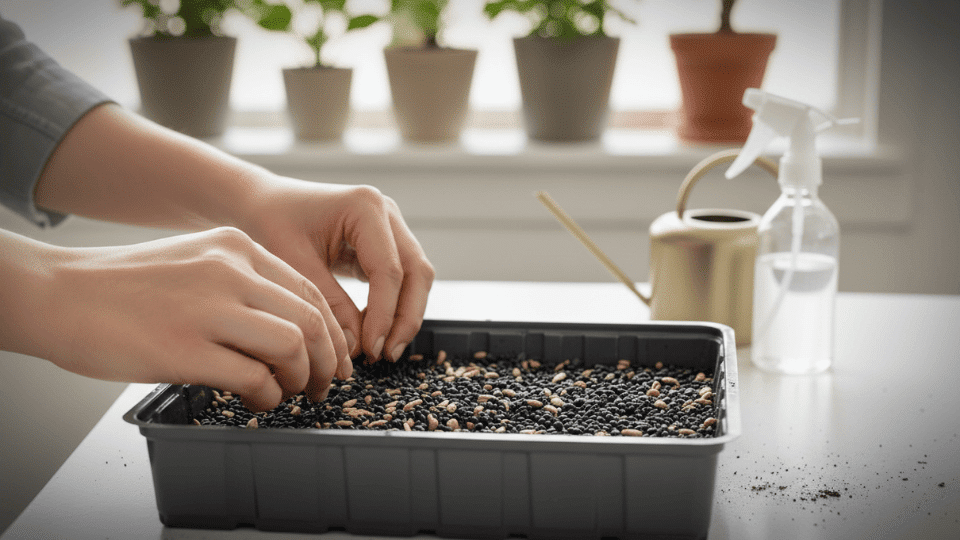
Distribute seeds densely across the growing surface, nearly touching but not overlapping in multiple layers. Pre-soak larger seeds, such as sunflowers, for 8 to 12 hours.
Learning to grow microgreens indoors requires understanding optimal seed density to achieve maximum yields without overcrowding.
Step 3: Cover for Germination
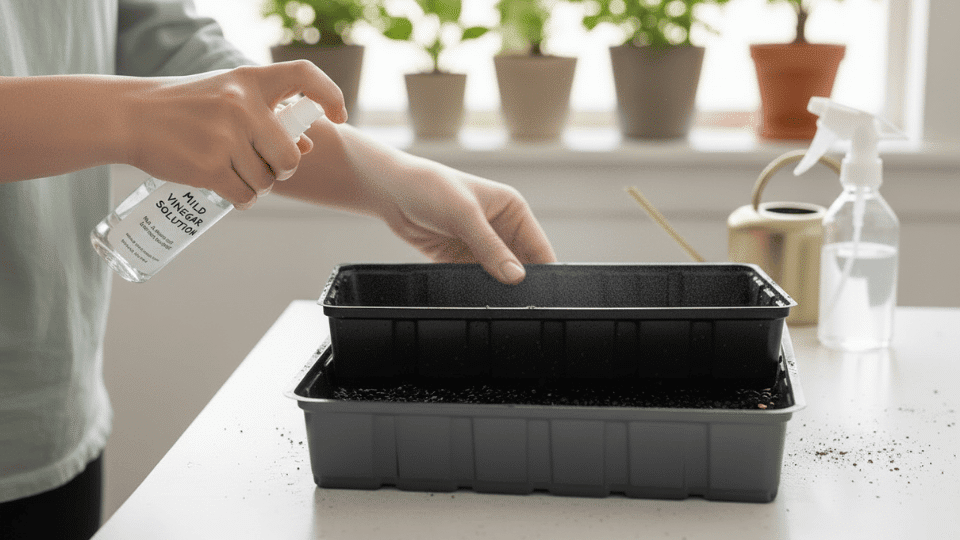
Place a second tray directly on seeded containers to create darkness and maintain humidity during germination. Keep covered for two to four days, misting lightly once or twice daily.
Remove the cover when stems reach 1 to 2 inches and are visible with seed leaves.
Step 4: Add Light
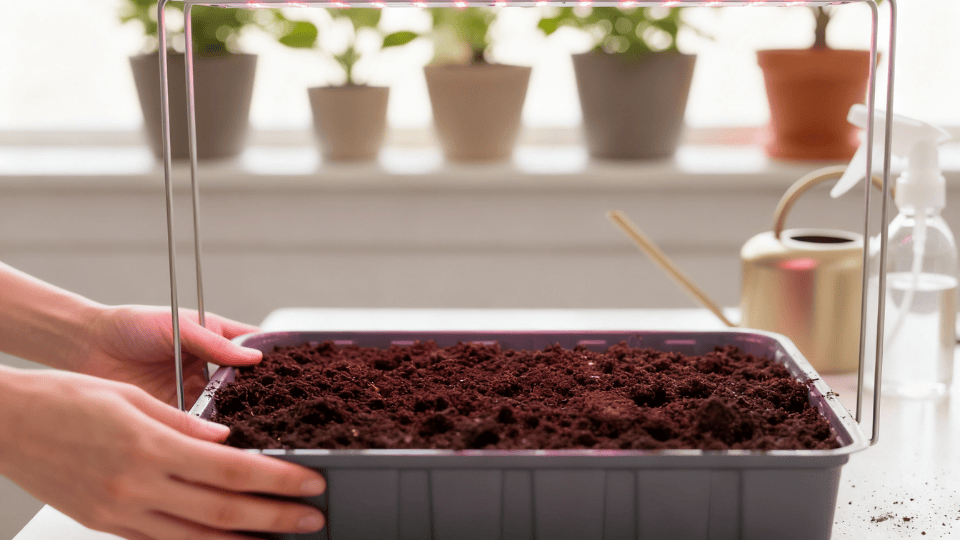
Position containers under grow lights or near bright windows receiving four to six hours of direct sunlight daily. Place LED lights 2 to 4 inches above the seedlings.
Provide 12 to 16 hours of light for vigorous growth and chlorophyll development when growing microgreens indoors.
Step 5: Water Properly
Maintain a consistently damp growing medium without waterlogging by bottom watering or gentle misting.
Place trays in water-filled containers for ten to fifteen minutes, allowing roots to absorb moisture upward. Proper watering is essential for learning to grow microgreens indoors successfully.
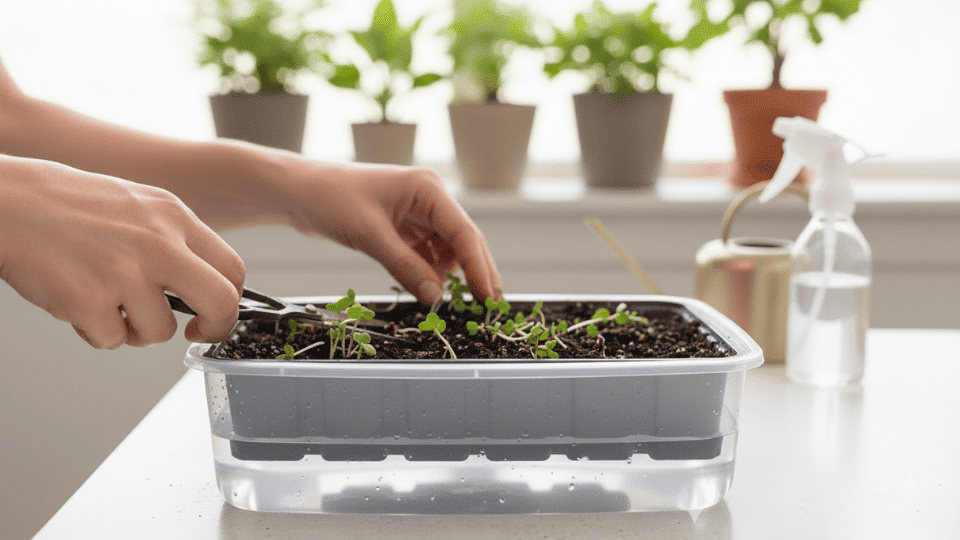
Step 6: Harvest
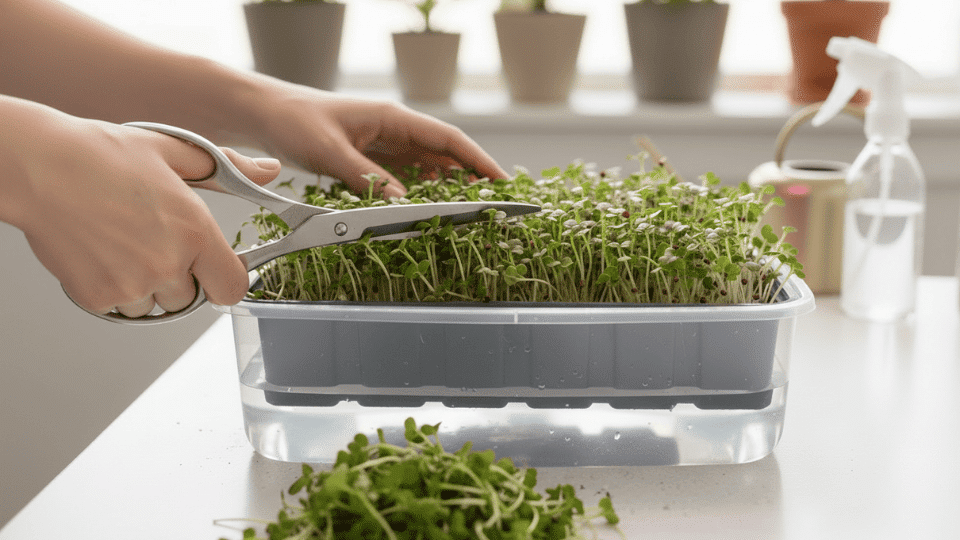
Cut microgreens just above the soil line when first true leaves develop, typically seven to twenty-one days after planting.
Use sharp scissors during morning hours for maximum crispness. Rinse gently, pat dry, and store in sealed containers for five to seven days.
Common Problems and Fixes
Even when following proper techniques for growing microgreens indoors, growers occasionally encounter challenges that affect crop quality and yield.
- Mold Issues: White fuzzy growth appears on the soil surface or stems due to excessive moisture and poor air circulation. Increase ventilation around growing trays using a small fan on a low setting. Reduce watering frequency and switch to bottom watering rather than misting.
- Falling Over: Seedlings become leggy and topple to the side due to insufficient light or stems growing too tall before harvest. Move containers closer to light sources, maintaining two to four inches between grow lights and plant tops. Increase daily light exposure to fourteen to sixteen hours.
- Patchy Growth: Uneven germination creates bare spots with some areas thriving while others fail to sprout properly. Ensure uniform seed distribution during planting without clumping seeds in concentrated piles. Press seeds firmly into the growing medium for consistent contact and moisture absorption.
How to Store and Use Microgreens
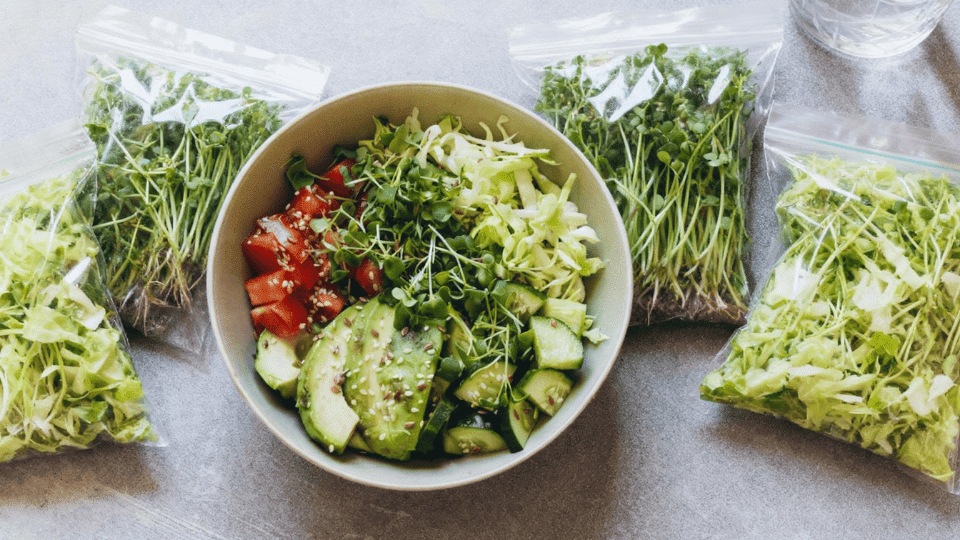
Maximizing the shelf life and culinary potential of homegrown microgreens requires proper storage techniques and creative kitchen applications.
These greens offer concentrated flavors and nutrition that makes countless dishes, turning everyday meals into restaurant-quality experiences with minimal effort.
Storing Tips
Proper storage extends microgreen freshness from harvest through consumption, maintaining crispness and flavor for up to one week.
- Place harvested microgreens in the refrigerator within 30 minutes of cutting to preserve nutrients and prevent wilting from exposure to room temperature.
- Store unwashed microgreens when possible, rinsing only the portions needed for immediate consumption to extend the shelf life of the remaining greens.
- Inspect stored containers every twenty-four hours, removing any yellowed or slimy leaves that could spread decay to healthy microgreens.
- Keep the refrigerator set between 35 and 40 degrees Fahrenheit for ideal microgreen storage conditions that slow deterioration without freezing leaves.
Ways to Eat Microgreens
Microgreens deliver intense flavors and nutritional benefits across numerous culinary applications, from simple garnishes to substantial recipe components.
- Sprinkle mixed microgreens over leafy salads to add concentrated flavor, visual appeal, and nutritional density without overwhelming other ingredients.
- Layer microgreens on sandwiches, wraps, and burgers as flavorful alternatives to traditional lettuce, offering superior taste and nutrition.
- Blend mild varieties like sunflower or pea shoots into morning smoothies for nutrient-dense additions that don’t overpower fruit flavors.
- Top soups, pasta dishes, grain bowls, and proteins with fresh microgreens immediately before serving for restaurant-quality presentation and flavor bursts.
- Incorporate microgreens into fresh vegetable juices to create concentrated nutrient-rich drinks that maximize the health benefits of homegrown produce.
Conclusion
Growing microgreens indoors is one of the simplest ways to enjoy fresh, homegrown food without waiting months for results.
You’ve learned the basics; choose your seeds, prep your containers, water carefully, and harvest at the right time. Now it’s your turn to experiment.
Try different varieties, adjust your lighting, and find which microgreens you love most. The best part?
You can start your first batch today with supplies you probably already have at home. Don’t overthink it; just plant, water, and watch them grow. Your first harvest is only a week away!