Most people get it wrong; they hold up a frame, step back, squint a little, and guess. Sometimes it looks fine. Other times, the whole wall feels off, and they can’t figure out why.
The problem isn’t the art or the frames, it’s the height. Hang something too high and it floats awkwardly. Too low and it disappears into the furniture.
The room just doesn’t come together. But knowing what height to hang pictures doesn’t require any special skills.
Why Hanging Art at Eye Level Creates Natural Harmony?
Picture placement does more than fill wall space; it sets the visual rhythm of an entire room.
When you learn at what height to hang pictures, it creates a natural flow between furniture, ceiling lines, and floor space.
The brain craves visual balance. Hanging art at eye level taps into how humans naturally perceive symmetry and proportion, making spaces feel comfortable and welcoming.
When you nail the art and each piece relates properly to its surroundings, the whole room elevates from basic to polished without any other changes.
The Standard 57 Inch Rule: Hang Art at Eye Level
The most reliable guideline in picture hanging is deceptively simple: center your artwork at eye level for instant visual harmony.
The magic number in art placement? Fifty-seven to sixty inches from the floor to the artwork’s center.
This standard comes straight from museums and galleries worldwide, where curators found out that this height range accommodates the average human eye level perfectly.
Walk through any professional gallery and you’ll notice this consistency; it’s no coincidence.
This measurement creates comfortable viewing angles without neck strain, allows artwork to anchor properly on walls, and maintains visual balance regardless of frame size.
Adapting the Art Height to Fit the People and the Space
The 57-60 inch rule is your foundation, not your ceiling. Adjust thoughtfully based on:
- Children’s Spaces: Lower artwork to 48-52 inches so kids can actually enjoy their wall art at their eye level
- Tall Households: Raise the center to 60-62 inches when most viewers stand above 6 feet
- Low Furniture Rooms: Keep closer to 57 inches to maintain a connection with seating and tables
- High-Ceiling Spaces: Use 58-60 inches to prevent art from feeling lost in vertical space
Measuring and Marking Before You Hang
Precision beats guesswork every time; a few minutes of measuring saves you from patched nail holes and crooked frames.
Tools You’ll Need
Gather these basic supplies before you start. Most are probably already in your toolbox. Having everything ready makes the hanging process quick and stress-free.
| Tool | Purpose |
|---|---|
| Tape measure | Measure artwork dimensions and wall heights accurately |
| Level | Ensure frames hang perfectly straight, not tilted |
| Pencil | Mark nail placement lightly before hammering |
| Hammer & nails/hooks | Secure hanging hardware into the wall |
| Hanging wire or D-rings | Attach to the frame back for support |
| Laser level (optional) | Project straight lines for multiple pieces or gallery walls |
| Paper templates (optional) | Cut to frame size for visual mockups before drilling |
Decoding the Simple Picture Hanging Formula
Formula: (Half the art’s height – wire distance) + 57 inches = Nail height from the floor
Example:
- Artwork height: 30″
- Wire sits: 3″ below the top
- Eye level: 57″
Steps to follow:
- Half the art’s height: 30 ÷ 2 = 15″
- Subtract wire distance: 15 – 3 = 12″
- Add eye level: 12 + 57 = 69″
Put your nail at 69 inches from the floor.
How to Hang Pictures in Different Spaces: Visual Guide
Knowing what height to hang pictures is one thing; applying it to real spaces is another.
The 57-60-inch guideline works well for open wall space, but certain situations call for more targeted adjustments based on furniture, room type, and how people use the space.
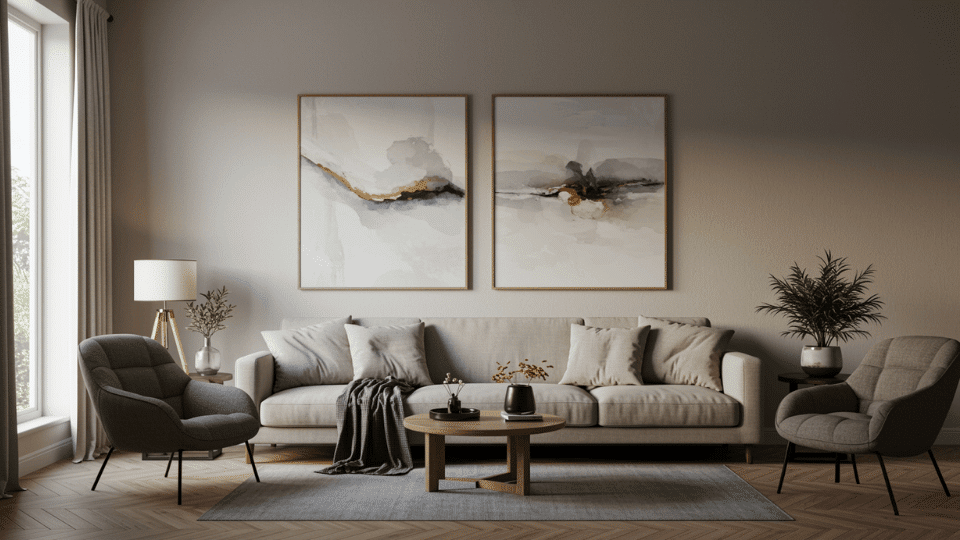
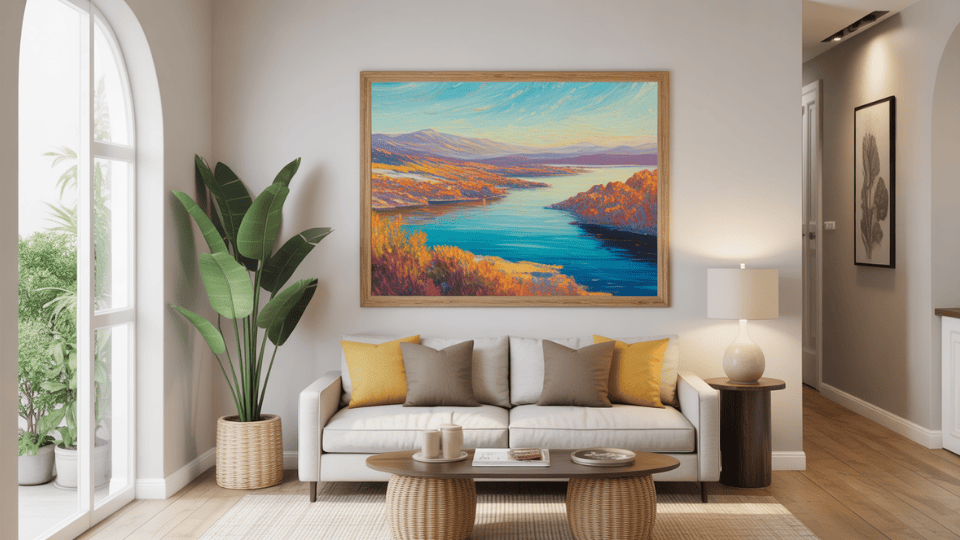
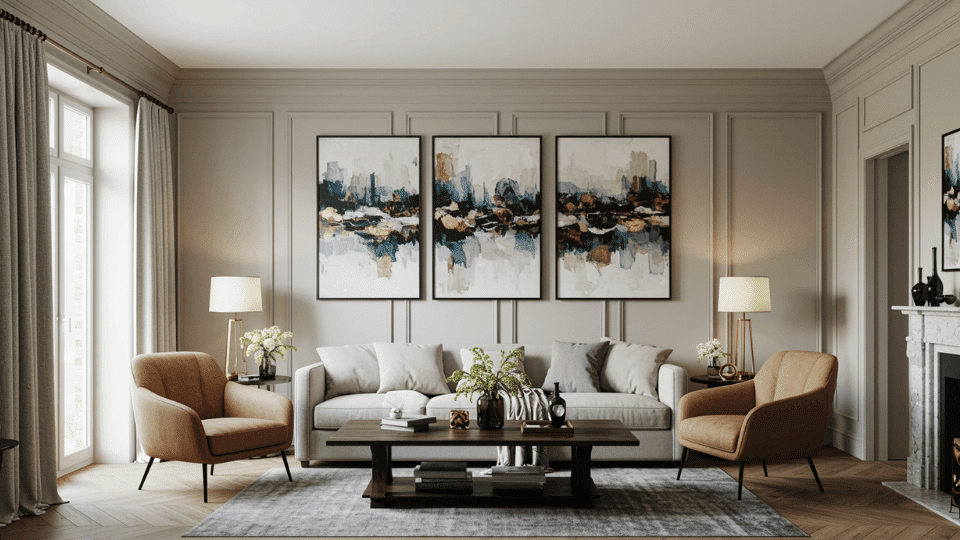
1. Above Sofas and Consoles

Position artwork 6-10 inches above your sofa, dresser, or console to create a strong visual connection. The art should measure roughly two-thirds the width of the furniture below for visual balance.
Keep the piece aligned with your furniture, not the ceiling height, to anchor it properly and prevent that awkward floating look.
2. Above the Headboard

Hang art 6-10 inches above your headboard, choosing pieces that measure roughly two-thirds the width of your bed.
Avoid placing it too high, or the artwork disconnects from the bed entirely, making your wall art feel like a separate decoration rather than part of the bedroom setup.
3. Over Fireplace Mantels
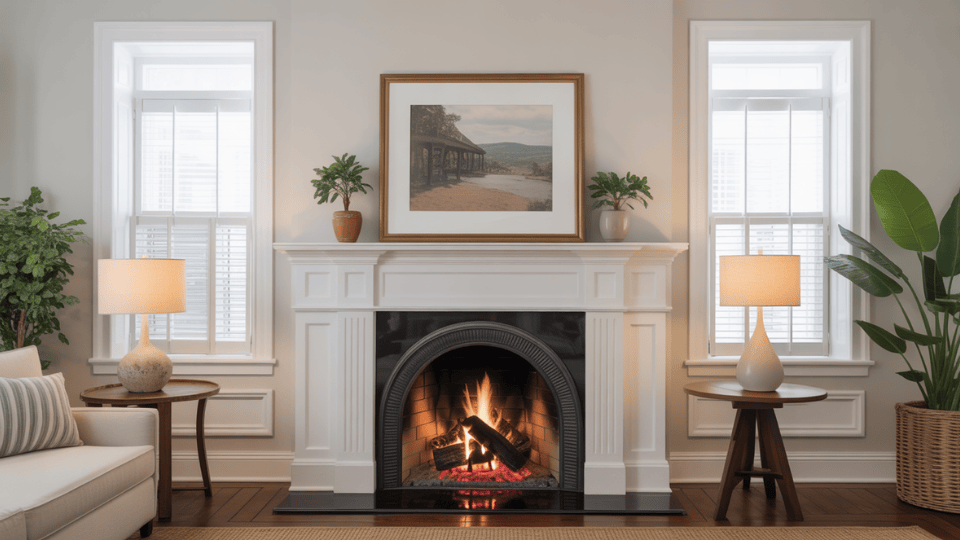
Position artwork 4-6 inches above the mantel top, adjusting based on your room’s ceiling height and the fireplace’s scale.
Larger fireplaces in tall rooms can handle slightly higher placement without overwhelming the space.
4. Dining Rooms

Lower your art slightly since people spend time seated, aim for the artwork’s center around 45 inches instead of the standard 57.
This determines how high to hang art for a comfortable viewing height when sitting at the table.
5. Entryways
Stick with standard eye level (57–60 inches) since viewers walk through standing upright, making traditional placement the most comfortable viewing height.
Centering artwork at this level creates a natural focal point as guests enter and move through the space. Choose pieces that feel welcoming, something that sets the mood or reflects your home’s personality right from the start.
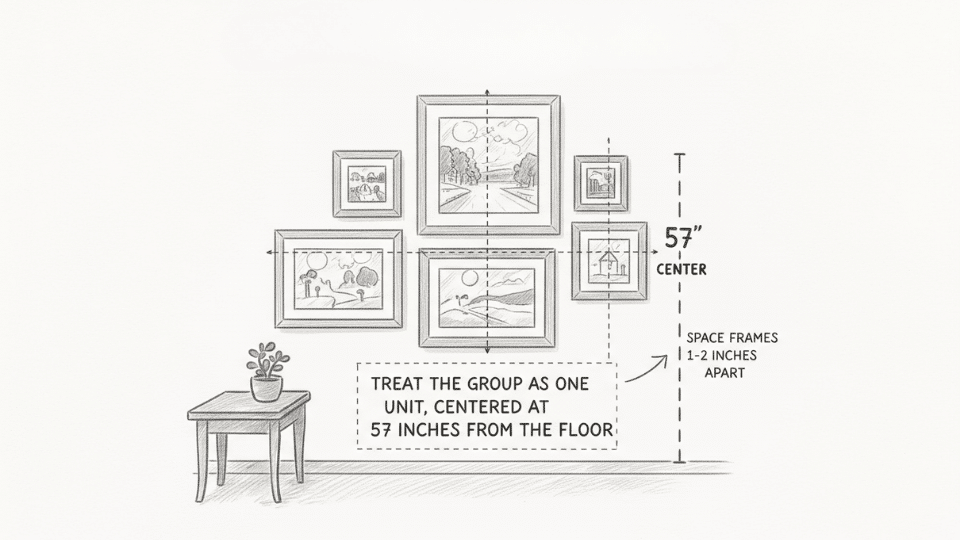
6. Gallery Walls
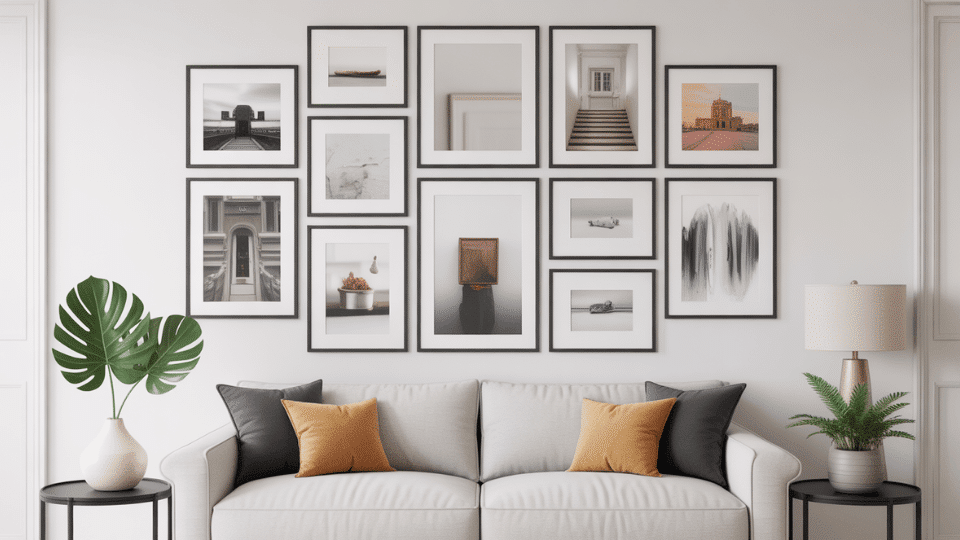
Treat the entire arrangement as one unified piece. Find the collective center of all frames and position it at 57-60 inches, maintaining 2-4 inches of consistent spacing between individual frames for a cohesive, professional look.
7. Staircase Walls
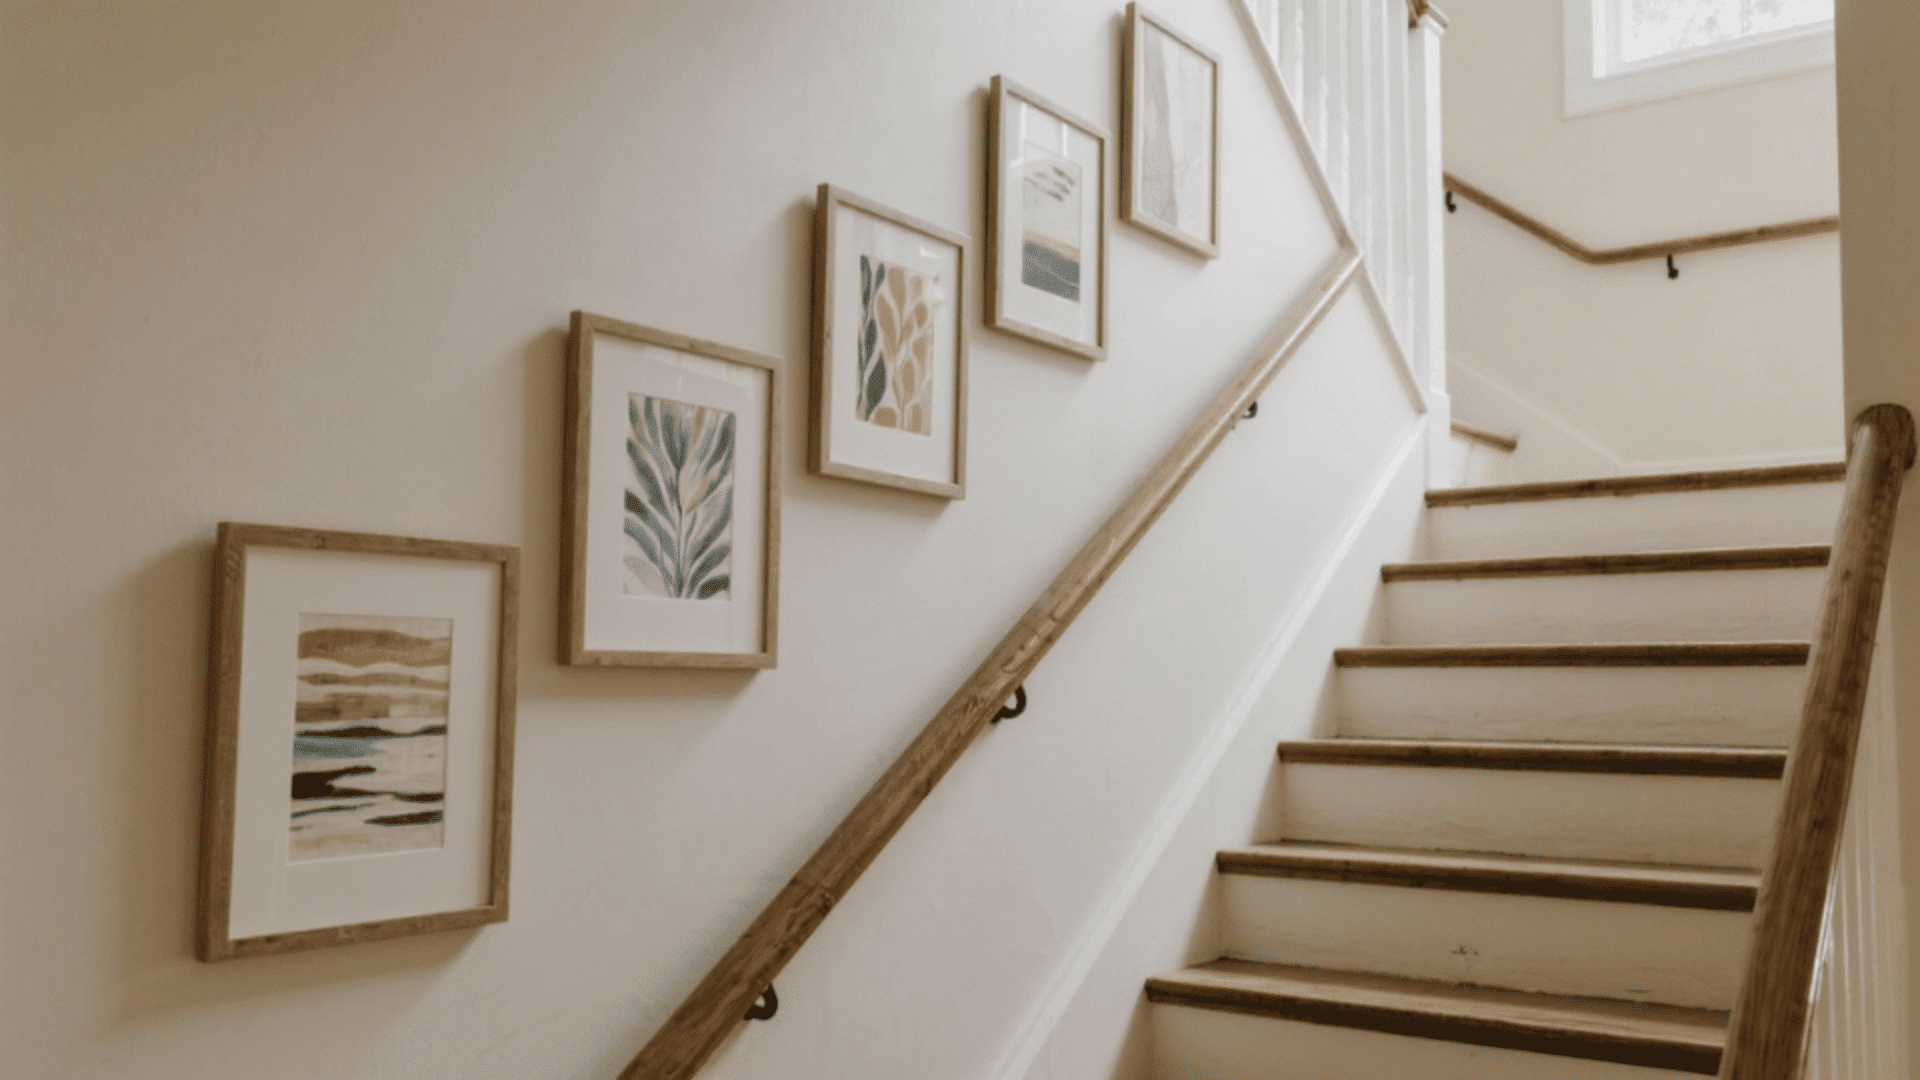
Hang art following the stairs’ upward rise while keeping each piece’s center at a consistent height relative to the nearest stair tread.
Keep spacing uniform between multiple pieces; usually, 2-4 inches works best. This creates a diagonal flow that mirrors the staircase angle, making the whole wall feel intentional.
8. Hallways
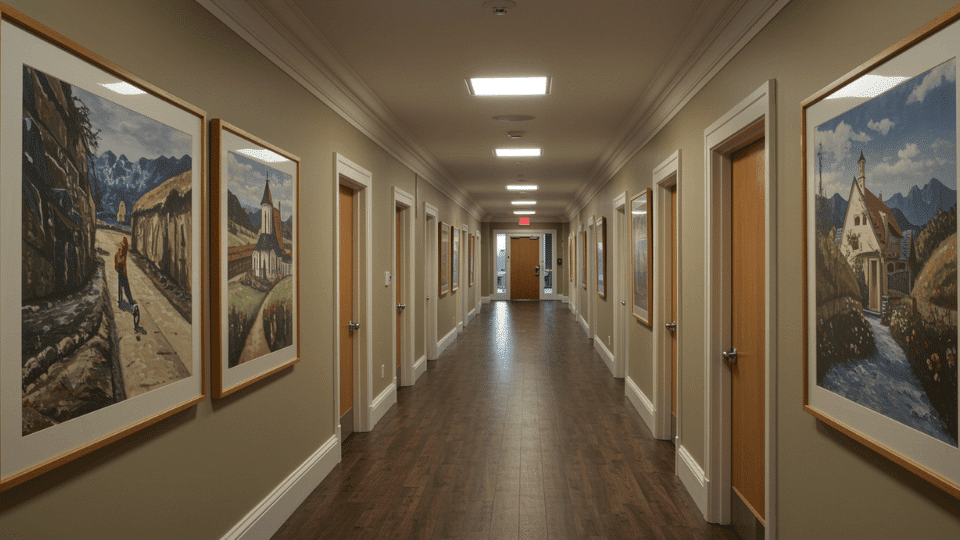
Use standard eye level (57–60 inches) and maintain uniform spacing if hanging multiple pieces to guide the eye naturally down the corridor.
Consistency creates a visual rhythm that feels balanced as you walk through. Opt for a cohesive theme or color palette to connect the artwork, making the hallway feel curated rather than cluttered.
9. Extreme Ceiling Heights
Raise artwork slightly in rooms with soaring ceilings to maintain proportion with the space. In low-ceiling rooms, lower the placement to increase intimacy and avoid a cramped feeling.
Large vertical pieces or stacked frames work beautifully in tall rooms, while wider, more grounded artwork suits cozier spaces best.
Common Mistakes to Avoid
Even when you know at what height to hang pictures, small mistakes can throw off your entire room. Avoid these common errors that make spaces look unfinished or awkward.
| Mistake | How to Avoid It |
|---|---|
| Hanging too high | Placing art too close to the ceiling breaks the room’s flow. Keep the center around 57–60 inches from the floor for natural eye-level balance. |
| Ignoring furniture context | Art that “floats” above furniture looks disconnected. Hang pieces 6–10 inches above sofas or consoles to create visual unity. |
| Poor spacing between pieces | Uneven gaps make walls look messy. Maintain 2–4 inches between frames for a clean, gallery-style layout. |
| Using weak hardware | Flimsy nails can’t support heavier frames. Use anchors or proper hooks matched to the artwork’s weight to keep it secure. |
Conclusion
You now have the complete answer to the question of what height to hang pictures. Center your artwork at 57-60 inches from the floor for perfect eye-level placement.
This golden rule changes any room, but remember to adjust for furniture, ceiling height, and specific spaces like stairways or dining areas.
Your walls deserve artwork that looks professionally placed, and now you have the tools to make it happen every single time.