Plain windows can make any room feel unfinished, even with fresh paint and nice furniture. People often struggle to add character without spending a fortune or hiring professionals.
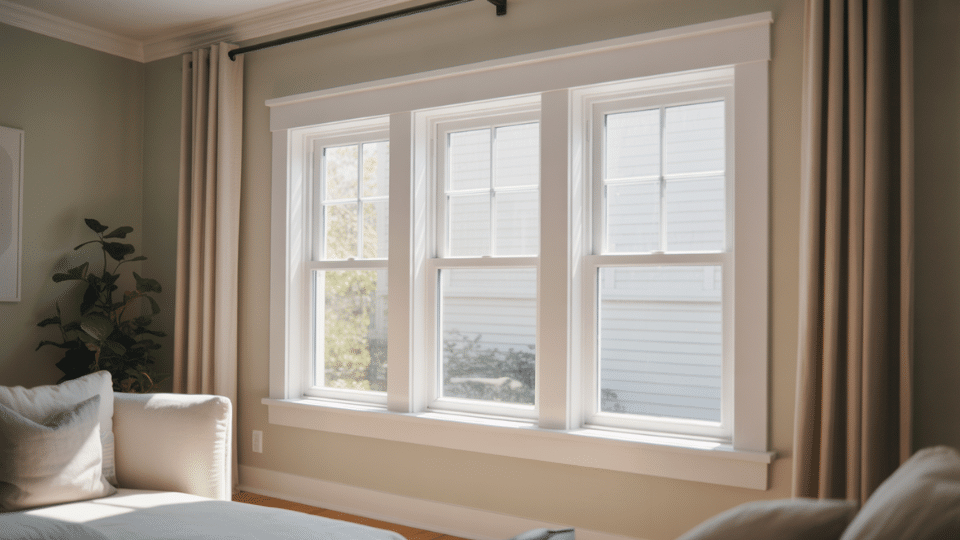
Craftsman style window trim solves this problem perfectly. It brings warmth, depth, and evergreen appeal to any space with clean lines and simple style.
From choosing materials to cutting angles and adding finishing touches, each step is clearly broken down here. Whether tackling a single window or an entire home, these tips make the process straightforward and rewarding.
Basics of Craftsman Style Window Trim
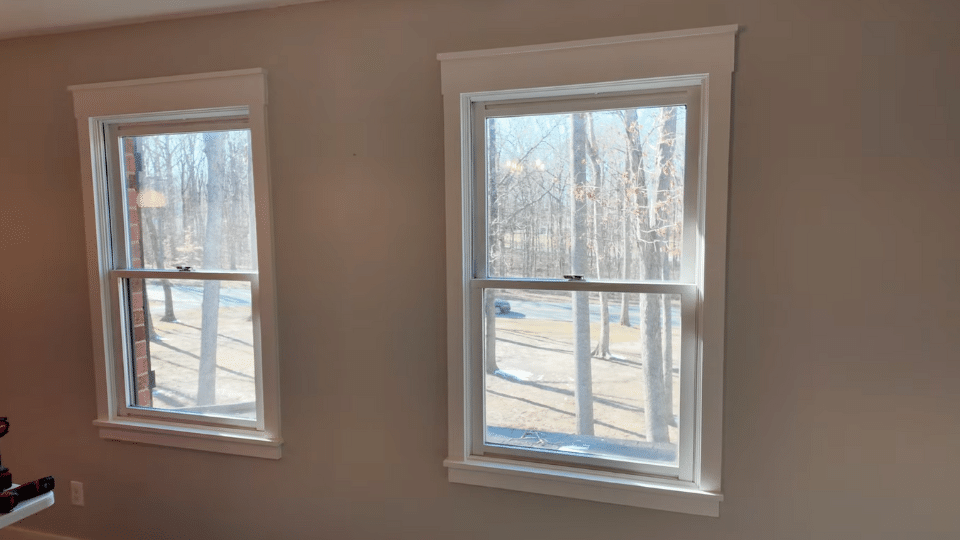
When I think of Craftsman trim, I’m drawn to its honest, early-20th-century charm. Unlike heavily decorated Victorian styles, Craftsman style window trim relies on clean lines and thoughtful proportions to make a statement.
Typically, I work with flat stock boards arranged in horizontal layers that frame windows with purpose and precision. What I appreciate most is its simple approach to woodworking.
Each piece I install has a specific role and adds visual interest through geometric shapes rather than elaborate curves. Choose traditional wood for that authentic warmth, or opt for modern MDF and PVC for easier maintenance.
My goal remains the same: to frame windows with trim that feels both grounded and graceful, honoring the craftsman tradition.
Comparing Craftsman Window Trim to Other Popular Styles
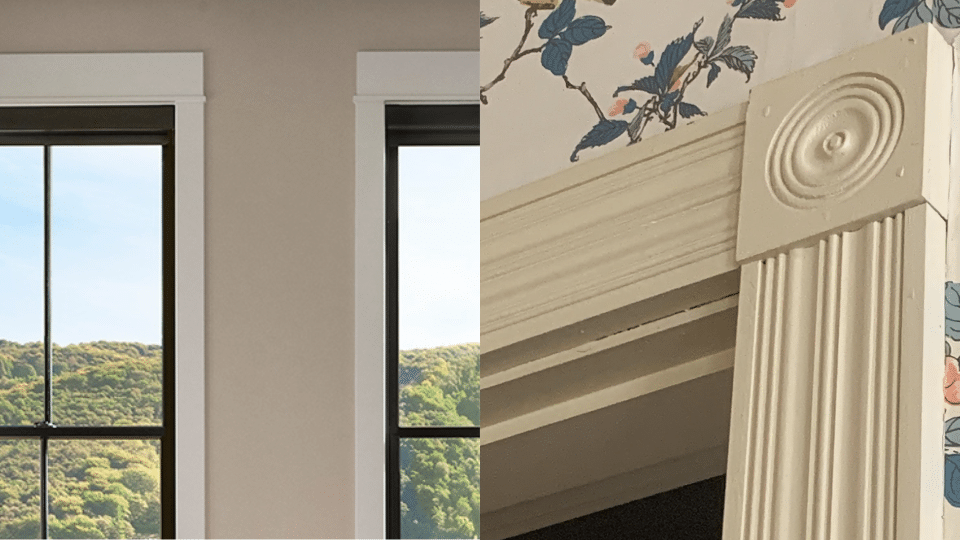
When discussing Craftsman Style Window Trim, I find it helpful to compare it with other popular styles to clarify.
- Victorian Trim: Features ornate moldings and decorative rosettes, quite different from the simple, squared edges in Craftsman work.
- Colonial Trim: Uses delicate, symmetrical details with thinner profiles, while Craftsman installations rely on bolder, chunkier boards.
- Modern/Minimalist: Strips away most detail entirely; Craftsman strikes a middle ground with intentional lines and layered depth.
- Farmhouse Trim: Shares some simplicity but often includes distressed finishes, whereas craftsman window trim maintains clean, purposeful geometry.
Each style tells a different story, but I consistently find Craftsman offers the best balance of character and restraint.
Materials Required for DIY Craftsman Style Window Trim
Below is a detailed list of all the materials required and the purposes they serve to install Craftsman-style window trim successfully.
| CATEGORY | ITEMS NEEDED | PURPOSE |
|---|---|---|
| MEASURING & MARKING | Tape measure, level, pencil, square | Accurate measuring and layout |
| CUTTING | Miter or circular saw | Clean, precise wood cuts |
| FASTENING | 16-gauge nailer, 21-gauge pin nailer, hammer, nail punch | Secure trim pieces neatly |
| ADHESIVES & FILLERS | Wood glue, Plastic Wood X filler, Caulk | Bond, fill, and seal joints |
| FINISHING | 240-grit sandpaper, orbital sander, paint, ¼″ paint roller | Smooth, durable finish |
| SAFETY & CLEANUP | Gloves, rags, vacuum | Protection and tidy workspace |
Step-by-Step Instructions to Install Craftsman Style Window Trim
Follow the detailed steps outlined below to achieve a professional-looking finish on your project and ensure a beautiful, polished appearance.
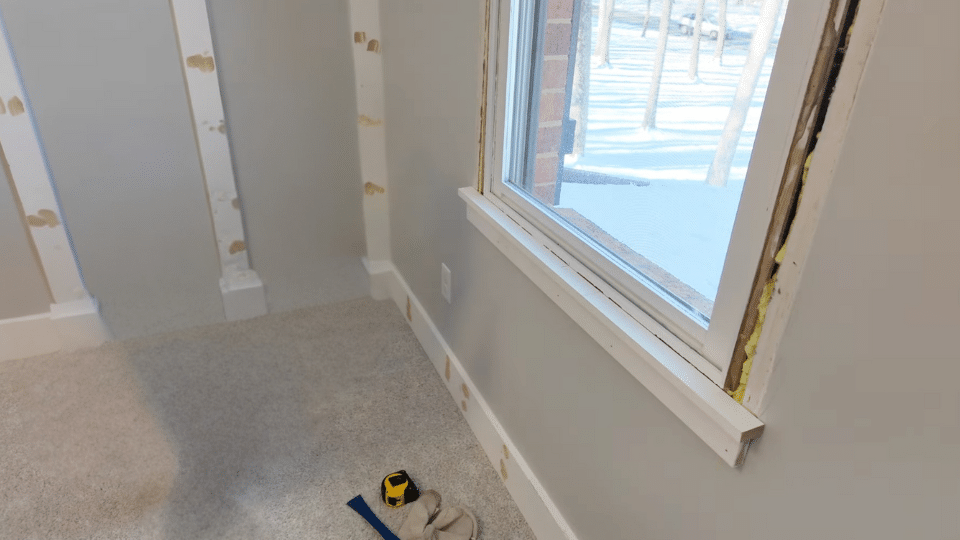
Step 1: Prep the Window Area
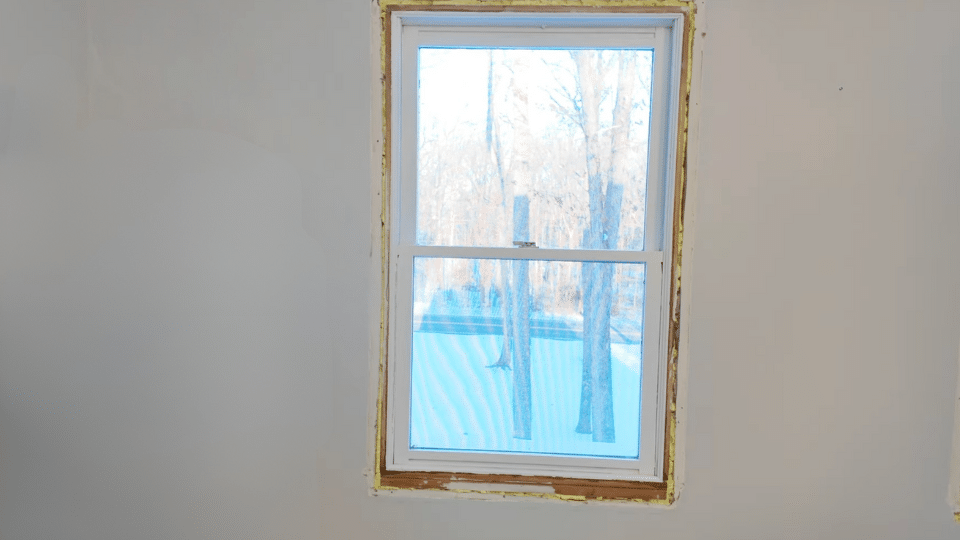
Before taking any measurements or making cuts, ensure your window frame is properly prepared. Start by sealing any gaps or cracks between the window and the drywall using spray foam.
This step prevents drafts and creates a solid foundation for your window trim. Once the foam has fully cured, grab a scraper and remove any old caulk, paint, or debris left around the frame.
Pay attention to rough spots on both the window and the surrounding drywall. The cleaner and smoother the surface, the flatter and more professional your finished trim will look.
Step 2: Measure and Cut the Bottom Trim
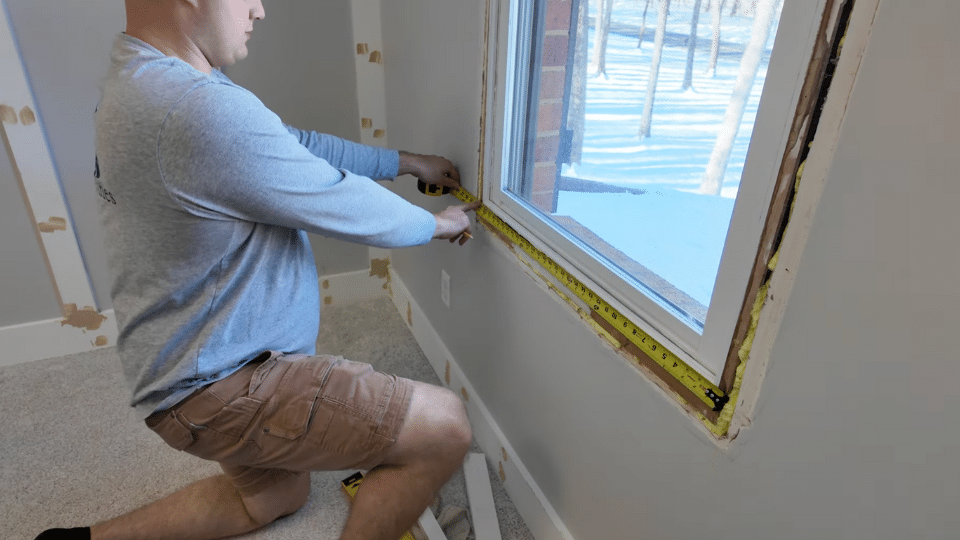
Accurate measuring is key to a perfect fit. Measure the full width of your window carefully and record the number right away. You’ll need two pieces for the bottom section.
A 1×3 board and a 1×2 board. For example, if your window width is 37 inches, cut the 1×3 to that exact size and the 1×2 slightly longer at 38 inches to allow for a small overhang.
Once cut, mark the center point on both the window and each board. These center marks will help keep your window trim perfectly aligned during installation.
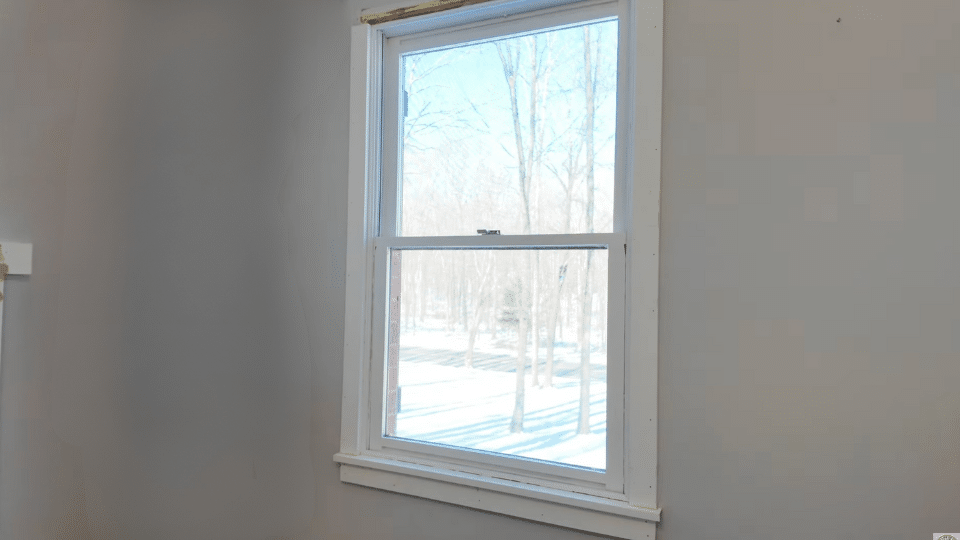
Step 3: Install the Bottom Trim
Position your 1×3 board flush against the wall beneath the window. Using a level, check that it’s perfectly straight before securing it with 16-gauge nails.
Next, apply a smooth bead of wood glue along the top edge of the 1×3; this will bond your top piece securely and prevent shifting over time.
Set the 1×2 board on top of the 1×3 to create a clean, subtle lip. Fasten it in place with 21-gauge pin nails for a sleek finish.
Be sure to wipe away any excess glue before it dries. If you notice the board leaning slightly, use a pry bar to gently adjust it until it sits perfectly flush.
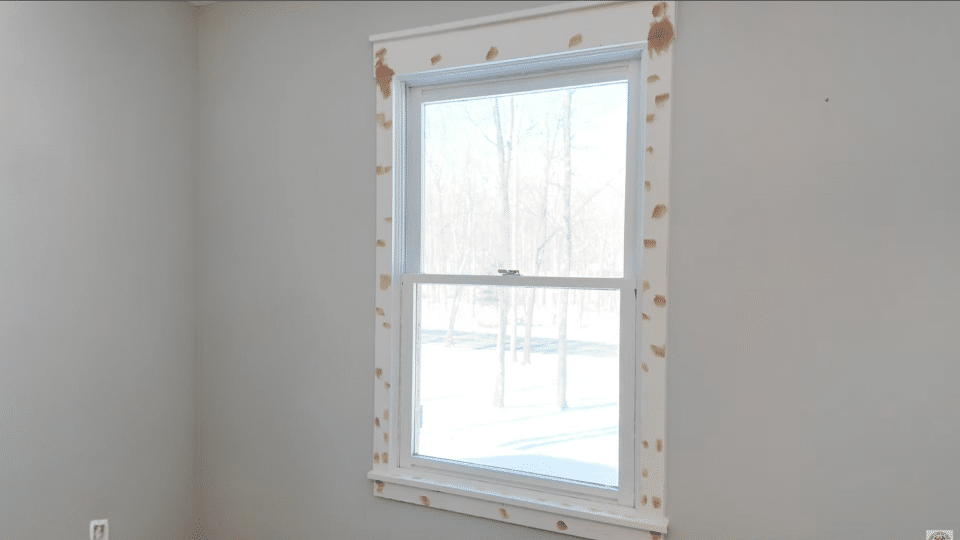
Step 4: Measure and Attach the Side Trim
Now it’s time to move up the sides. Measure from the top of the bottom sill up to about a quarter inch below the upper edge of the window.
Cut two matching 1×4 boards (or any width you prefer for your trim) to this length, usually around 52½ inches for standard windows.
Apply wood glue to the bottom edge of each side piece, then position the boards carefully along the window edges. Use pin nails to attach the inner edge first, followed by 16-gauge nails along the outer edge to anchor them securely.
If a board bows slightly, press or pry it into place until straight before nailing. Wipe off any glue that seeps out and double-check that both sides are perfectly even and aligned.
Step 5: Install the Top Header Trim
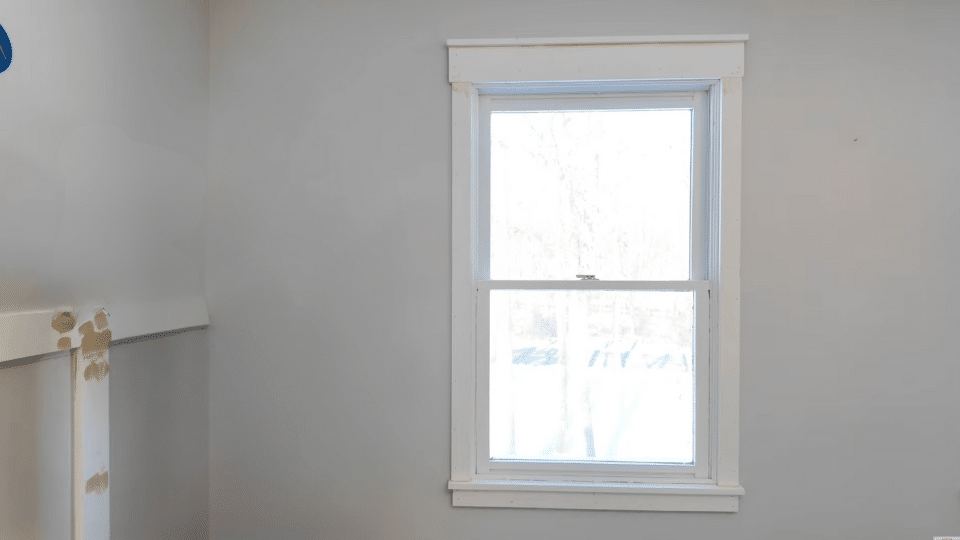
For the top section, measure the total width from the outer edge of one side trim to the other. Add half an inch to this measurement, giving you a quarter-inch overhang on each side for a polished look.
Cut a 1×5 board for the main header and a 1×2 board for the decorative top piece, both with matching overhangs. Test-fit the boards first; if the side trim sits too tight, gently pry them outward for a snug but even fit.
Apply wood glue to the top of the side trims and the back of the 1×5, then secure the header with 16-gauge nails. Glue and nail the 1×2 decorative piece right above it using pin nails.
This layered approach is a hallmark of window trim. After installation, wipe away any excess glue and check that all the center marks align neatly.
Step 6: Fill, Caulk, and Sand
Once all your craftsman window trim pieces are in place, it’s time to make the finish seamless. Use a wood filler to fill in every nail hole and joint.
Allow it to dry completely before proceeding. Next, apply a high-quality caulk along all seams where the trim meets the wall or window frame.
Use a gloved finger or a damp rag to gently smooth the caulk, applying just enough pressure to create a clean, consistent line.
Avoid pressing too hard; you want to fill gaps without thinning the caulk. Let the filler and caulk dry overnight for the best results.
Step 7: Paint and Finish
When everything has dried, it’s time to bring your trim to life. Using 240-grit sandpaper on a random orbital sander, gently smooth all filled areas and edges until perfectly even.
Vacuum the surface to remove all dust, then wipe the trim with a damp cloth to ensure it’s clean. Now you’re ready to paint. A quarter-inch nap roller will give a beautiful, even finish.
Apply two coats of paint for a durable, appealing look that complements any room. Once the paint dries, step back and admire your work. You’ve just created stunning, modern window trim that will make the whole space shine.
To know more about installing a Craftsman style window Trim, refer to the YouTube video below.
Common Mistakes to Avoid
Getting craftsman style window trim right requires attention to detail. Here are key pitfalls to avoid:
- Measurement mishaps: Always measure twice and cut once. Even small errors compound quickly across multiple windows.
- Poor joint gaps: Tight-fitting miters and butt joints are essential. Fill gaps with wood filler before painting for a professional look.
- Visible fasteners: Use finishing nails and countersink them properly. Nobody wants to see nail heads on beautiful trim work.
- Skipping primer: Bare wood needs quality primer, especially on exterior applications where moisture protection matters most.
- Wrong proportions: Maintain proper reveals between trim pieces. Craftsman window trim looks best with consistent spacing throughout.
- Rushing through: Take your time. Patience during installation prevents costly fixes later.
Maintenance and Long-Term Care
Protecting your craftsman style window trim ensures it stays beautiful for decades. Here’s how to maintain your investment:
- Clean regularly: Wipe down trim quarterly with mild soap and water. Dust and grime can dull the finish over time.
- Refresh the finish: Touch up painted trim every 2-3 years, especially on exterior windows. Stained wood may need resealing annually, depending on sun exposure.
- Check for moisture: Inspect sills and bottom casings twice yearly for water damage, soft spots, or peeling paint. Catch problems early before they spread.
- Seasonal care: Caulk gaps before winter to prevent drafts. In spring, check for loose pieces after freeze-thaw cycles.
- Keep hardware tight: Tighten screws on window locks and handles as needed to prevent stress on the trim.
Bring Your Vision to Life
Installing craftsman style window trim changes ordinary windows into standout features that define your home’s personality.
The combination of quality materials, careful measurements, and patient execution creates results you’ll appreciate for years.
Remember to take your time during each phase, as attention to detail makes all the difference.
With proper maintenance and periodic touch-ups, your craftsman window trim will continue looking fresh and beautiful.